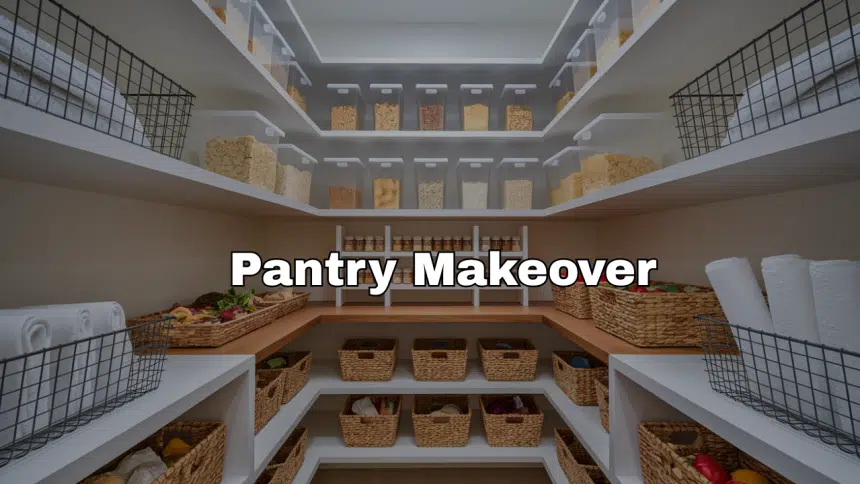
A cluttered pantry doesn’t just look bad—it slows you down, wastes food, and adds frustration to simple tasks. If your shelves are bending, bins are overflowing, or you’ve lost track of what’s actually in there, it’s time to take control.
From custom shelves to clean trim, you’ll learn how to make every inch count. It’s about creating a space that supports your kitchen instead of making it harder to use.
If you’re ready for real storage that fits your routine and stays organized, this guide keeps things clear, doable, and efficient from start to finish.
Your pantry is about to become the hardest-working space in your home—and you’re going to build it yourself.
Why Your Pantry Makeover is Needed?
A cluttered pantry silently drains your time and money. The average family wastes $1,500 yearly on forgotten food hidden behind disorganized shelves.
Most people spend 20+ minutes daily searching for ingredients they already own. Stress levels spike when cooking in kitchens with poor storage systems.
Food safety becomes compromised when expiration dates aren’t visible. Meal planning feels impossible when you can’t see what’s available.
Poorly designed pantries waste up to 40% of potential storage space. Organizing this key area creates a ripple effect of efficiency throughout your entire kitchen workflow.
Storage Solutions and Organization Tools
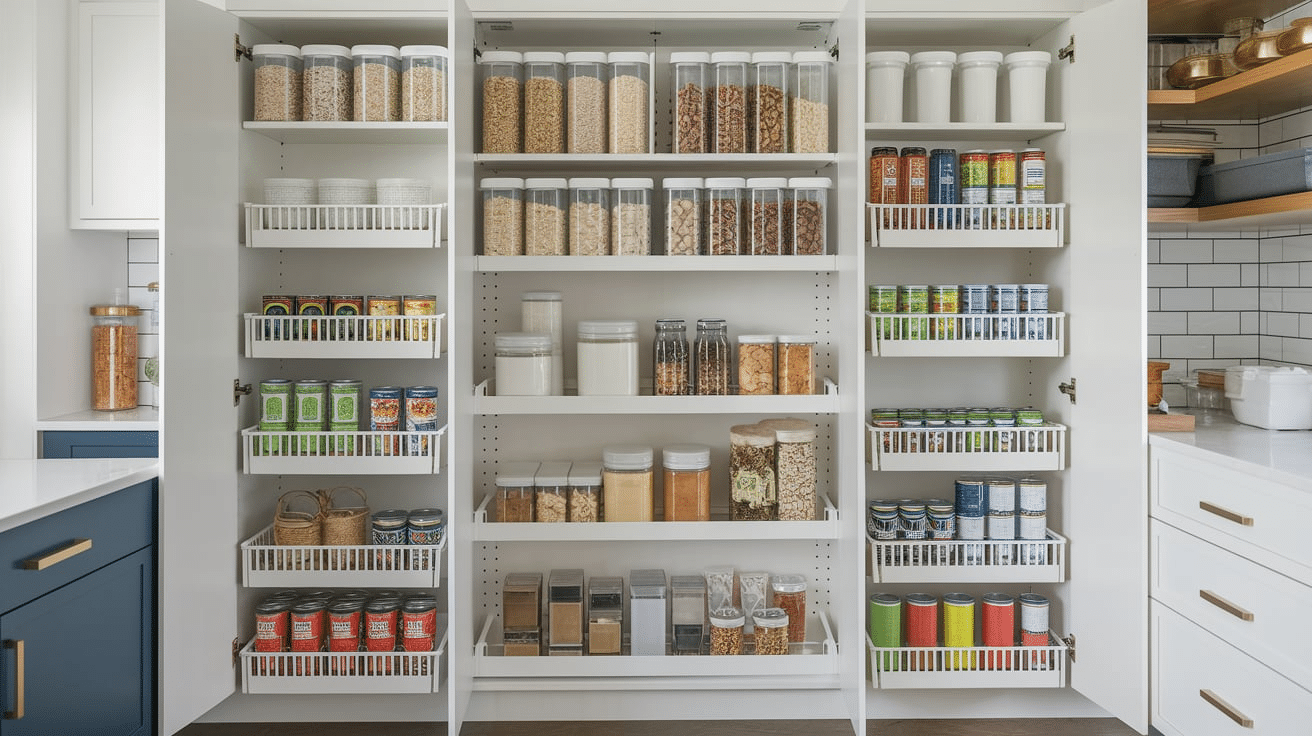
Airtight containers keep dry goods fresh and visible. Adjustable shelves and door-mounted racks maximize vertical space.
Make Use of Smart Storage Solutions: Lazy Susans make corner spaces accessible. Tiered shelves clearly display canned goods. Pull-out drawers convert deep cabinets into usable storage.
Create a Consistent Labeling System: Label everything consistently for a cohesive, organized look.
Remove Expired Products: Start by removing all expired products and checking the dates on canned goods. Then, donate unopened, non-perishable items you won’t use to local food banks.
Clean Every Surface Thoroughly: Wipe down every shelf with all-purpose cleaner. Vacuum corners and crevices. Clean walls and floors to remove dust and spills.
Group Items Logically: Sort remaining items into logical groups: baking supplies, breakfast foods, snacks, canned goods, and pastas. This makes the organizing phase much easier and reveals what storage solutions you’ll need.
DIY Pantry Makeover
A DIY Makeover Pantry is all about changing your pantry into a beautiful, functional space—without hiring a contractor.
Using basic tools, simple materials, and a step-by-step approach, you can build sturdy custom shelving, install sleek cabinets, and create a pantry that fits your exact needs.
It’s a budget-friendly way to upgrade your storage, make cooking easier, and give your kitchen a fresh, organized look—all with your own two hands.
Tools and Materials You’ll Need
Before you start building, make sure everything is ready. Here’s what you’ll need to recreate this pantry makeover.
| Tools | Materials |
|---|---|
| Stud finder | Upper kitchen cabinets (30”x30”x12”) |
| Drill & impact driver | 2×4 treated lumber |
| Kreg jig & pocket hole screws | 1×3 select pine boards |
| Brad nailer | Half-inch sanded plywood |
| Table saw | Eighth-inch hardboard |
| Miter saw | Wood glue |
| Level | Construction screws |
| Hammer/pry bar | Spackle, mesh tape |
| Measuring tape & blue painter’s tape | Caulk & caulking gun |
| Sander (block or orbital) | Base trim + shoe trim |
| Safety glasses | Polyurethane finish |
Steps for Pantry Diy Makeover
Follow this step-by-step guide to remake your pantry from a cluttered mess into an organized, functional space that makes cooking and meal planning simpler and more efficient.
Step 1: Plan, Measure & Clear the Space
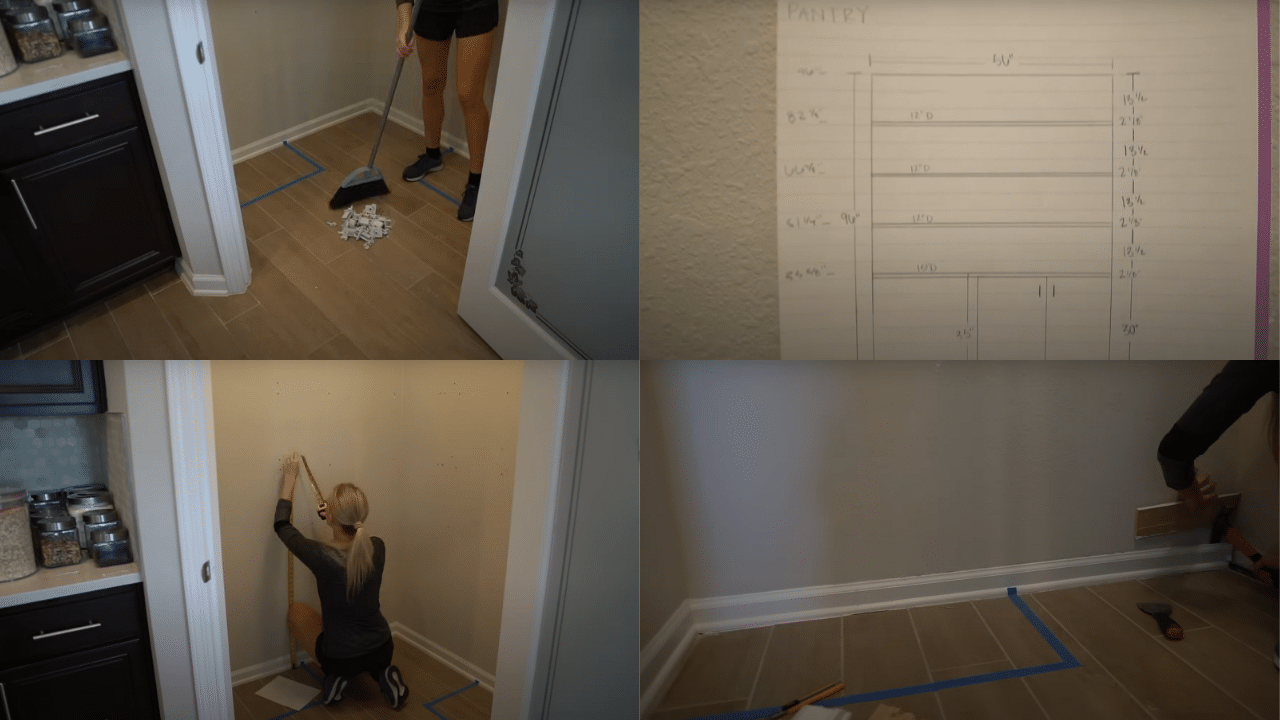
Start by getting a clear vision and preparing your pantry for transformation.
-
Sketch the pantry layout and shelf spacing using SketchUp or paper. Use blue painter’s tape to visualize shelf and cabinet placement on the walls and floor.
-
Measure ceiling height, shelf depth, and wall widths (both 56 inches in the video). Remove wire racks and baseboard trim to prep for new installation.
Step 2: Build and Install the Cabinet Base
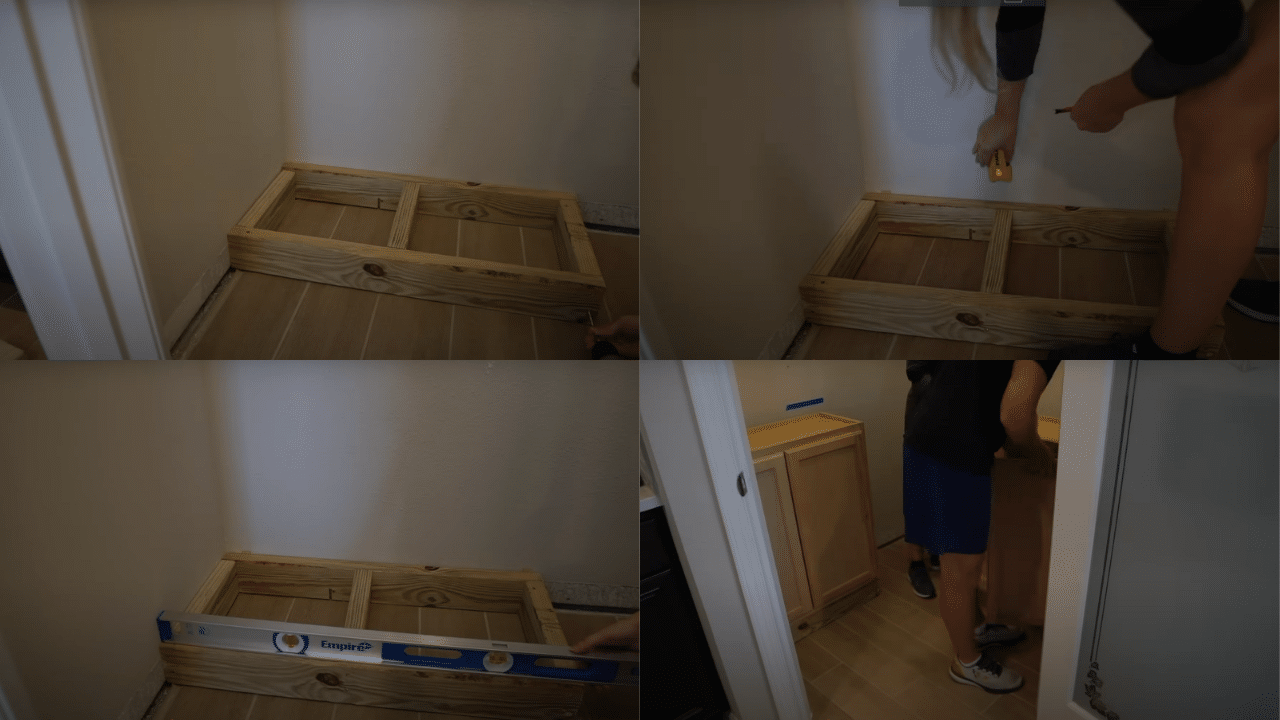
The base supports everything—keep it level and secure for strong cabinetry.
-
Build the base from treated 2x4s and secure it using 3½” construction screws. Use a level and shims to ensure the base sits evenly on the floor.
-
Locate studs with a stud finder and screw the base securely into the wall.
-
Install the Home Depot upper cabinets and use blocking behind to align with a 15″ deep countertop.
Step 3: Frame the Shelves with 2×2 Lumber
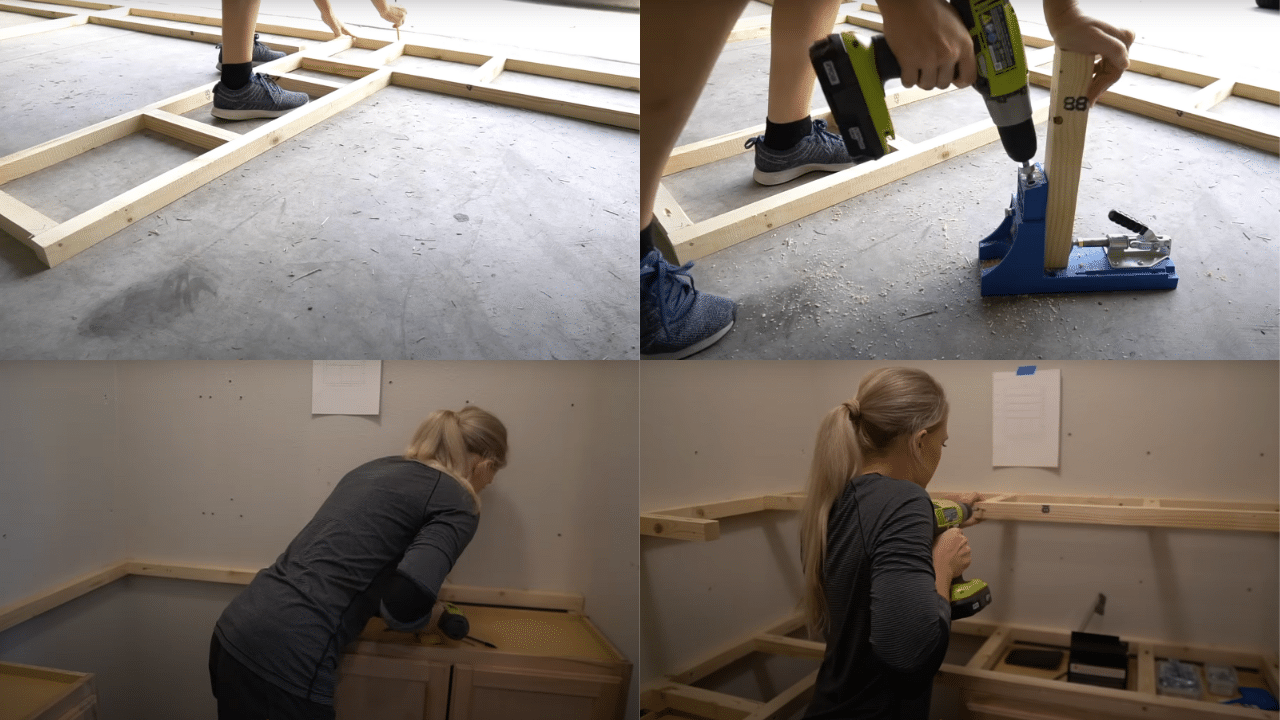
Build strong framing for each shelf layer to ensure lasting support and structure.
-
Cut and dry-fit 2×2 framing pieces, then drill pocket holes using a Kreg jig. Screw framing into studs with longer screws, starting from the back wall.
-
Level the first shelf frame carefully—it determines all others above. Add center support pieces for extra strength, especially for wider shelves.
Step 4: Cut & Install Shelf Surfaces
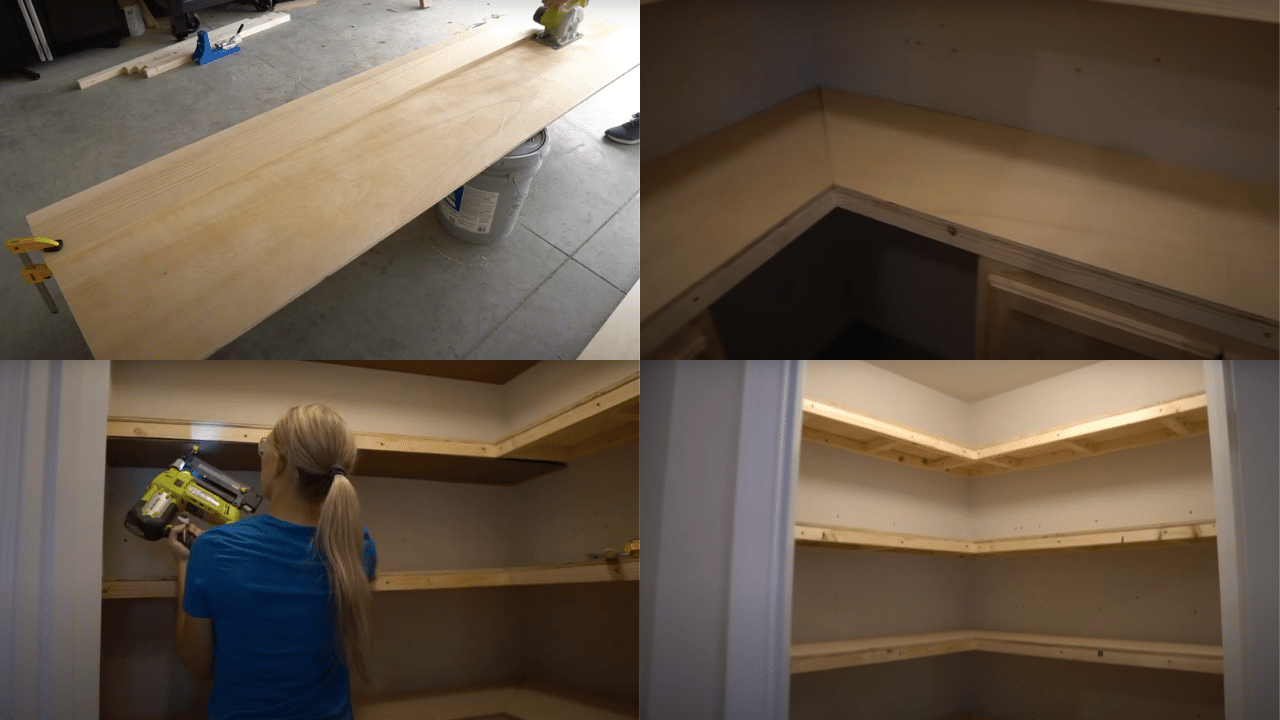
Lay the plywood tops and cover exposed frames for a polished shelf surface.
-
Cut half-inch sanded plywood to fit each shelf and dry-fit them in place. Make 45° cuts for corners where needed, especially for the bottom countertop.
-
Cover the underside of each shelf with ⅛” hardboard to hide framing. Secure plywood and hardboard with brad nails and wood glue.
Step 5: Trim, Patch, Paint & Finish
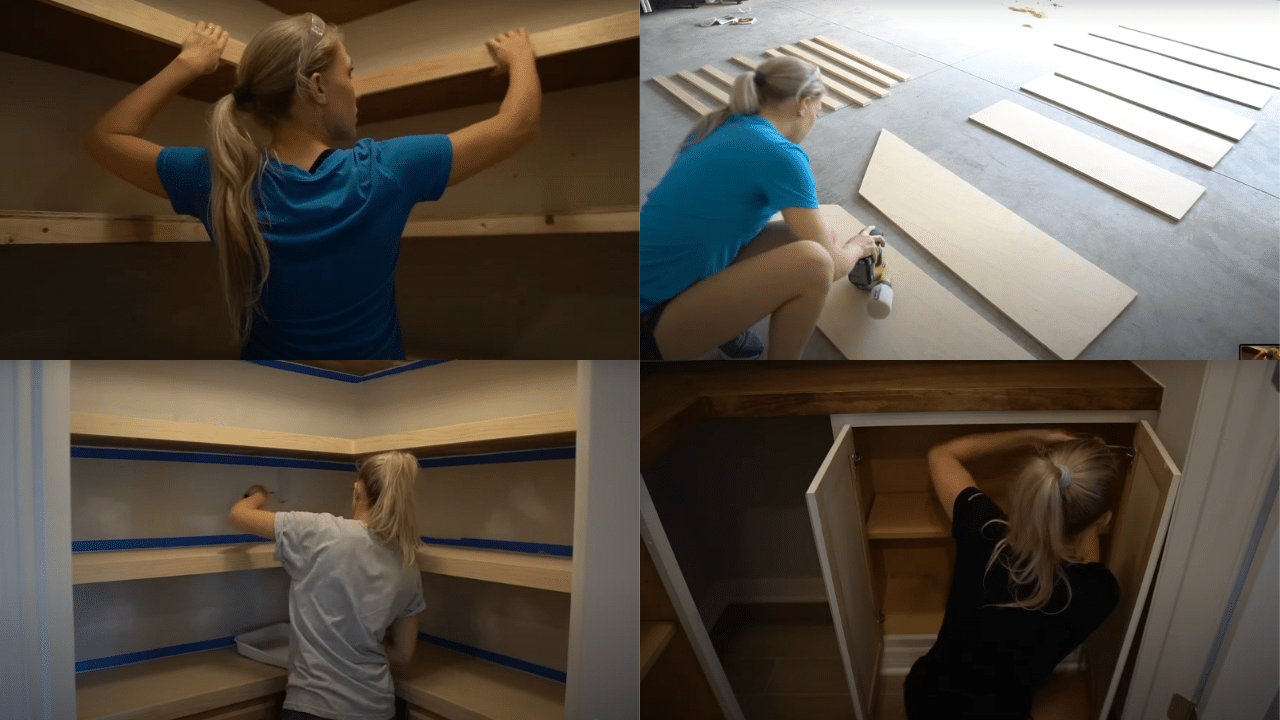
Add those final touches to make your pantry look seamless and custom-built.
-
Rip 1×3 pine boards to 2⅛”, miter corners, and attach as trim on each shelf.
-
Fill nail holes and gaps with wood filler, then sand smooth after drying. Use mesh tape and spackle to patch wall holes, then re-texture to match. Caulk seams, paint shelves white, stain the countertop, and seal with polyurethane.
Video Tutorial
Check out this full walkthrough on YouTube: Home With Stefani
Helpful Tips
1. Use Painter’s Tape to Visualize Everything
Before you build anything, tape out your shelf heights and cabinet placement on the walls and floor. It helps you spot spacing issues early and make adjustments without wasting materials.
2. Pre-drill and Use a Stud Finder
Always locate wall studs and pre-drill your holes. This ensures that shelves and cabinets are securely mounted and won’t sag or shift over time.
3. Label Your Cuts and Dry-Fit Pieces
When working with plywood and trim, label each piece and dry-fit everything before attaching. This prevents mix-ups and ensures everything lines up perfectly before you commit.
4. Rip Trim Boards Yourself to Save Money
Instead of buying expensive custom trim, buy wider pine boards and rip them down to the size you need using a table saw. You get the custom look without the custom price.
5. Caulk Seams Immediately Before Drying
When caulking shelf seams, pull off your painter’s tape while the caulk is still wet. Waiting until it dries can cause peeling or uneven lines, meaning more work to fix it later.
Conclusion
Say goodbye to digging through cluttered shelves and hello to a pantry that’s actually built for daily life. You’ve replaced frustration with function—custom shelving, cabinet space, and clean finishes that make staying organized easier than ever.
The best part? You didn’t need a full remodel or a professional team—just the right tools, some effort, and a clear plan.
This isn’t just about looks. It’s about creating a setup that saves time, cuts down on waste, and makes your kitchen flow better overall. Every shelf, cut, and coat of paint was worth it—and now, your pantry proves that great design can be simple, solid, and totally DIY.
Drop a comment below, share your favorite feature, or let me know what you’d tweak next time!