
Ever noticed how a simple tree stand can change your home during the holidays? That perfect wooden base doesn’t just hold your tree—it becomes part of your family traditions.
This step-by-step guide will walk you through building your own wooden tree stand that’s sturdy, beautiful, and made with your own hands. No fancy woodworking skills are needed!
With basic tools and materials, you’ll create something that lasts for years of holiday memories. Your guests will never guess you made that solid tree stand – and you might just start a new holiday tradition in your home.
Ready to make something special? Let’s build a tree stand that’s as meaningful as the decorations that go on it.
Why Build Your Own Tree Stand?
Store-bought tree stands often disappoint—flimsy plastic models crack under pressure, while metal versions drain your wallet without lasting more than a couple of seasons.
Creating your wooden stand eliminates these frustrations. You’ll save money (typically 50-70% less than quality commercial options) while gaining something that works with your specific tree.
A custom-built stand can perfectly fit your preferred tree type, no matter if you bring home skinny firs or full spruces. The solid wood construction handles even the heaviest ornament-laden branches without the dreaded holiday wobble.
The real bonus? That moment when visitors admire your decorated tree and you casually mention, “I built that stand myself.” It’s practical craftsmanship that becomes a proud part of your holiday traditions.
Materials Required
| Material | Quantity | Purpose |
|---|---|---|
| 2x4x10 pressure-treated boards | 5 | Main structure and platform |
| Screws or nails | As needed | For securing all joints |
| Wood glue (optional) | 1 bottle | Additional hold strength |
| Clamps | 2 | To hold boards while cutting |
| Circular or miter saw | 1 | For angle and straight cuts |
| Speed square / bevel gauge | 1 | To measure and transfer angles |
| Measuring tape | 1 | For spacing steps and cuts |
| Pencil / marker | 1 | To mark measurements and angles |
Step-by-Step Guide to Building a DIY Wooden Tree Stand
This guide will walk you through building a sturdy wooden tree stand, from cutting precise angles to assembling the frame and securing the platform. Follow each step carefully to create a reliable and quiet stand for your outdoor.
Step 1: Cut the Ladder Legs
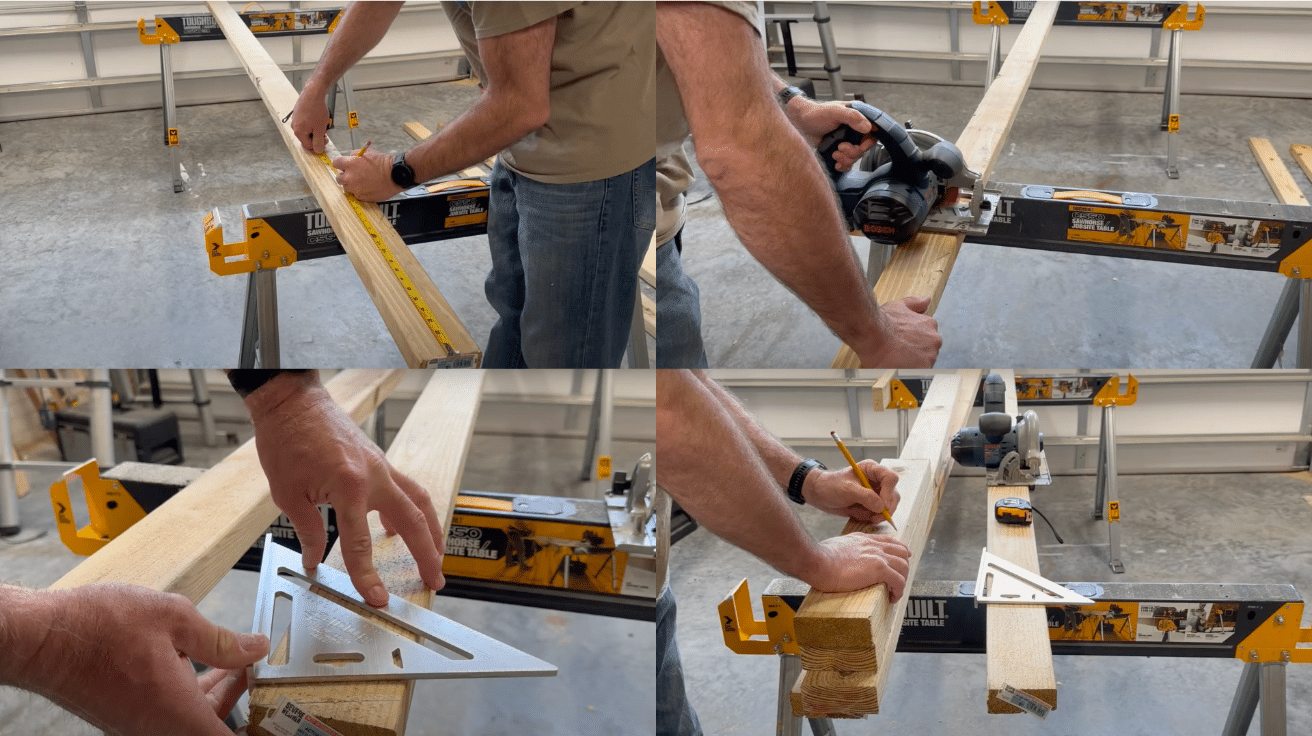
- Place the speed square at the edge of the 2×4 board and use a pencil to draw a 15° angle across one end for the base cut.
- Use a circular or miter saw to cut along the 15° line, ensuring the cut is clean and smooth.
- Flip the board around and mark a 15° line in the same direction so the angles are parallel.
- Cut the second end of the board and use it as a template to trace and cut the other three legs.
Pro Tip: Label the first angled leg after cutting and use it to mark all remaining legs to save time and ensure consistency.
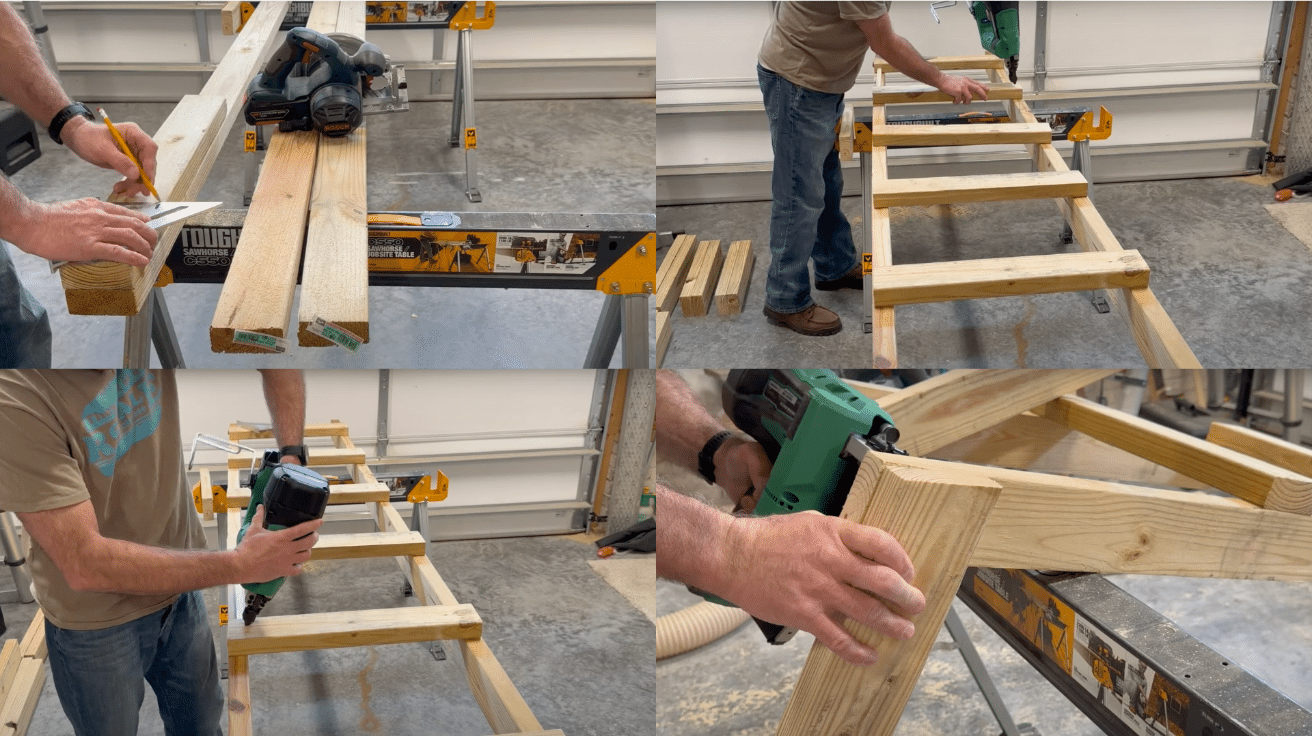
Step 2: Attach the Steps

- Measure 19 inches down from the top of the front legs and mark both sides for the position of the first step.
- From the bottom of the legs, measure up 13 inches and mark the location of the last step.
- Use a 14-inch scrap board or spacer to evenly mark where each additional step should go in between.
- Position each step board on the marks and attach them using two screws per side, driving them in slightly angled.
Pro Tip: Use clamps to hold each step in place while screwing to keep the alignment straight and prevent shifting.
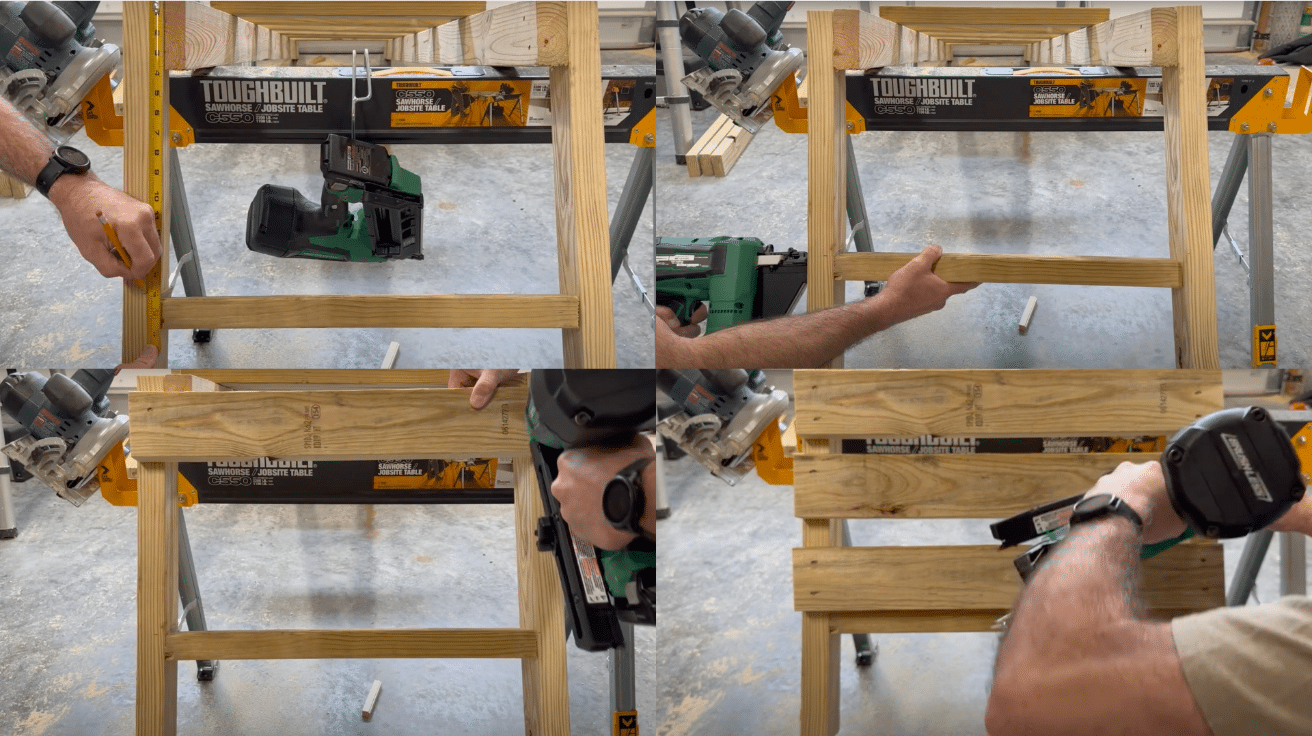
Step 3: Build the Platform Seat
- Cut two 2x4s to 24 inches and place them flat across the top of the front ladder legs as the base supports.
- Position the first seat slat 1.5 inches from the back edge and secure it with two screws at each end.
- Align the second slat so that it is flush with the front edge of the supports and screw it down firmly.
- Center the third slat between the front and back slats, leaving even spacing, and fasten it securely.
Pro Tip: Pre-drill screw holes into the slats to prevent splitting, especially near the edges.
Step 4: Add Bracing Under the Platform
- Hold a board diagonally from the outside of the ladder frame up to the bottom of the platform and mark both ends.
- Cut the marked angles with a saw and test the fit; it should sit flat against both the frame and platform.
- Use this first angled brace as a pattern and cut an identical second one for the opposite side.
- Attach both braces securely, making sure they are aligned flush with the outer frame of the ladder.
Pro Tip: Use wood glue in addition to screws at brace joints for extra durability and long-term stability.
Step 5: Install Tree Braces
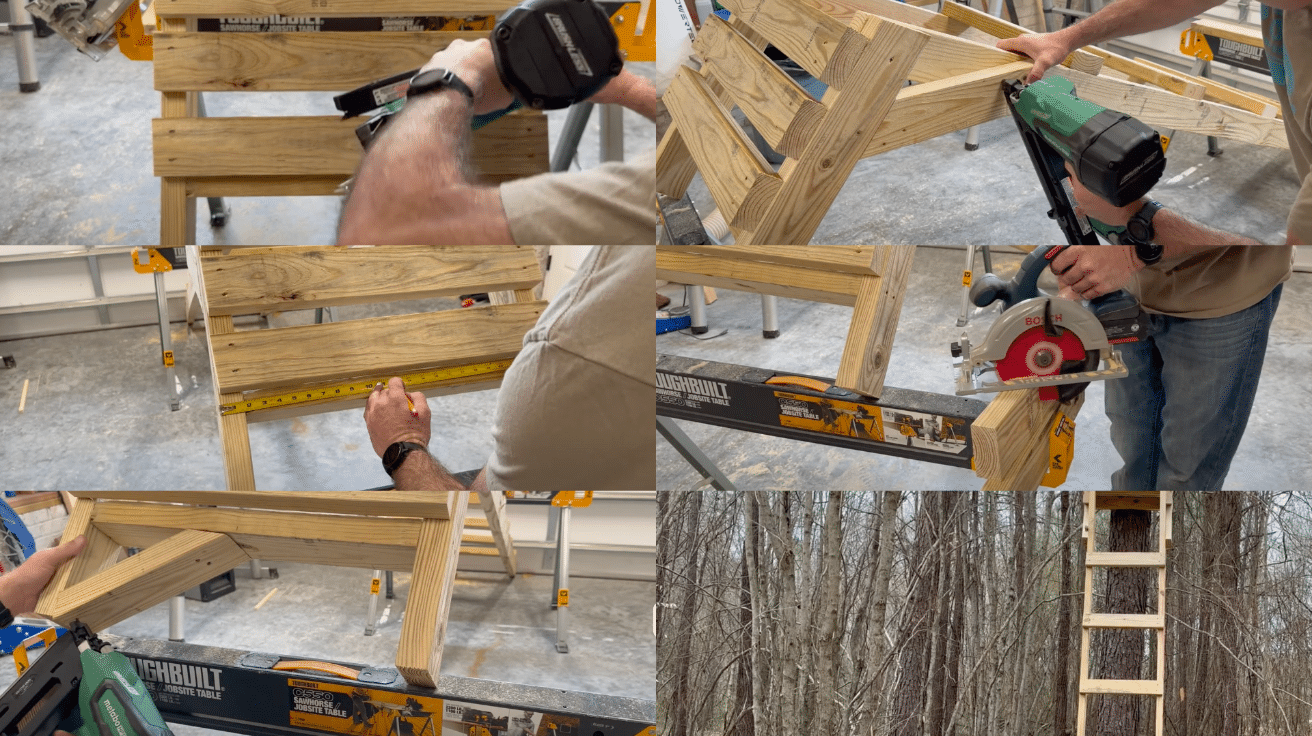
- Locate the center point at the rear edge of the seat platform and make a mark for reference.
- Hold a long board from this center mark down to where it contacts the rear legs and mark both ends.
- Cut both angles, flipping the board if needed to complete angled cuts cleanly on both ends.
- Use the finished board as a guide to cut a matching second brace, then attach both in a V shape from the platform to the legs.
Pro Tip: Secure each brace with long screws and double-check the symmetry from behind to ensure it sits evenly against a tree.
Watch How It’s Done: DIY Wooden Tree Stand Video Tutorial
Check out the video below by @randomreviews7574 for a step-by-step guide on DIY Wooden Tree Stand.
Common Mistakes to Avoid
When constructing your own wooden ladder stand, even small oversights can lead to larger problems later, both in performance and safety.
Below are some of the most frequent mistakes DIYers should avoid during the build process:
- Skipping angle accuracy on leg cuts can result in an unstable and wobbly frame that leans unevenly
- Attaching steps without pre-marking equal spacing often leads to crooked or uneven step alignment
- Driving screws without pilot holes can cause the wood to split, especially near ends or edges
- Failing to clamp boards while securing steps or braces can cause shifting and misalignment during assembly
- Placing the ladder on sloped or soft ground without anchoring it can make the stand dangerous to climb
- Forgetting to check levelness during each stage can create a lopsided or leaning final structure
- Overtightening screws or driving them at odd angles may weaken joints or strip the wood entirely
Finishing Touches
There you have it—a sturdy, handmade wooden tree stand that will serve you well for many holidays to come. Remember, the beauty of this project isn’t just in the finished piece.
It’s in knowing you built something useful with your own two hands. The first time you place your tree in this stand, you’ll understand why so many people choose to make rather than buy.
That feeling of accomplishment is hard to beat. This project proves that simple tools and materials can create something truly lasting and special for your home.
Looking for more ideas? Check out our other DIY Project guides to create a space that’s uniquely yours.
Now, time to decorate that tree, gather your loved ones, and enjoy the season with your handcrafted stand supporting it all.