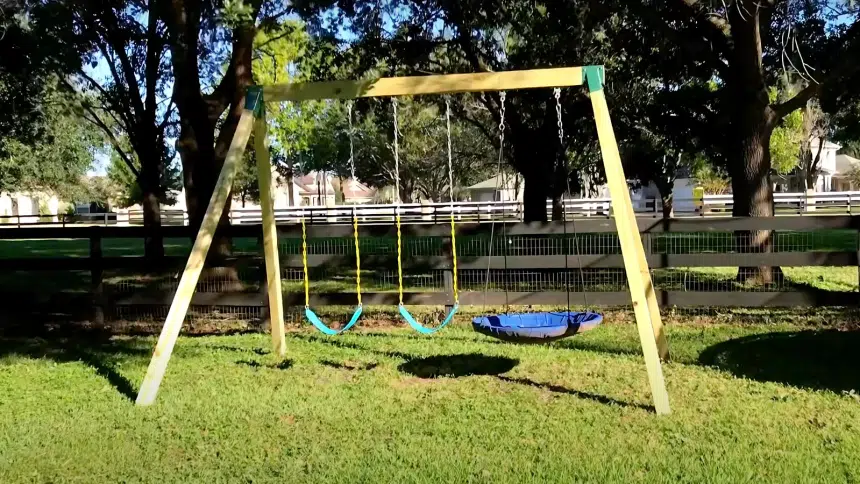
Building your own backyard swing set is a rewarding project that creates endless outdoor fun for your family. With some basic tools and materials, you can construct a sturdy, custom play area that fits your specific needs and space.
Unlike store-bought plastic models that might not last through multiple seasons, a DIY wooden swing set offers durability and the flexibility to adjust as your children grow.
Plus, building it yourself can save money while giving you the satisfaction of creating something special with your own hands.
But before getting started, it’s important to gather the right tools and understand the basic construction process.
In this guide, we’ll cover how to build your own backyard swing set from scratch. Let’s go!
Here’s the “Must-Have Tools for Your DIY Swing Set”
Before you begin building your swing set, make sure you have the right tools for the job.
These essential tools will help ensure your project goes smoothly and your swing set is both sturdy and beautiful.
| Tool | Quantity | Purpose |
|---|---|---|
| Drill | 1 | To pre-drill holes for the lag screws |
| Socket Wrench / Adjustable Wrench | 1 | To tighten lag screws |
| Ratcheting Socket Wrench | 1 | For easier tightening of lag screws |
| T-Square | 1 | To mark accurate measurements and spacing |
| Rubber Mallet | 1 | To gently knock hardware into place without damage |
| Measuring Tape | 1 | For measuring lengths and spacing |
| Pencil | 1 | To mark measurements on the wood |
| Drill Bit Set | 1 set | To pre-drill holes for lag screws (smaller size) |
| Lag Screws | Various | To secure hardware to the wood |
| Swing Set Hardware | 1 set | For attaching the swings (brackets, bolts, etc.) |
| Washers | Various | To ensure proper fit and secure attachment |
| Heavy Duty Swing Hangers (1 Pair) | 1 pair | To hang the swings securely (Amazon link provided) |
| Heavy Duty Swings | 2 | To use for the swing set (Amazon link provided) |
Having these tools will make your DIY swing set build much smoother and ensure that everything goes into place correctly!
DIY Swing Set Process in 5-Steps
Building a swingset is a straightforward project. By following these six simple steps, you’ll have a safe and stylish swingset in very little time. Let’s get started!
1. Mark and Cut the Wood
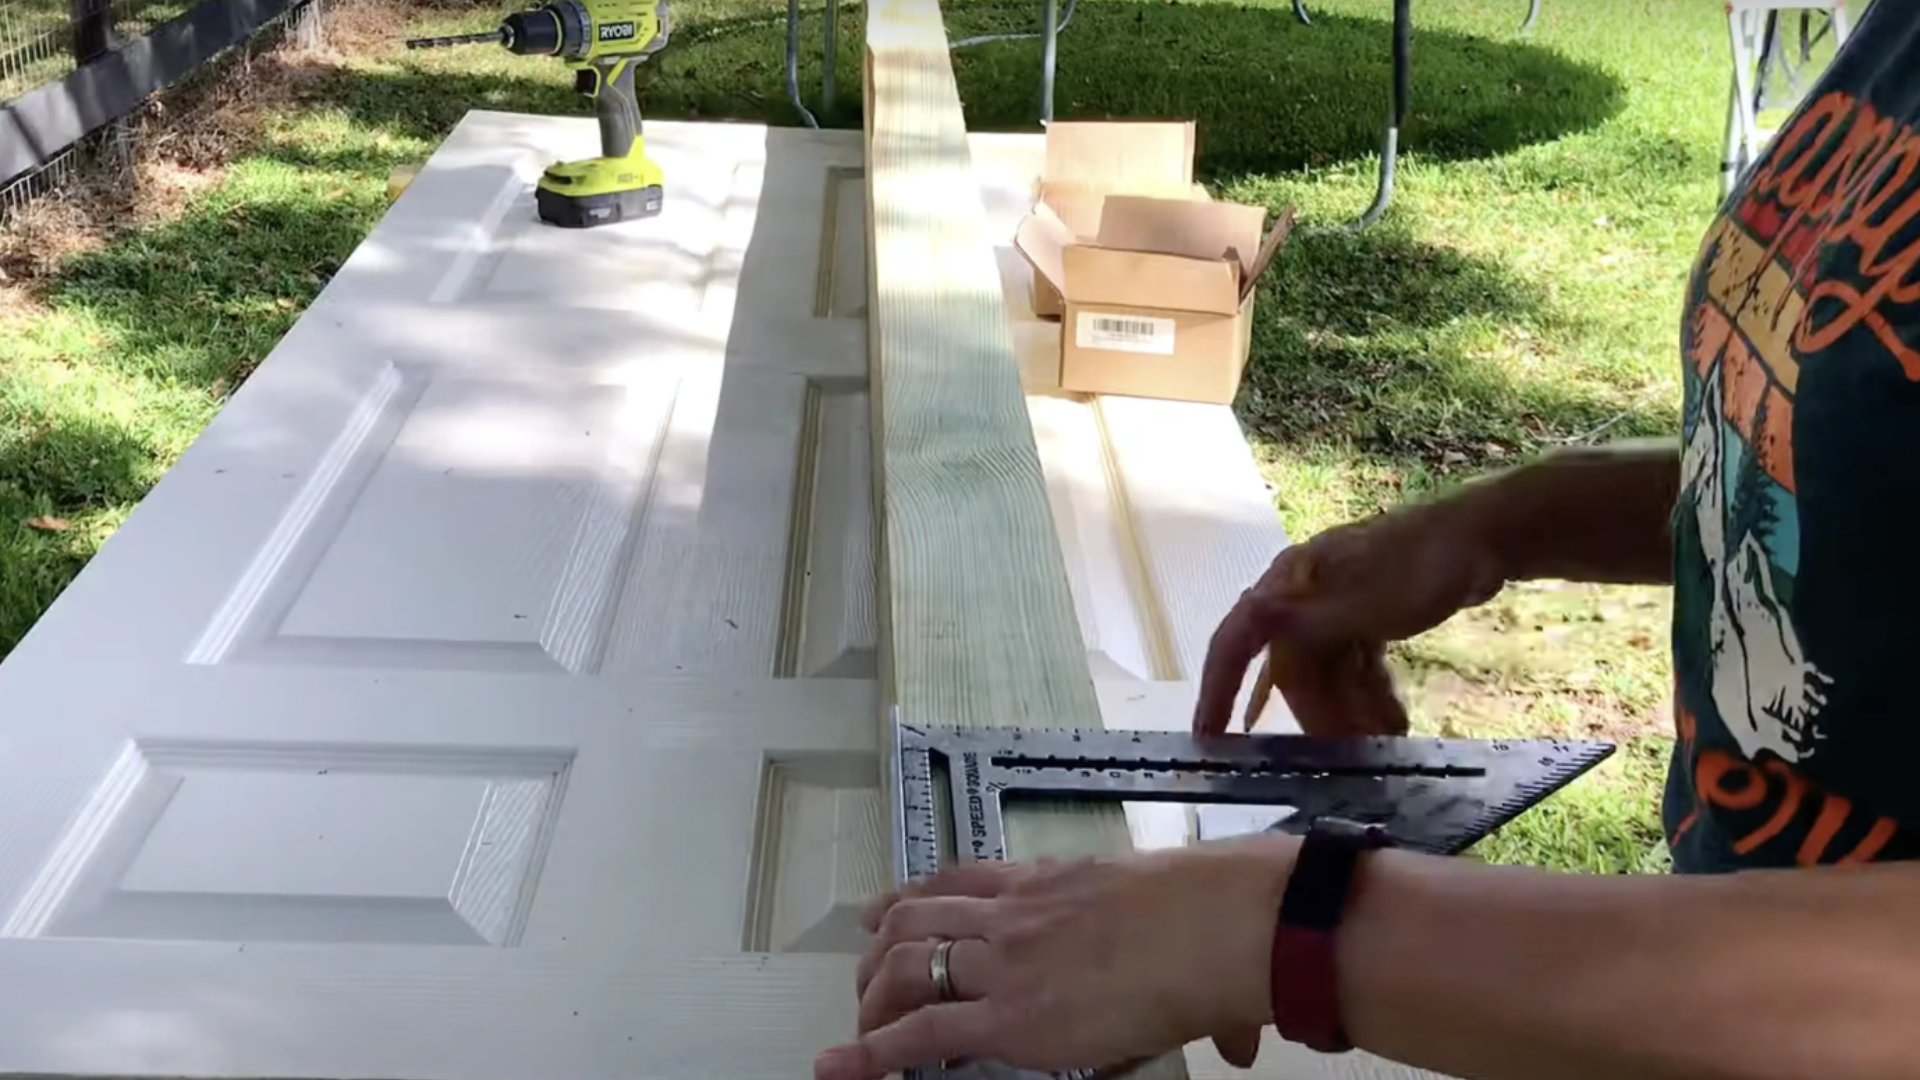
Start by measuring and marking the spots where you’ll place the swings on your 10-foot-long 4×6 posts. Use a T-square and pencil to ensure precise marking for the swing placement.
If needed, cut the 4×6 wood to the desired length. In the video, the builder used a 12-foot-long 4×6 but later wished they had kept it at 12 feet for better spacing between the swings.
The recommended spacing between swings is 18-20 inches. The builder used 16 inches, but recommends a bit more space for smoother swinging.
-
Tip: If you want to accommodate three swings without them knocking into each other, consider using 12-foot-long 4×6 posts for more spacing. For younger kids, you can go with a shorter length, but for older kids or adults, more space between swings is better.
2. Install Swing Hardware and A-Frame Brackets
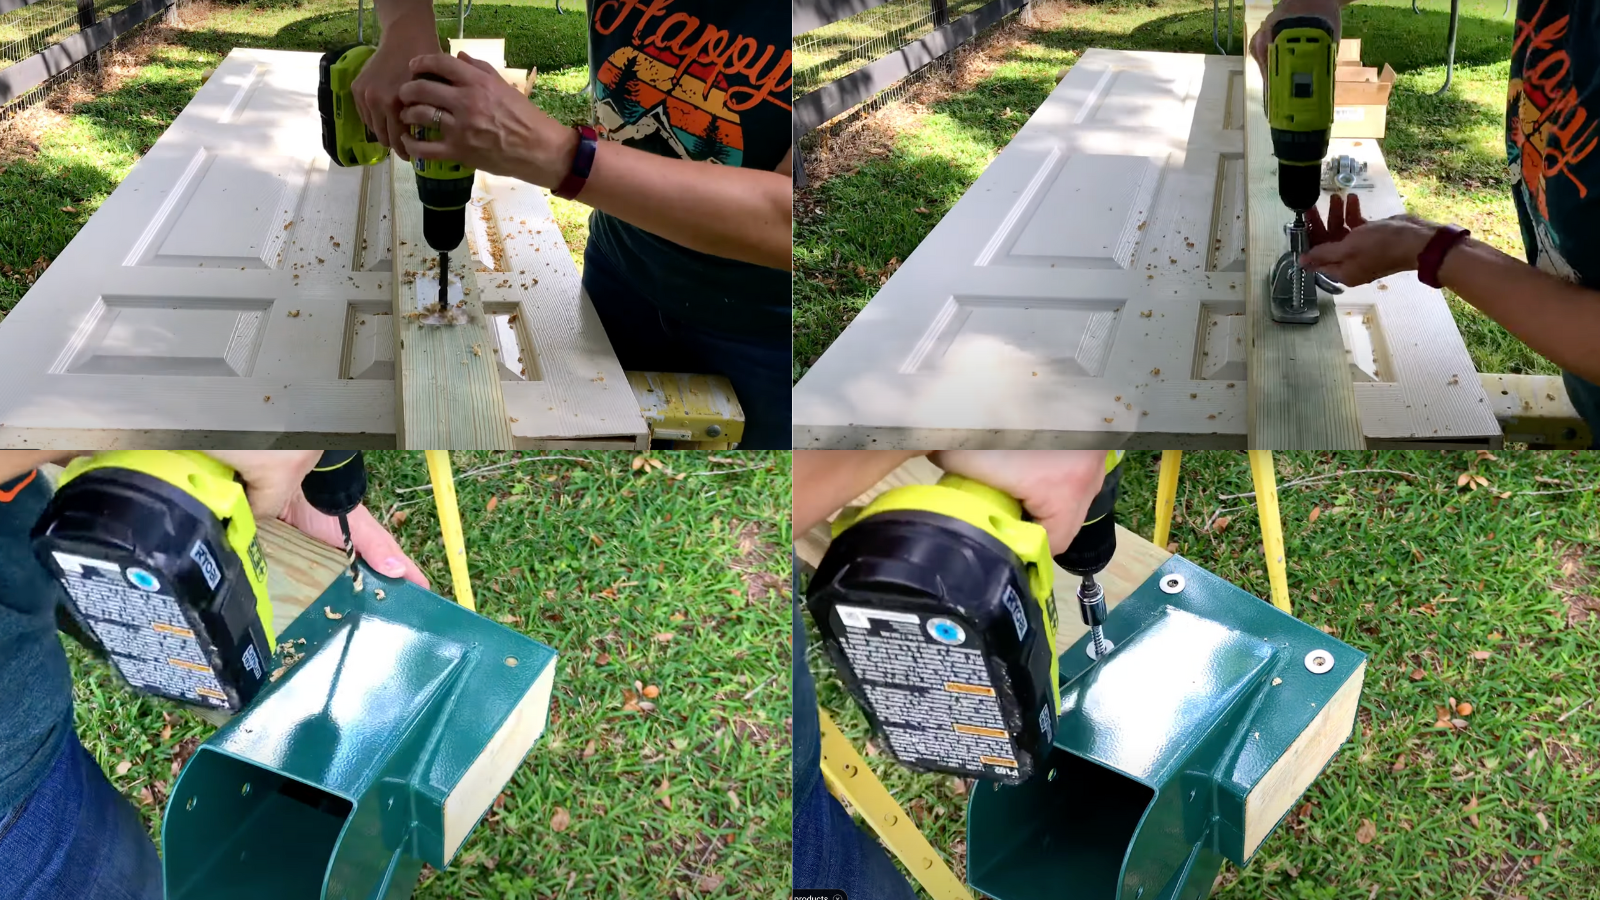
Begin by pre-drilling holes for both the swing hardware and A-frame brackets. Use a drill bit slightly smaller than the lag screws to ensure a tight fit.
Attach the swing hardware (A-frame brackets) onto the 4×6 posts. Use the lag screws and washers provided to secure them tightly.
After securing the swing hardware, attach the A-frame brackets to the 4×6 posts. These brackets connect the posts to the 4×4 legs. Pre-drill slightly larger holes for these brackets, as their lag screws are bigger.
Tighten the screws using a drill. Finish the process by hand-tightening them with a ratcheting socket wrench or adjustable socket wrench.
-
Tip: Use the stickers that come with the swing hardware to align the brackets and hardware accurately, making the installation easier.
3. Attach the Legs
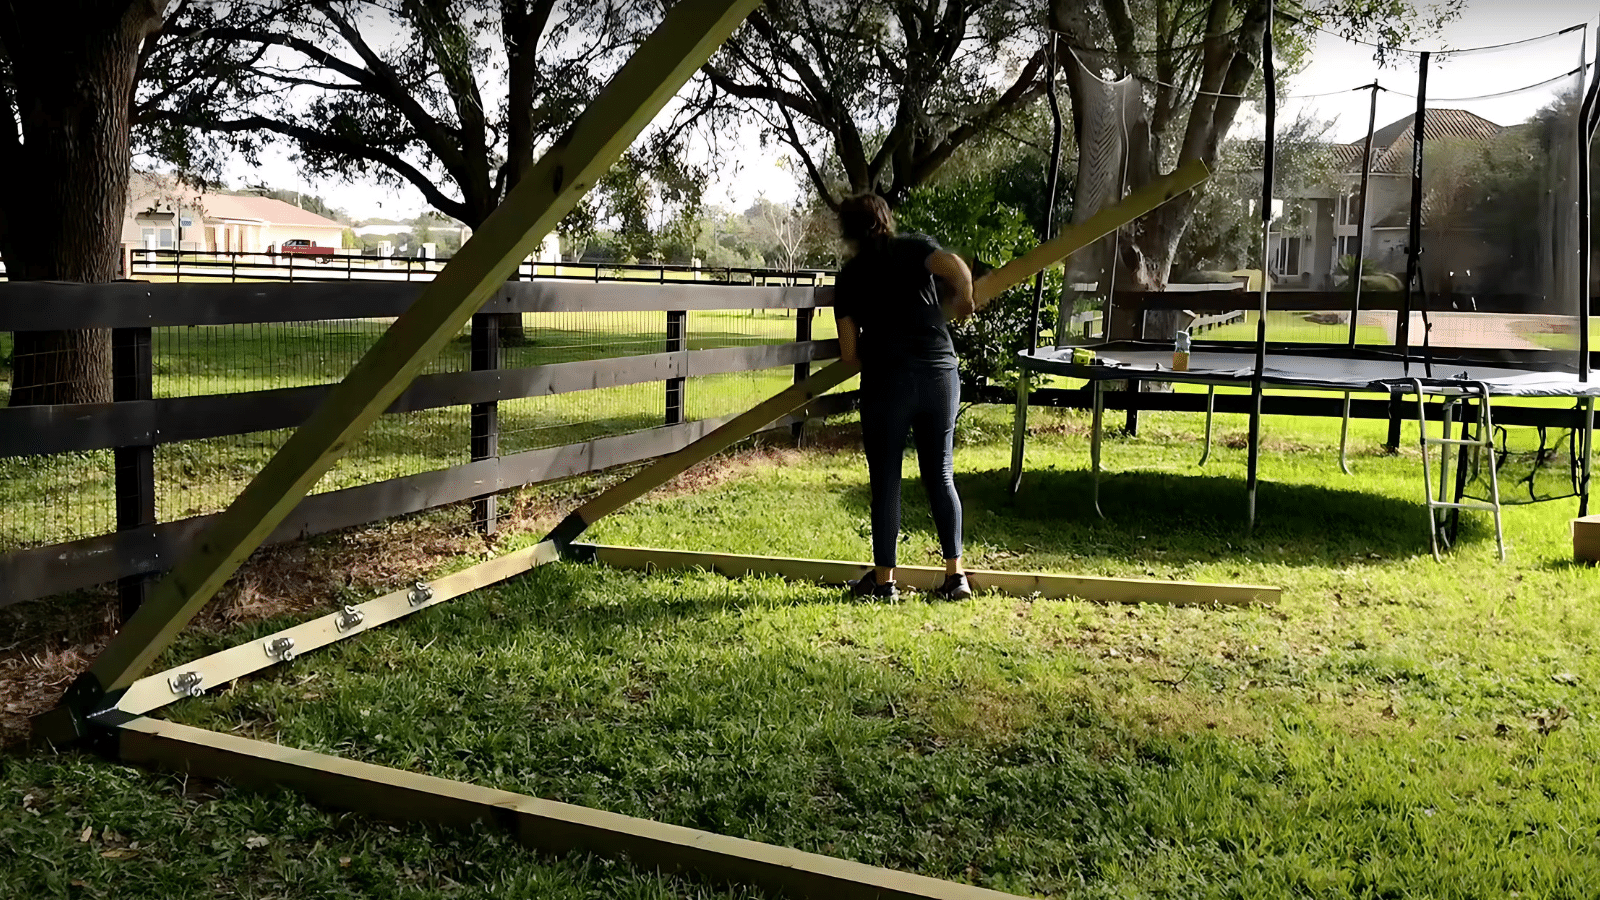
Insert the 4×4 legs into the A-frame brackets. Ensure that the top of each 4×4 leg touches the inside of the bracket. This ensures the structure can carry the weight of the swing set properly.
Once the legs are in place, secure them by inserting the lag screws into the pre-drilled holes in the brackets. There should be four screws for each leg (three on the 4×6 and two on the 4×4).
-
Tip: If you’ve used 10-foot-long 4×4 posts for the legs, you may want to cut them down to 9 feet. In the video, the builder used 10-foot posts but found that they were too tall.
4. Assemble the Swing Set
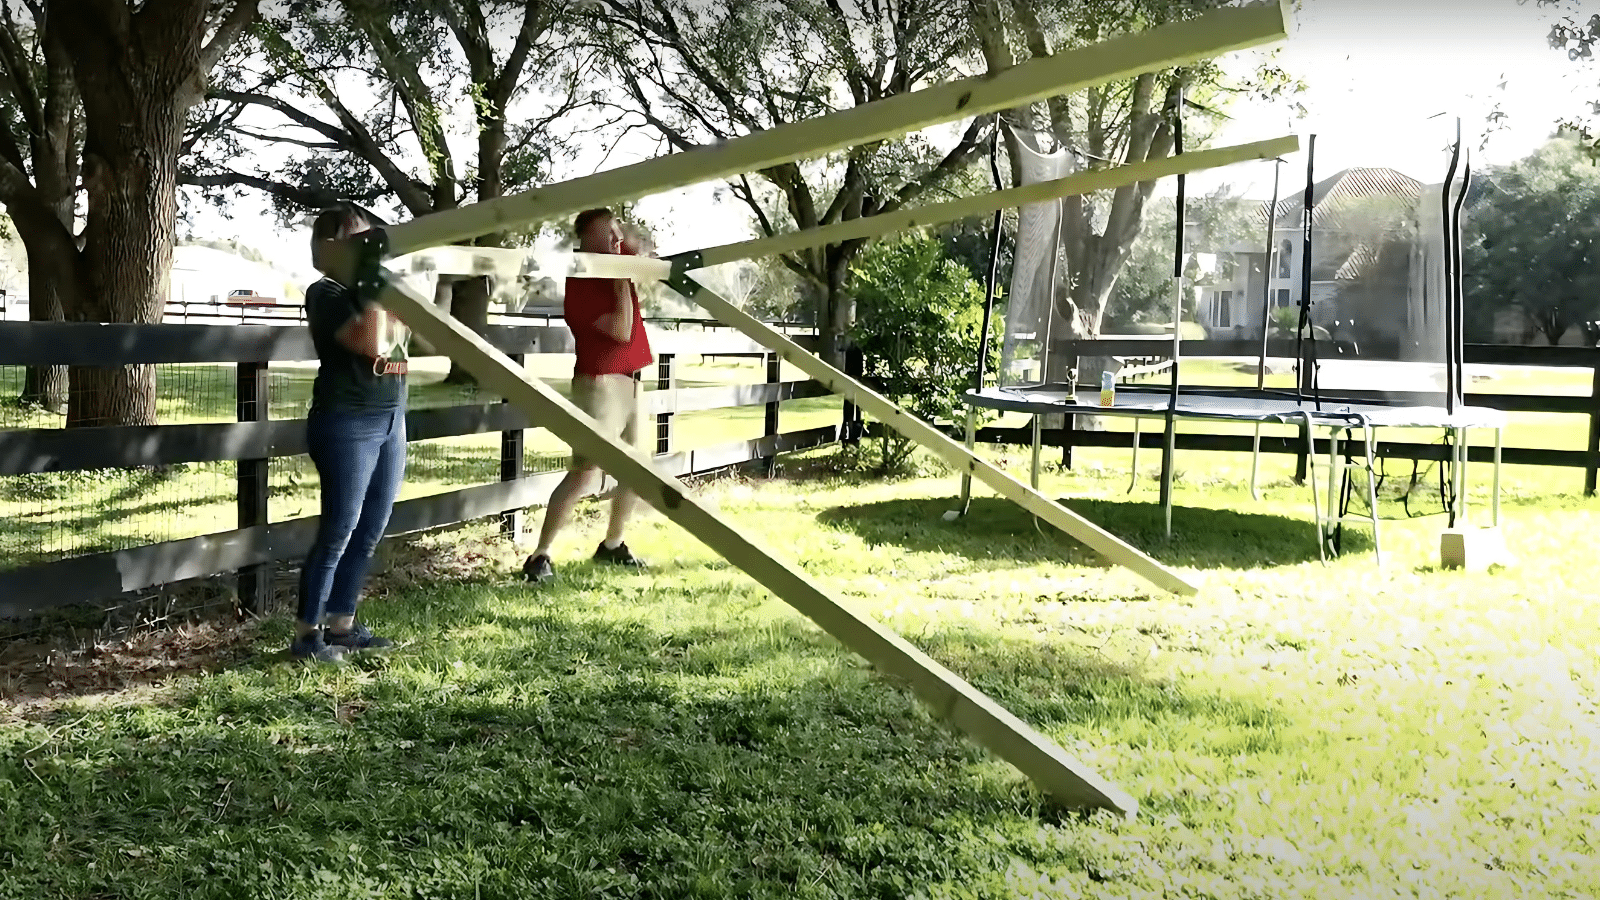
Once the frame is fully assembled, you’ll need help lifting it into position. The swing set frame is heavy, so it’s best to have two people to move the posts into the correct spot.
-
Tip: Don’t try to lift the frame by yourself, as it’s too heavy and awkward to do alone. Once you’ve positioned the frame, you can fine-tune the location and make sure everything is level before securing it in place.
5. Install the Swings and Test
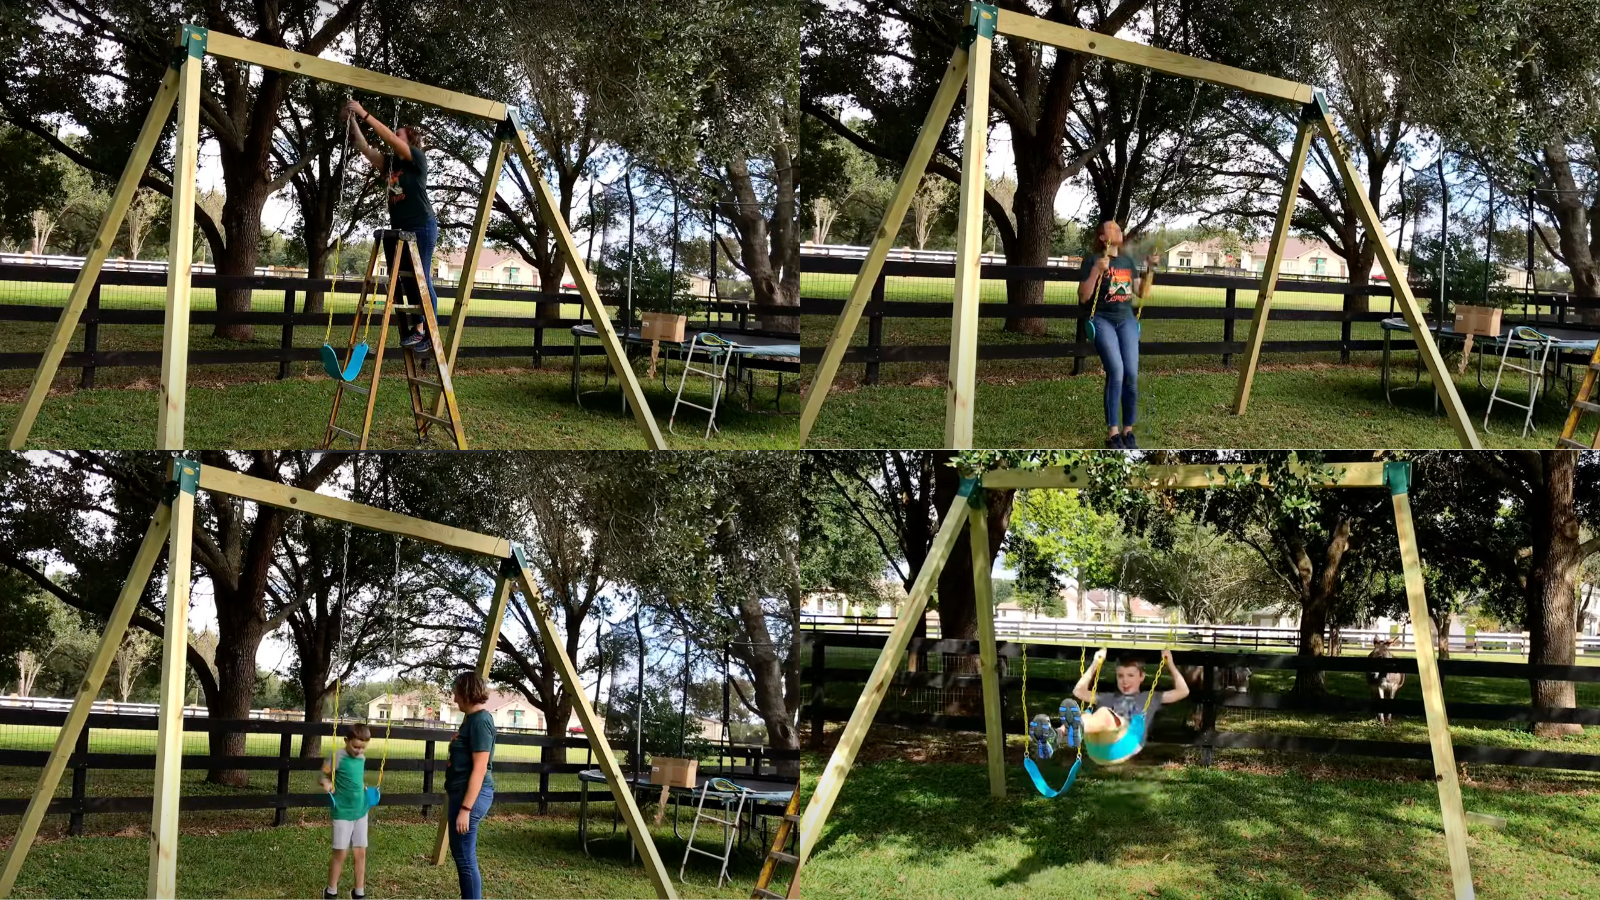
After the frame is in place, attach the swings to the pre-installed hardware. Double-check that all the lag screws are tight and the swings are secure.
Before letting the kids play, test the swing set by applying weight to ensure it’s stable. Sit on the swings yourself to check that everything is securely attached and that the swing set doesn’t wobble.
-
Tip: If you feel the swing set isn’t completely stable, consider anchoring it to the ground with swing set anchors. This is especially important for safety, as the structure can settle and shift over time due to weight and weather.
Final Advice
For older kids or adults, aim for 9-foot-long legs for the swing set. The builder in the video found that 10 feet was too tall, and cutting them down to 9 feet made the set more comfortable for swinging.
If you’re buying hardware or kits, be cautious about opting for lighter metal frames, as they may not be sturdy enough for older kids or adults. Look for solid materials like 4×4 and 4×6 wood for a safer and more durable build.
Watch How It’s Done: DIY Swing Set Art Video Tutorial
Check out this video from Abbotts At Home – DIY & Home for a detailed explanation:
Budgeting for DIY Swing Set: Cost Breakdown
Here’s a simple Budgeting for DIY Swing Set: Cost Breakdown that outlines the key expenses based on the materials and tools you’ll need. This will help your readers get an idea of what to expect when budgeting for the project.
Here’s an estimated cost breakdown for each item required to build the DIY swing set:
| Item | Quantity | Estimated Cost per Unit | Total Cost |
|---|---|---|---|
| Heavy Duty Swing Hangers (1 Pair) | 1 pair | $20.00 | $20.00 |
| Heavy Duty Swings | 2 | $50.00 each | $100.00 |
| Drill | 1 | $40.00 | $40.00 |
| Socket Wrench / Adjustable Wrench | 1 | $15.00 | $15.00 |
| Ratcheting Socket Wrench | 1 | $25.00 | $25.00 |
| T-Square | 1 | $10.00 | $10.00 |
| Rubber Mallet | 1 | $15.00 | $15.00 |
| Measuring Tape | 1 | $5.00 | $5.00 |
| Pencil | 1 | $1.00 | $1.00 |
| Drill Bit Set | 1 set | $20.00 | $20.00 |
| Lag Screws | Various | $10.00 (for a pack) | $10.00 |
| Swing Set Hardware | 1 set | $50.00 | $50.00 |
| Washers | Various | $5.00 (for a pack) | $5.00 |
This cost is an estimate and may vary by location and where you purchase materials. Prices depend on material quality, location, and if items are bought online or in-store.
It’s always a good idea to shop around for deals or consider repurposing materials you might already have!
How to Ensure the Safety Check of The Swingset Properly
Safety Precaution Checklist:
-
Stability Check:
✔ Ensure the swing set is level and properly anchored to the ground.
✔ Use ground anchors if needed to prevent tipping. -
Tighten All Hardware:
✔ Check and tighten all screws, bolts, and nuts.
✔ Ensure there are no loose parts that could cause instability. -
Inspect Swing Hangers:
✔ Ensure swing hangers are securely attached to the frame.
✔ Check for signs of wear or rust and replace if needed. -
Examine Swing Seats:
✔ Inspect swing seats for cracks or damage.
✔ Check ropes or chains for fraying, and replace if worn out. -
Height Adjustment:
✔ Ensure the swings are at the correct height for users.
✔ Adjust the height to prevent swings from being too high or low. -
Ground Contact:
✔ Ensure swing set legs make full contact with the ground.
✔ Bury or adjust the legs if necessary to avoid wobbling. -
Regular Inspections:
✔ Periodically check the swing set for any damage or loose parts.
✔ Address any issues immediately to maintain safety.
This checklist will help ensure that the swing set stays safe for use at all times.
Conclusion
Building your own backyard swing set is a fun project that creates lasting value for your family. With basic tools, good planning, and careful steps, you can build a safe, strong play area that fits perfectly in your yard.
This DIY approach saves money compared to store-bought options while giving you the freedom to make changes as your children grow. The wooden structure will last for years, standing up to weather and regular use much better than plastic alternatives.
The time you spend building will pay off with countless hours of outdoor play and family memories. Just remember to check all connections regularly and maintain the wood to keep it safe year after year.
Ready to start building? Grab your tools and follow our five-step guide – your family will thank you for the effort!