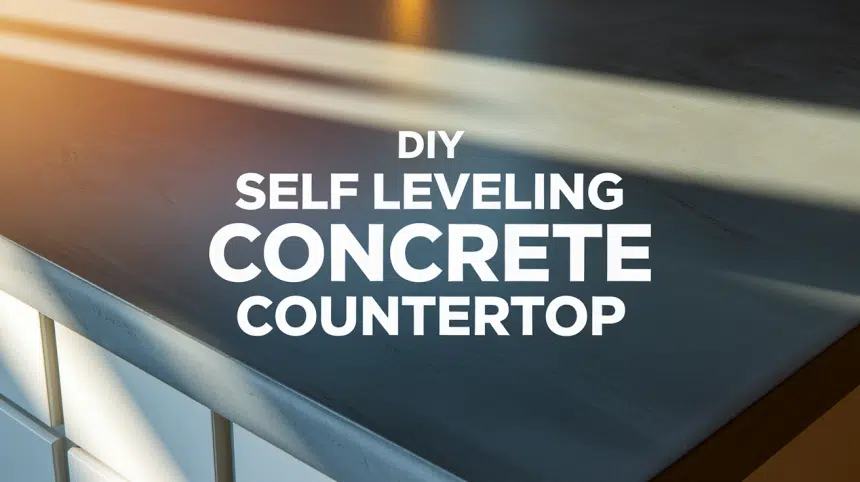
Have you been thinking about updating your kitchen or bathroom without breaking the bank? Self-leveling concrete countertops might be exactly what you’re looking for.
These practical surfaces are becoming increasingly popular in homes and businesses across the country—and for good reason!
They combine strength, good looks, affordability, and straightforward installation, which makes them accessible to both DIY enthusiasts and professionals.
What makes these countertops so special? How difficult are they to install yourself? And can they really compete with traditional stone options?
Throughout this guide, we’ll answer these questions and walk you through everything you need to know about creating beautiful, long-lasting concrete surfaces for your home.
What is a Self-Leveling Concrete Countertop?
Self-leveling concrete is a specialized mixture containing polymers and flow agents that allow it to spread evenly across surfaces with minimal effort.
Unlike traditional concrete, which requires extensive troweling and finishing, self-leveling formulations flow to create a flat, smooth surface.
The science behind this material involves carefully balanced chemical additives that modify the viscosity of the concrete while maintaining structural integrity.
These additives temporarily reduce surface tension, allowing air bubbles to rise and escape while the mixture spreads to fill available space.
This versatile material is used in homes and businesses, extending beyond countertops to floors, tables, and other horizontal surfaces requiring a smooth, consistent finish.
Why Choose a Self-Leveling Concrete Countertop?
When considering your options for kitchen and bathroom surfaces, self-leveling concrete stands out as a practical choice that doesn’t sacrifice style for function.
The appeal of self-leveling concrete countertops stems from several key advantages:
Strength and Longevity: These surfaces withstand daily use, resist scratches, and hold up against heat better than many alternatives. With proper care, they can last decades.
Modern Appearance: The clean, minimalist look of concrete fits perfectly with current design trends while remaining adaptable to various styles through coloring and finishing techniques.
Budget-Friendly Option: Compared to natural stone like granite or marble, self-leveling concrete typically costs significantly less while providing comparable functionality.
Simple Upkeep: Daily cleaning requires only mild soap and water, with occasional resealing to maintain protection.
With this combination of durability, style, affordability, and easy maintenance, it’s no wonder more homeowners are choosing self-leveling concrete for their counter surfaces.
Materials Needed for a Self-Leveling Concrete Countertop
To create your own self-leveling concrete countertop, you’ll need:
| Material | Purpose |
|---|---|
| 2×4 Bracing | Supports the countertop structure around the edges |
| Half-Inch Hardy Board | Base material for the countertop |
| Z Countertop Forms | Mold for creating the edges and corners of the countertop |
| Fiberglass Mesh | Reinforces the concrete mix |
| SandTopping Mix | Base concrete mix for the countertop |
| Z Liqui-Crete | Liquid additive for self-leveling properties |
| Cement Board Screws | To secure Hardy Board to the base |
| Duct Tape | Seals seams between forms |
| Screed | Tool to level the poured concrete |
| Steel Trowel | To smooth the concrete surface |
| Two-Part Sealer | Protects the finished countertop |
When selecting products, prioritize quality over cost savings, particularly for the concrete mix and sealer, as these directly impact the final result and longevity of your countertop.
Step-by-Step Guide to Installing a Self-Leveling Concrete Countertop
Ready to roll up your sleeves? This straightforward process can be completed over a weekend with the right preparation and attention to detail.
Follow these steps carefully for the best results with your self-leveling concrete project.
Step 1: Prepare the Base
-
Remove old countertops and clean the surface thoroughly.
-
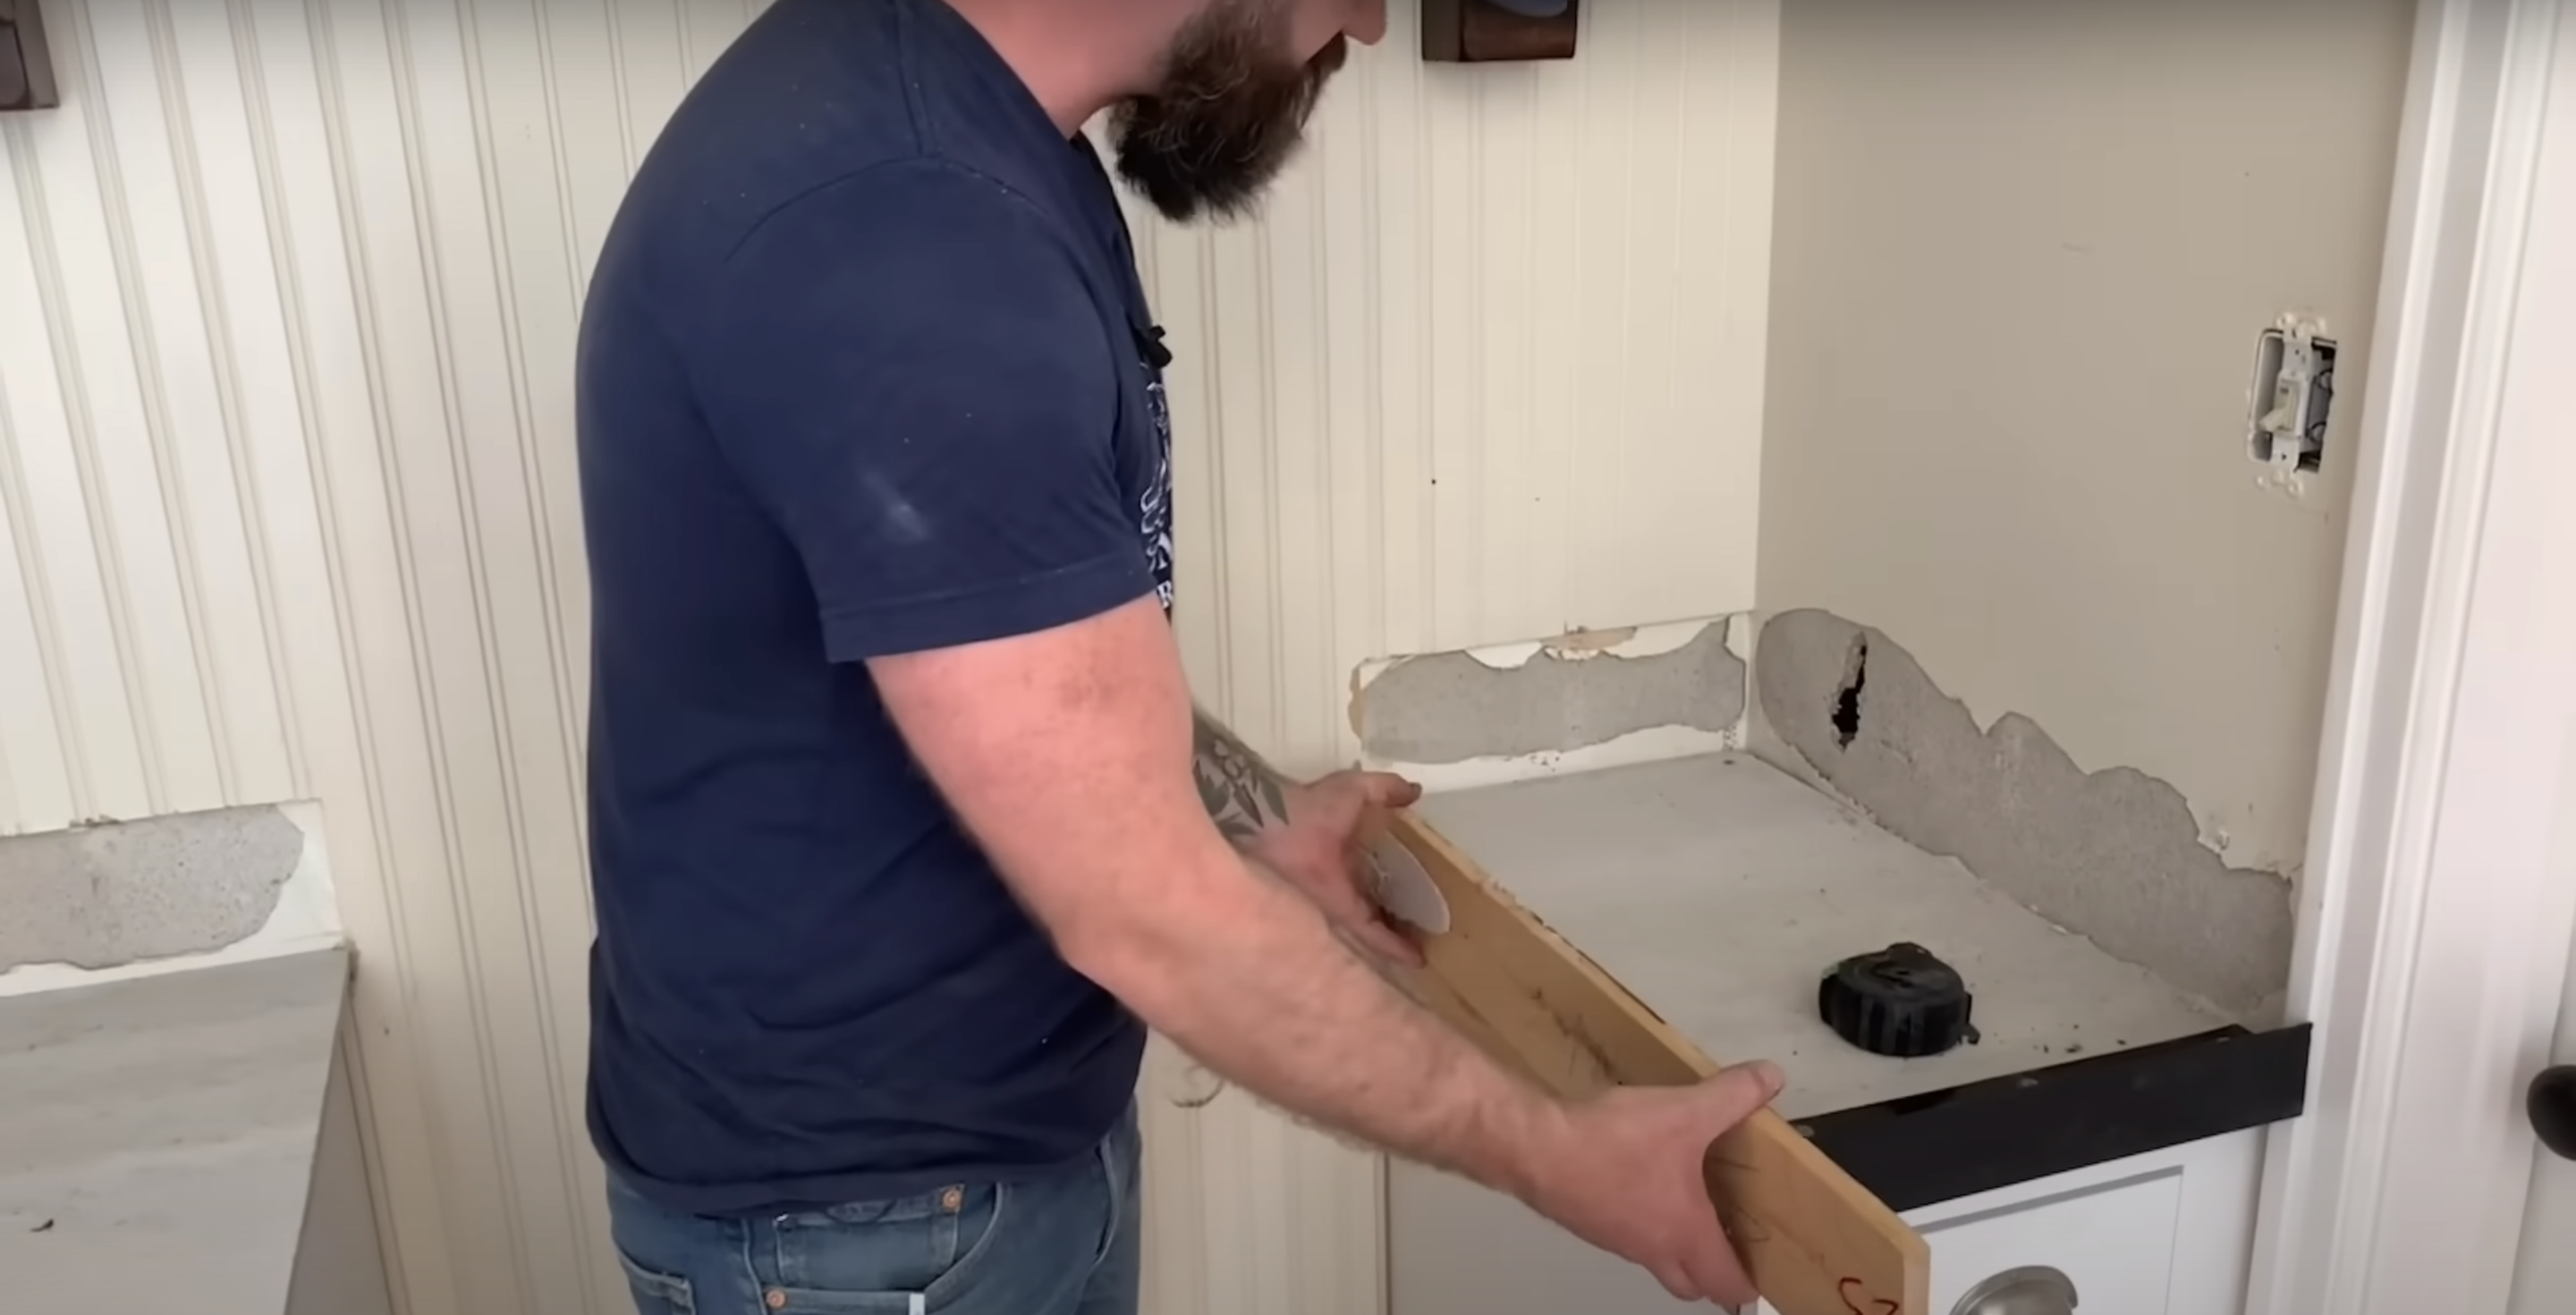
Attach 2×4 bracing along the edges to support the concrete’s weight.
-
Install half-inch Hardy Board using cement board screws, ensuring it’s level and securely in place.
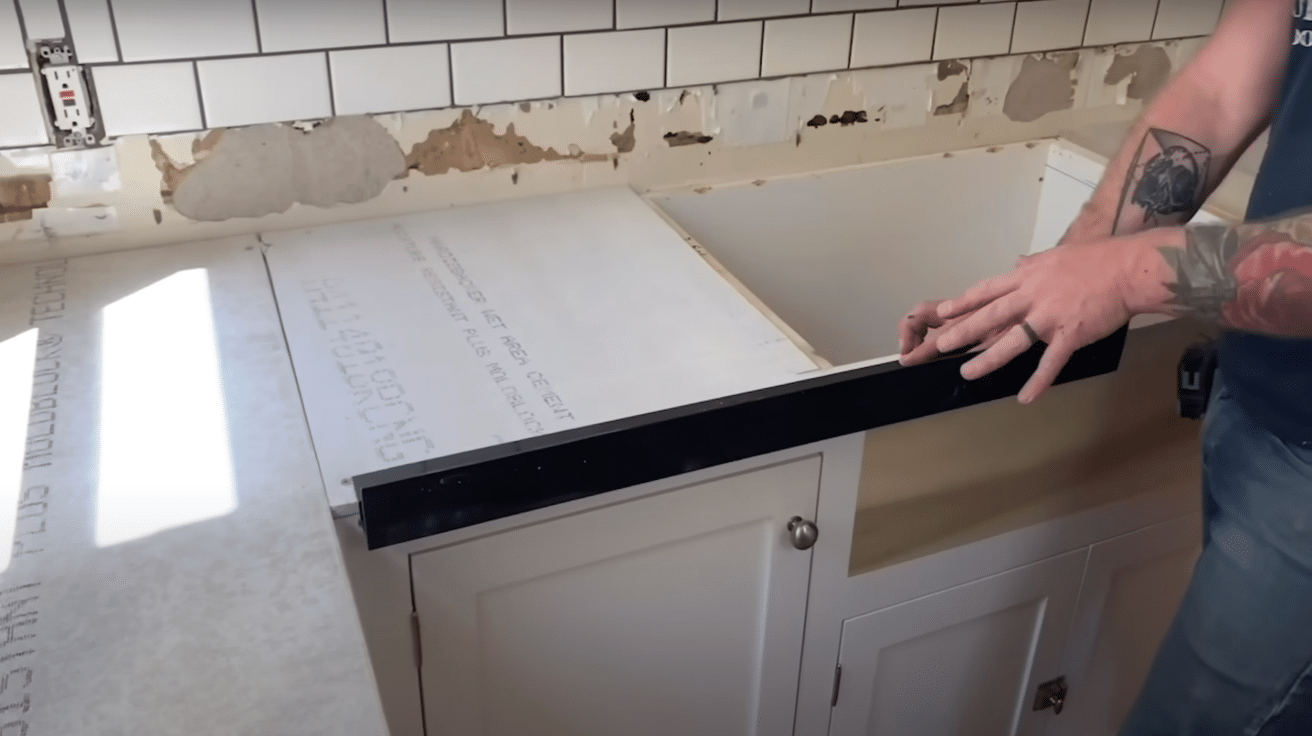
Step 2: Set Up Forms
-
Attach Z Countertop Forms around the edges using cement screws, making sure the corners are tight.
-
Use mitered corners to create smooth, seamless edges. Seal any seams with duct tape to prevent concrete leakage.
Step 3: Install Mesh and Reinforcement
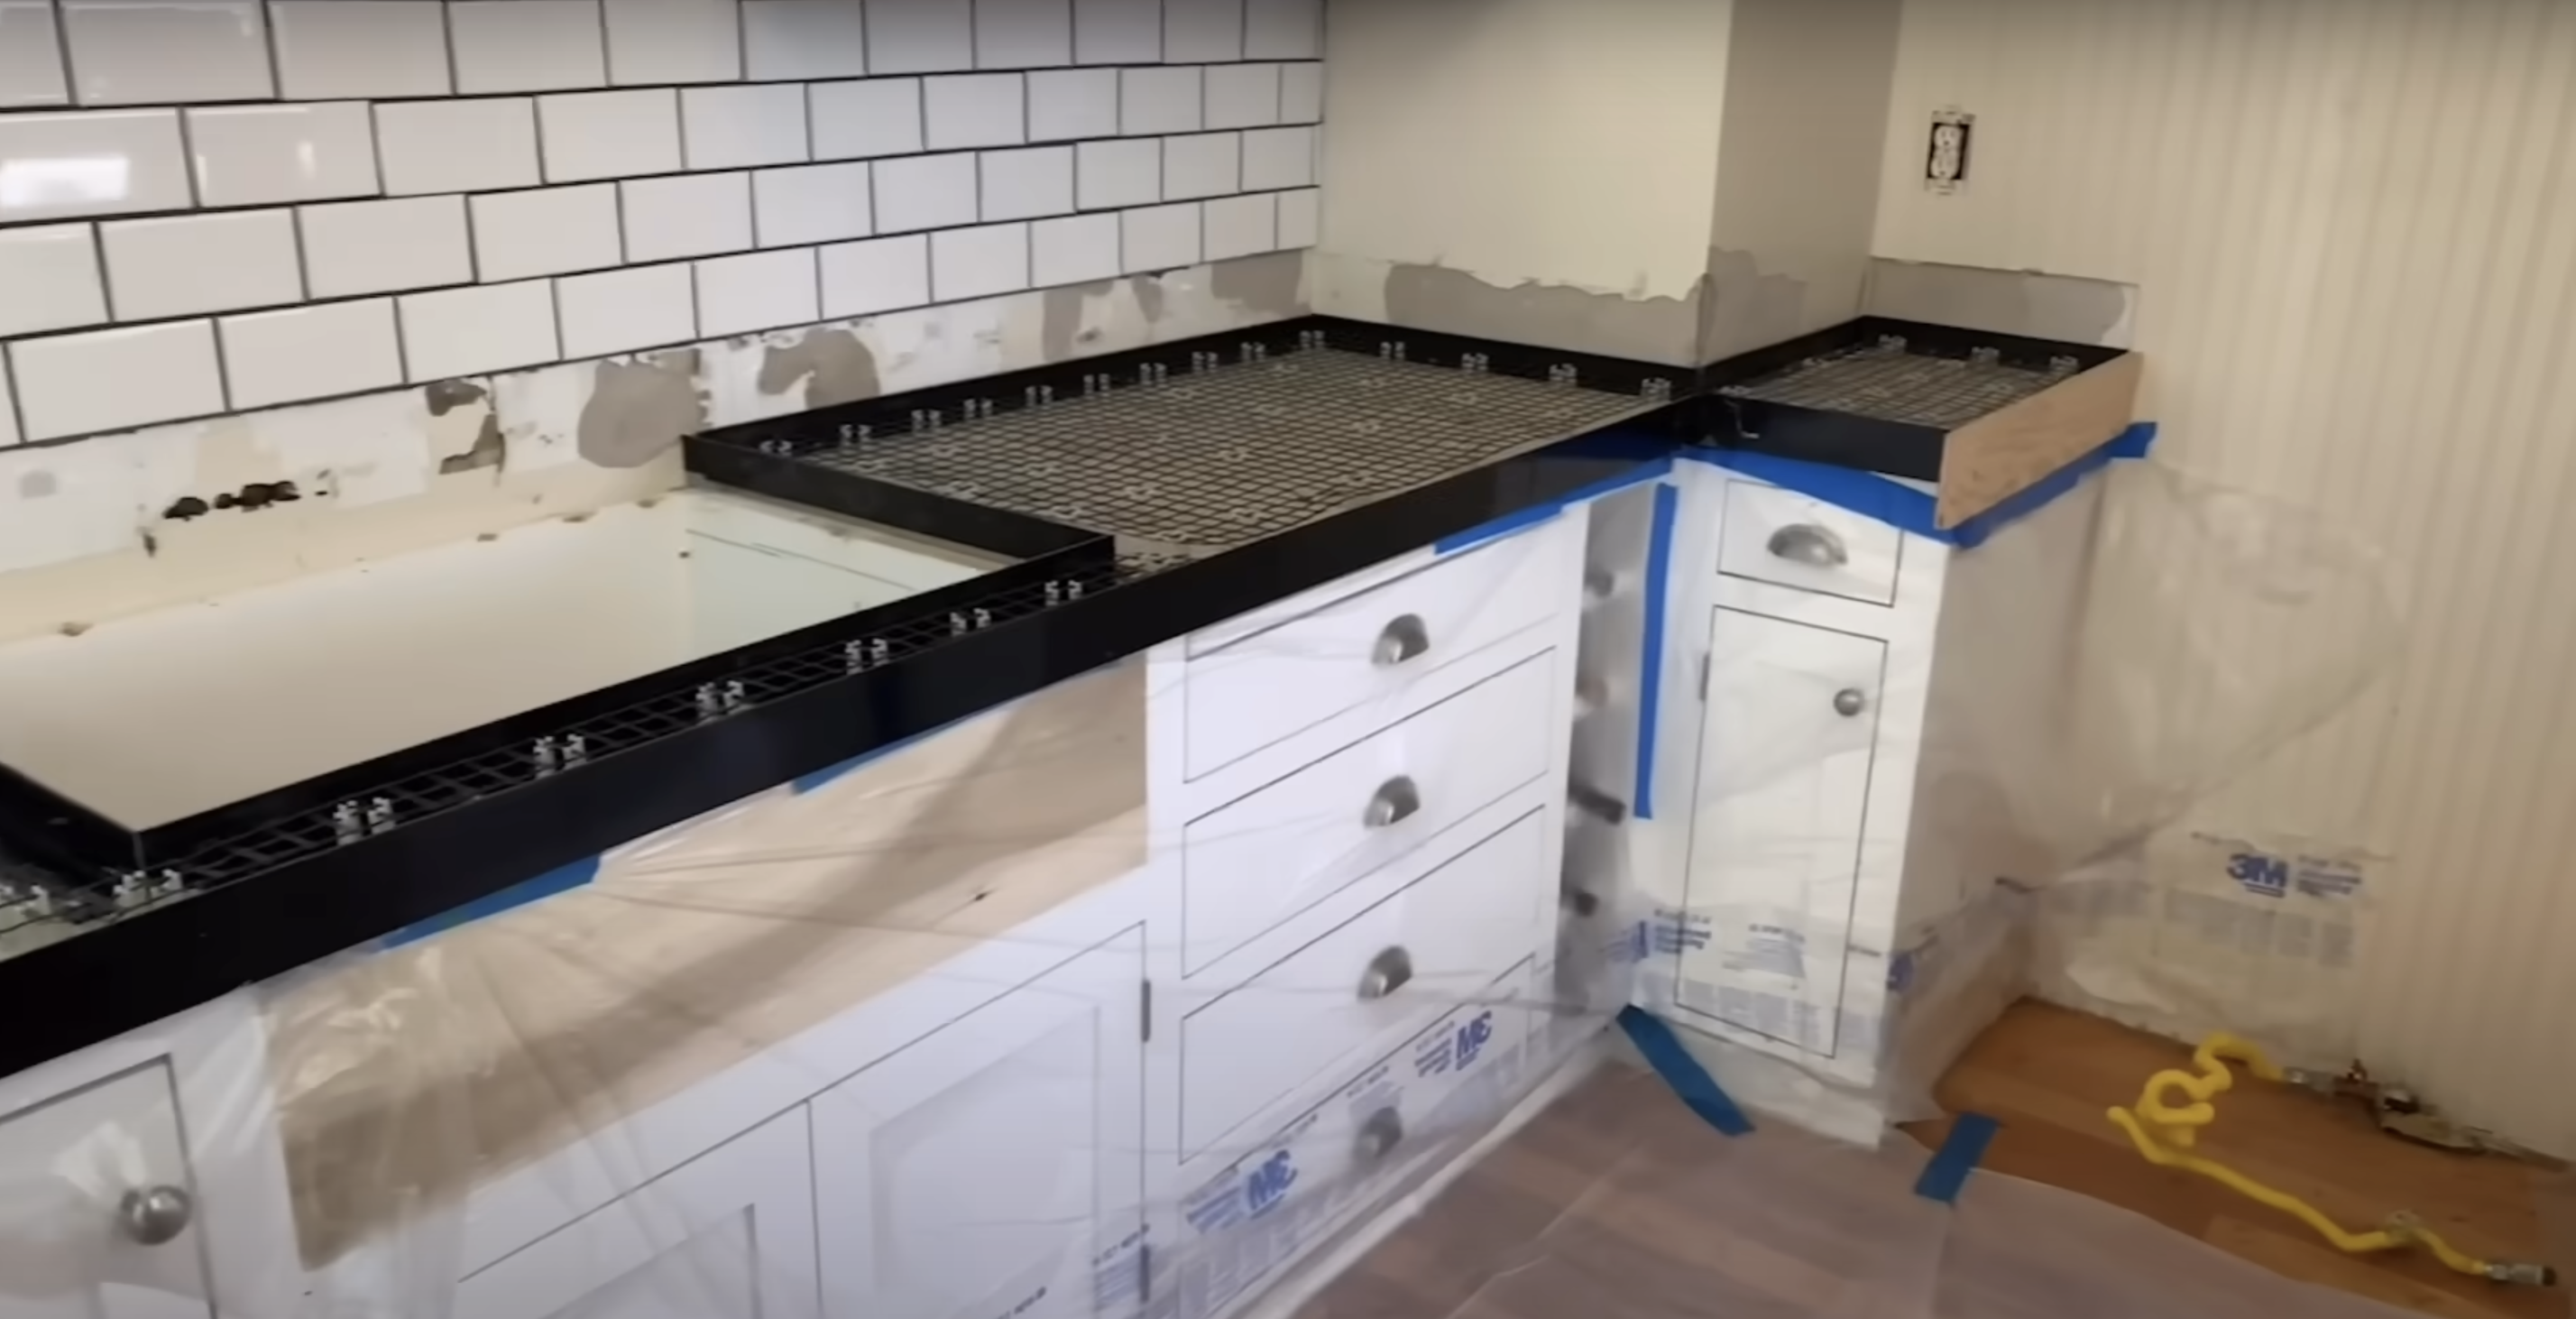
-
Lay down fiberglass mesh on the Hardy Board to add strength. Secure the mesh with clips to keep it at the right height during pouring.
-
Check the mesh placement to ensure even coverage before pouring concrete.
Step 4: Mix and Pour Concrete
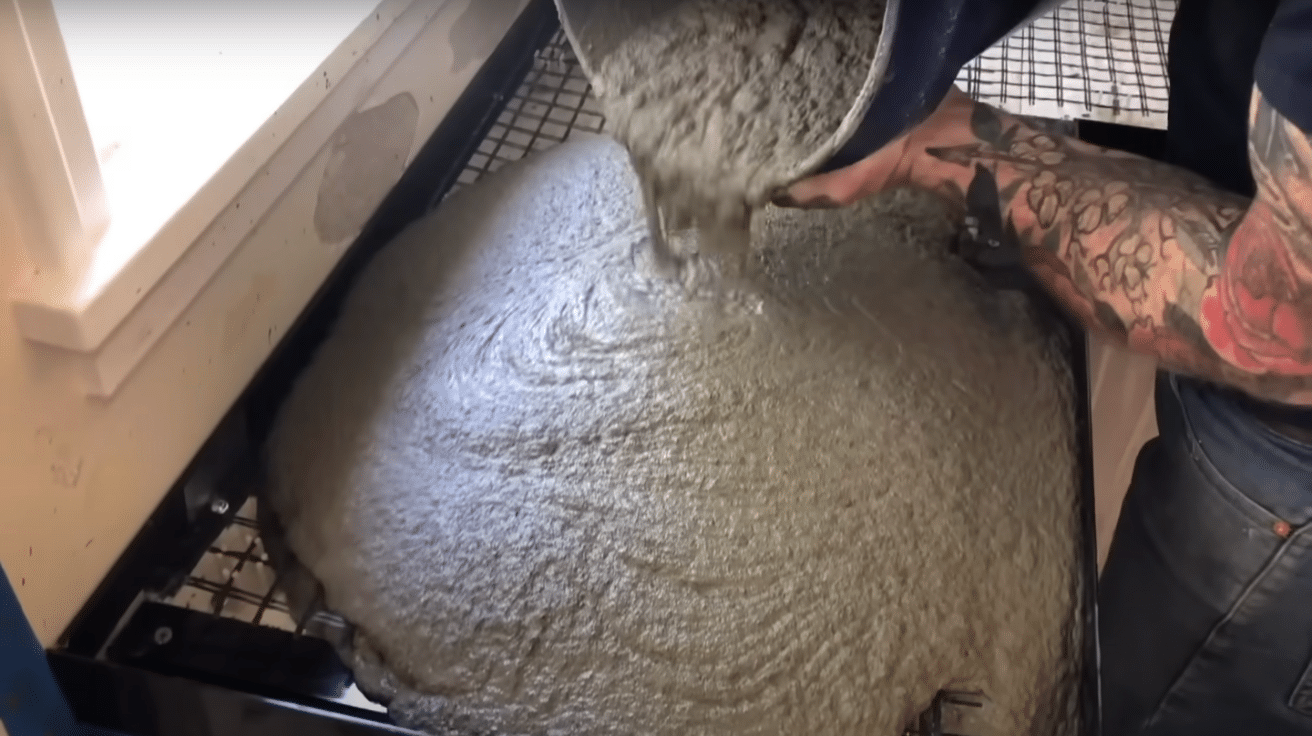
-
Mix SandTopping Mix with Z Liqui-Crete for a smooth, durable consistency.
-
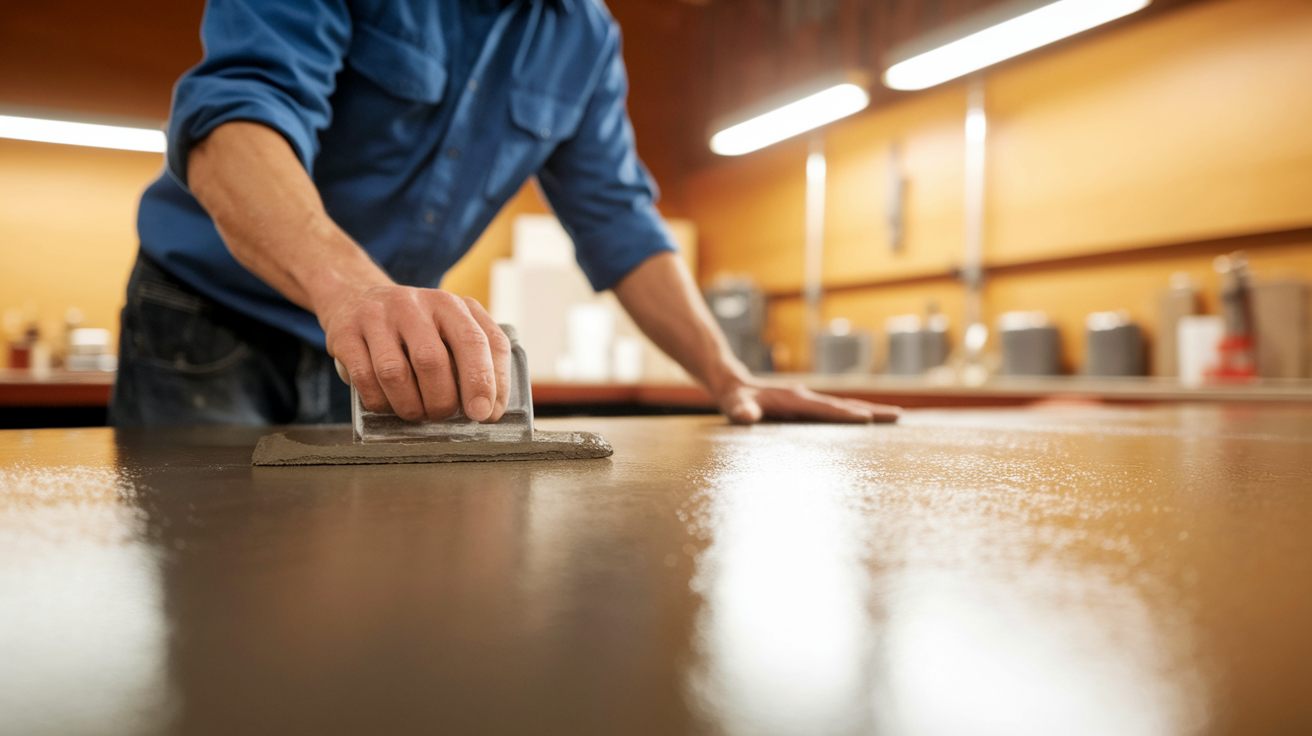
Pour the concrete mixture onto the countertop, distributing it evenly. Use a screed to level the surface and a steel trowel to smooth it out.
Step 5: Let Concrete Set and Finish
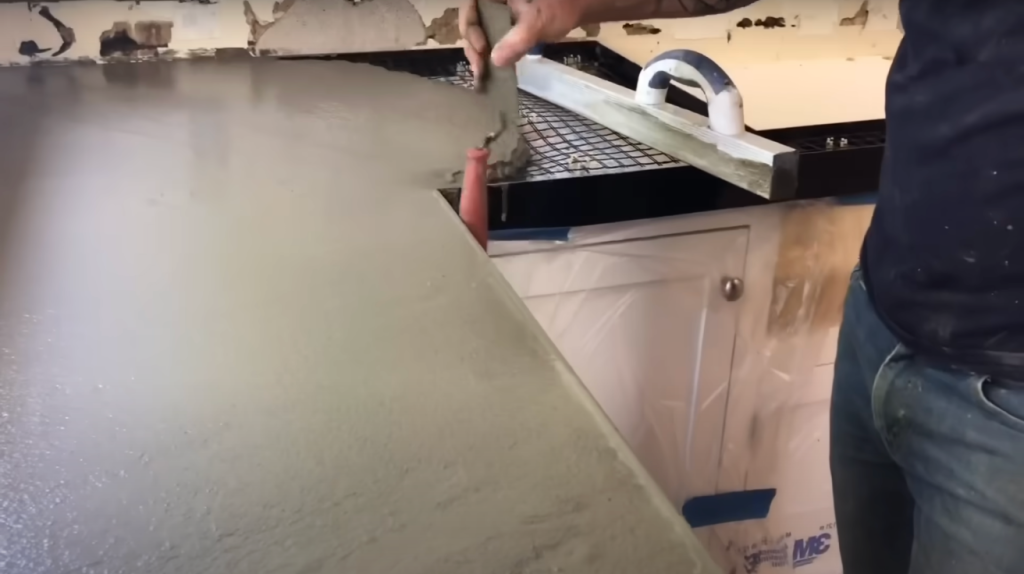
-
Allow the concrete to cure for 24-48 hours, depending on temperature.
-
Carefully remove the forms once the concrete is firm.
-
Smooth any rough edges with a putty knife for a clean finish.
Step 6: Seal the Concrete
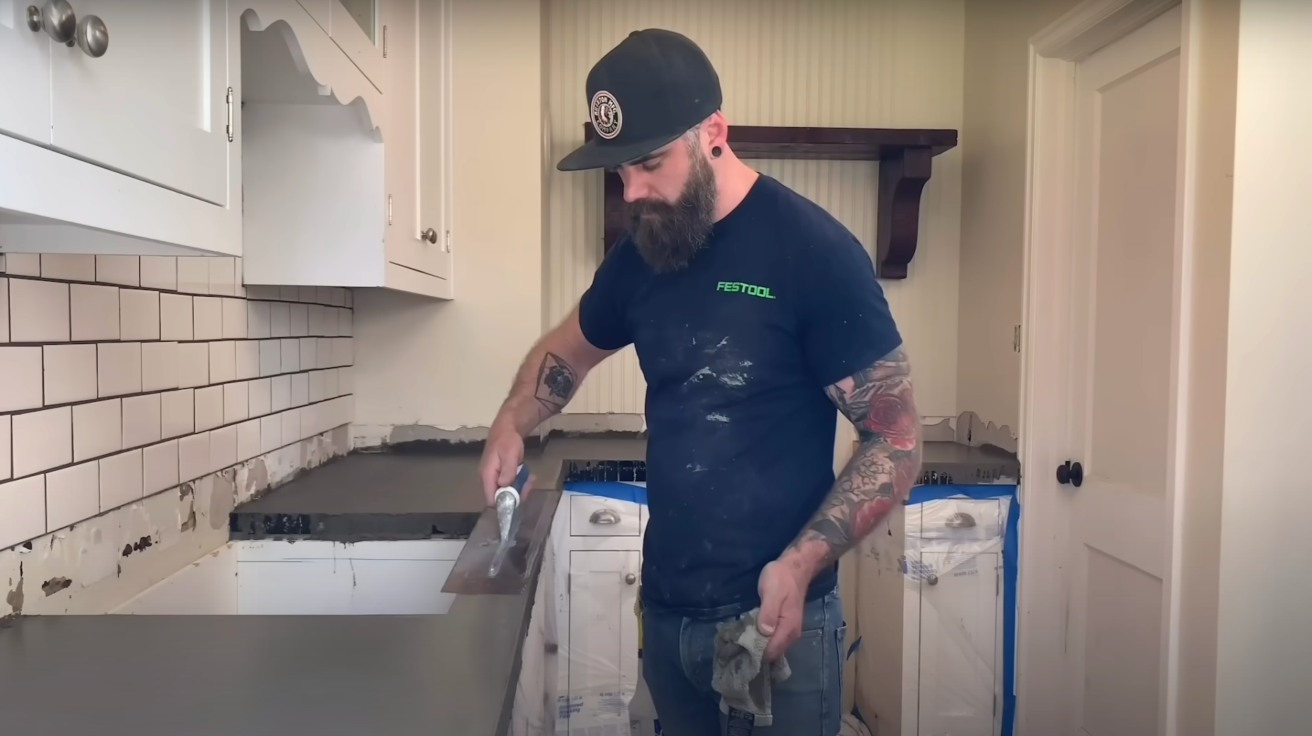
-
Once the concrete is fully cured, clean the surface.
-
Apply a two-part sealer for maximum protection and durability.
-
Let the sealer dry completely before using the countertop.
Video Tutorial
Follow this step-by-step video that walks you through the entire process from preparation to final sealing by Bourbon Moth Woodworking.
Cost of Installing a Self-Leveling Concrete Countertop
The financial breakdown for a typical DIY self-leveling concrete countertop installation includes:
- Self-leveling concrete mix: $3-7 per square foot
- Forms and substrate materials: $2-4 per square foot
- Sealer and finishing products: $1-3 per square foot
- Tools (if purchased): $50-150 total
Total DIY cost typically ranges from $6-15 per square foot, significantly less than the $50-100+ per square foot for premium stone countertops.
Professional installation generally adds $25-50 per square foot to these material costs.
Tips for Achieving the Best Self-Leveling Concrete Countertop
Even experienced contractors follow specific practices to ensure quality results with self-leveling concrete. Here are some professional techniques that will help you avoid common pitfalls and achieve a superior finish:
- Control your working environment—maintain a consistent room temperature between 65-75°F during installation and curing.
- Use a spiked roller to remove trapped air bubbles after pouring.
- Consider adding fiber reinforcement to the mix for additional strength.
- Test your concrete mix and techniques on a small sample board before tackling the full countertop.
- For a completely flat surface, use a long level to check as the concrete sets.
- When mixing colored concrete, record exact measurements to ensure consistency if multiple batches are needed.
Following these practical tips can make the difference between an amateur-looking project and one that appears professionally crafted.
Advantages and Disadvantages of Self-Leveling Concrete Countertops
Before committing to this material for your home, it’s important to understand both its strengths and limitations. Let’s examine what makes self-leveling concrete a good choice and where it might not be ideal:
| Pros | Cons |
|---|---|
| Highly customizable with various colors, textures, and finishes | May develop fine hairline cracks over time if not properly reinforced |
| Integrates well with undermount sinks and other fixtures | Requires appropriate sealing to prevent staining |
| Creates a continuous surface without visible seams | DIY installation involves a learning curve |
| Can be cast in place or pre-cast and installed | Needs time for proper curing before use |
| Environmentally friendly compared to some manufactured surfaces | Can be challenging to repair if significantly damaged |
Understanding these pros and cons will help you make an informed decision about whether self-leveling concrete is the right material for your specific needs and situation.
Alternatives to Self-Leveling Concrete Countertops
While self-leveling concrete offers many benefits, it’s worth comparing it with other popular countertop materials to ensure you’re making the right choice for your specific needs and budget:
When considering options:
1. Natural Stone (Granite, Marble):
- More expensive ($50-150 per square foot installed)
- Requires maintenance and periodic resealing
- Each piece has unique patterns
2. Engineered Quartz:
- Premium pricing ($60-100 per square foot installed)
- Non-porous and highly stain-resistant
- Wide range of consistent colors and patterns
3. Solid Surface (Corian):
- Mid-range pricing ($35-75 per square foot installed)
- Continuous appearance
- Can be scratched but is repairable
4. Butcher Block:
- Moderate cost ($30-60 per square foot installed)
- Warm, natural appearance
- Requires regular maintenance and oil treatments
Each material has its own set of strengths and limitations. Your final choice should reflect your priorities regarding cost, maintenance requirements, durability, and style preferences.
Wrapping it Up!
So, what do you think about self-leveling concrete countertops? They offer an impressive combination of practicality, visual appeal, and value that makes them worth considering for your next home improvement project.
If you like their adaptable style, budget-friendly price point, or the satisfaction of creating something yourself, these surfaces have much to offer.
Ready to take on this project yourself? Or perhaps you prefer hiring a professional to ensure excellent results? Whatever you decide, self-leveling concrete countertops can remake your space with a modern feel that will last for many years.
Have you worked with concrete in other home projects? We’d love to hear about your experiences or answer any questions you might have about getting started!