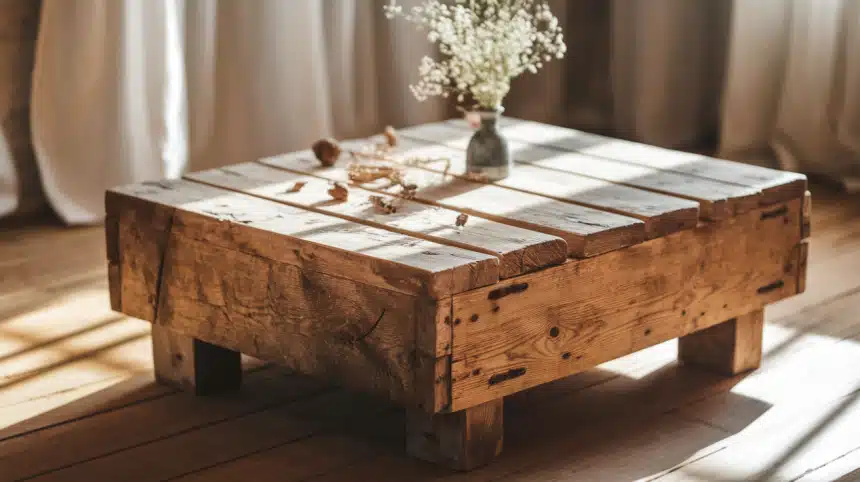
Looking to add comfort, style, and function to your living space? A DIY ottoman coffee table might be the perfect weekend project.
In this complete tutorial, we’ll walk you through every step of making your ottoman coffee table—from choosing the right materials to adding the finishing touches.
If you want extra storage, a soft footrest, or a cozy centerpiece, this guide will help you build a piece that suits your home and budget.
No advanced woodworking skills are needed—just basic tools, a bit of creativity, and a willingness to try something new.
Let’s get started and turn your vision into a stylish, handmade piece you’ll love using every day.
Why Make a DIY Ottoman?
Creating your own ottoman is both practical and satisfying. Here’s why you should consider this project for your home:
-
Cost-effective: Building your own ottoman typically costs much less than buying one from a store, especially for high-quality pieces.
-
Custom dimensions: You can make it exactly the size you need for your space, perfect for small apartments or oddly shaped rooms.
-
Personal style: Choose fabrics, colors, and finishes that match your existing décor perfectly, rather than settling for what’s available in stores.
-
Skill building: Develop useful woodworking and upholstery skills that can be applied to future home projects.
-
Satisfaction: Experience the pride of making something functional with your own hands.
-
Sustainability: Repurpose materials you already have, reducing waste and environmental impact.
-
Perfect fit: Based on your specific needs, design an ottoman that serves multiple functions—extra seating, storage, or a coffee table.
-
Gift potential: Create meaningful handmade gifts for friends and family that show thought and care.
Materials Required
These are the equipment needed for this DIY.
| Material | Purpose |
|---|---|
| Upholstery fabric | To cover the ottoman and give it a fresh look |
| Heavy-duty stapler | To secure the fabric tightly to the ottoman frame |
| Staples | Works with the stapler to hold the fabric in place |
| Scissors | To cut off excess fabric for clean edges |
| Lighter or fabric burner | Optional: to seal raw fabric edges and prevent fraying |
| Ottoman base or frame | The structure you’re upholstering |
| Storage baskets (optional) | Adds function by giving space underneath the ottoman |
| Ruler or measuring tape | To measure fabric accurately before cutting |
| Work gloves (optional) | For hand protection while stapling and handling fabric |
DIY Ottoman Step-by-Step Guide
Follow these simple steps to make your own DIY Ottoman. You’ll quickly create a comfy, stylish piece!
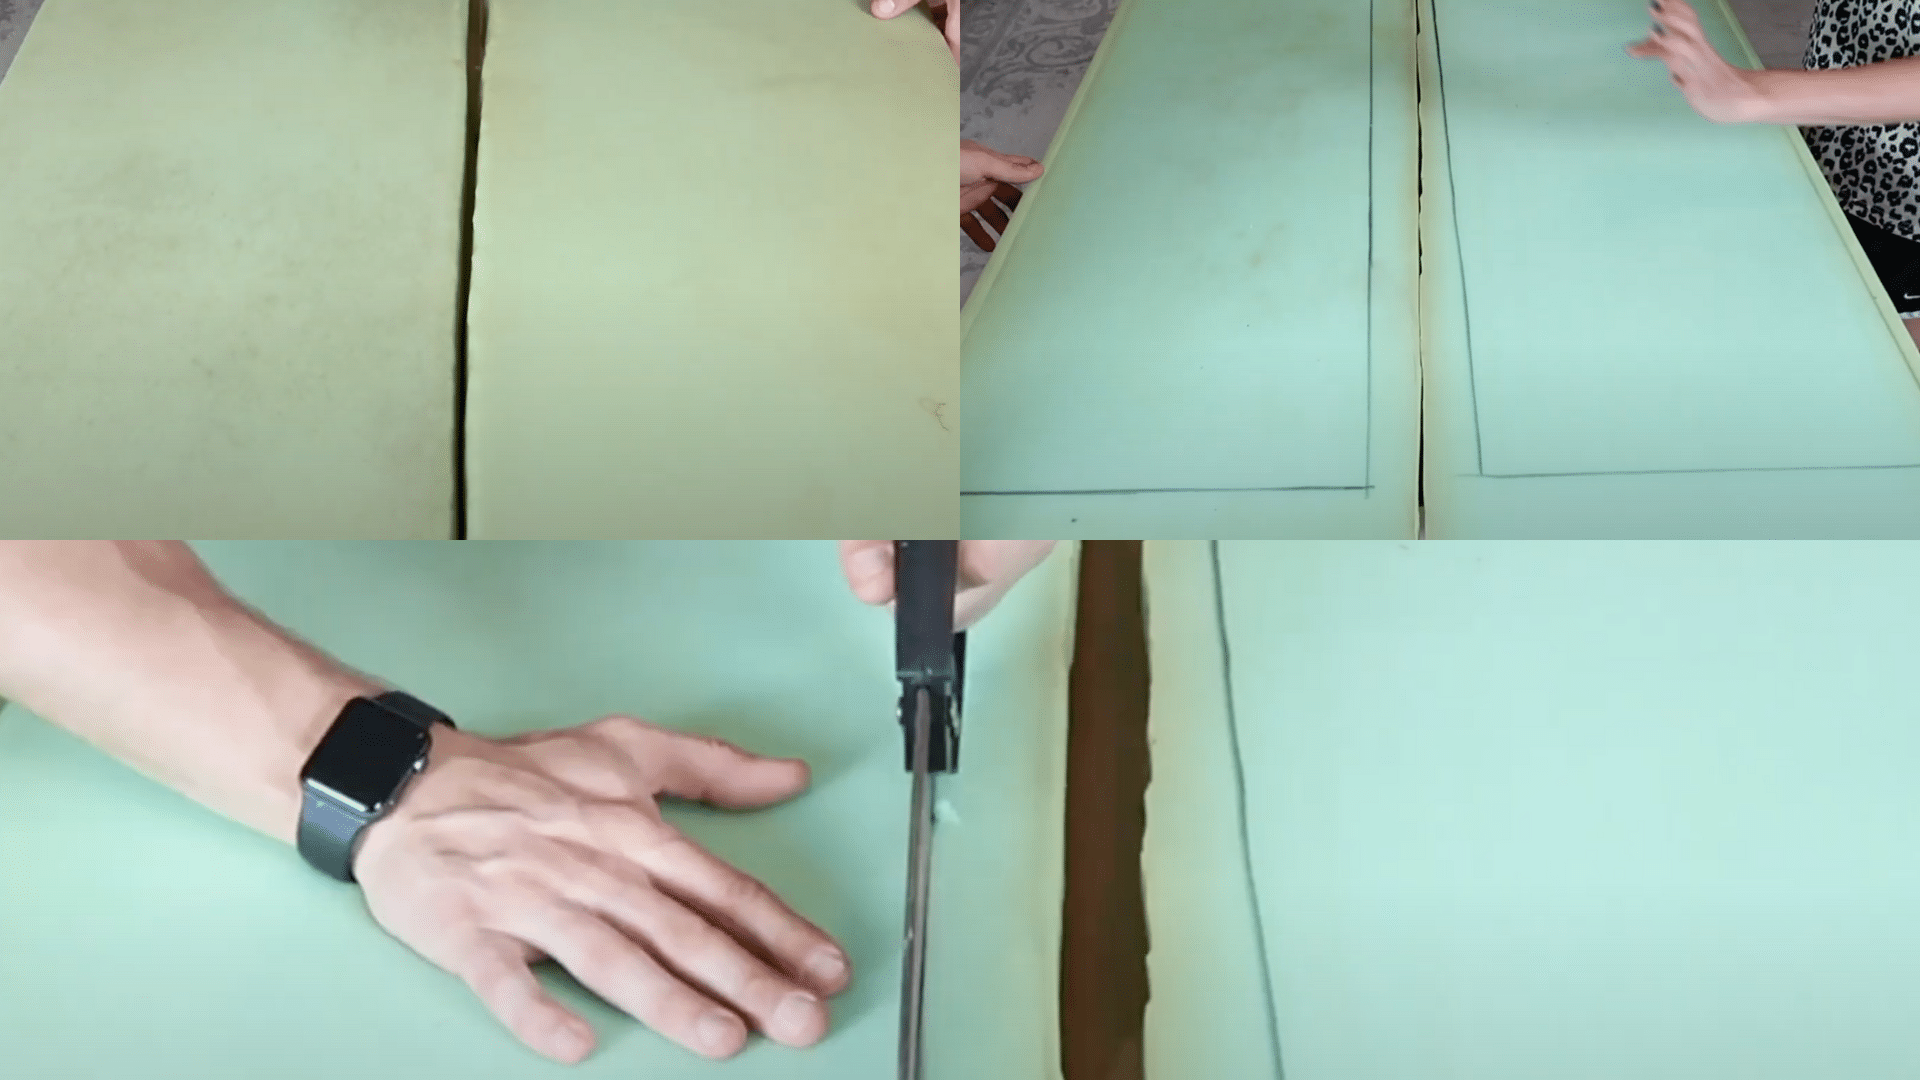
Step 1: Fold and Trim the Fabric
-
Fold the fabric neatly over the edge of the ottoman.
-
Trim off any extra material that hangs beyond the base.
-
Use clean, straight cuts to avoid bulky corners.
Pro Tip: Always leave a little extra fabric before cutting—you can trim more later, but you can’t add it back!
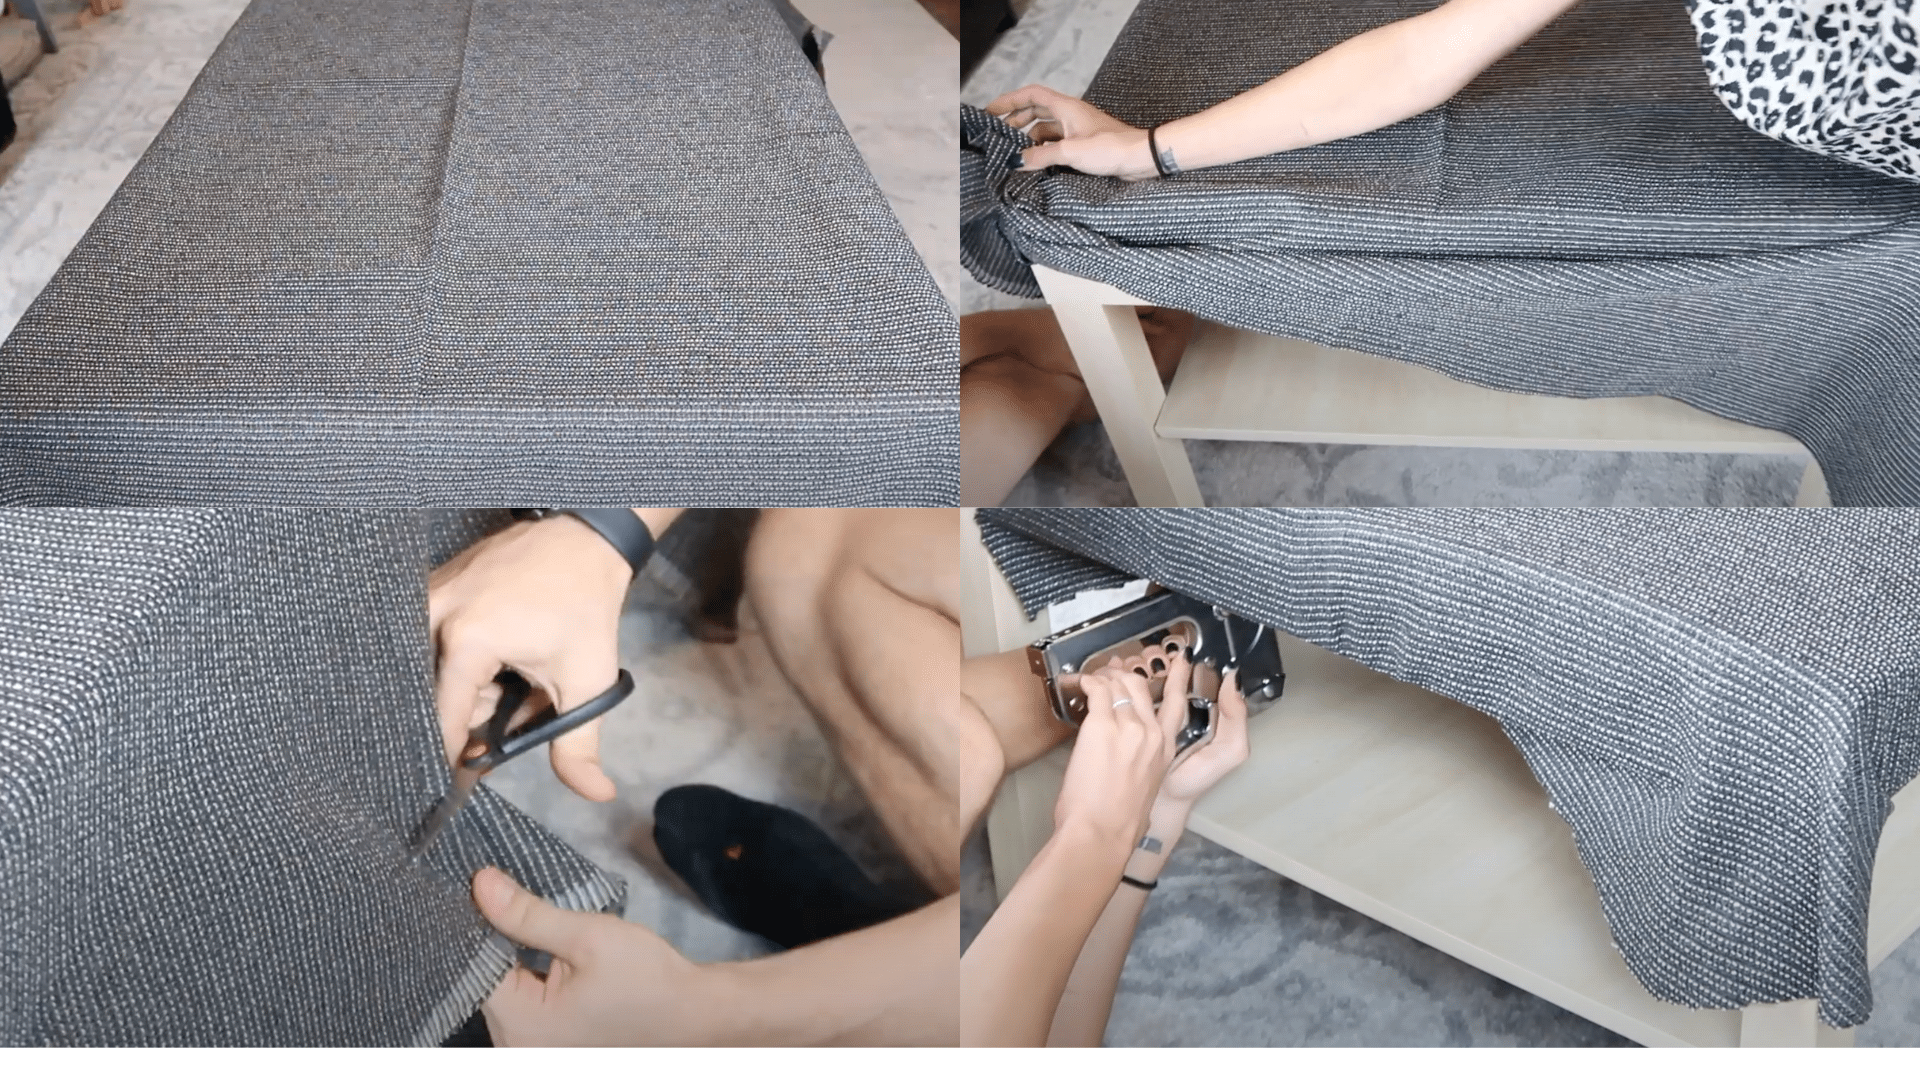
Step 2: Pull Tight and Staple
-
Stretch the fabric tightly over the surface.
-
Staple both sides securely to keep the material in place.
-
Check that the fabric stays flat as you go.
Pro Tip: Start stapling from the center and work your way out to keep the fabric evenly pulled.
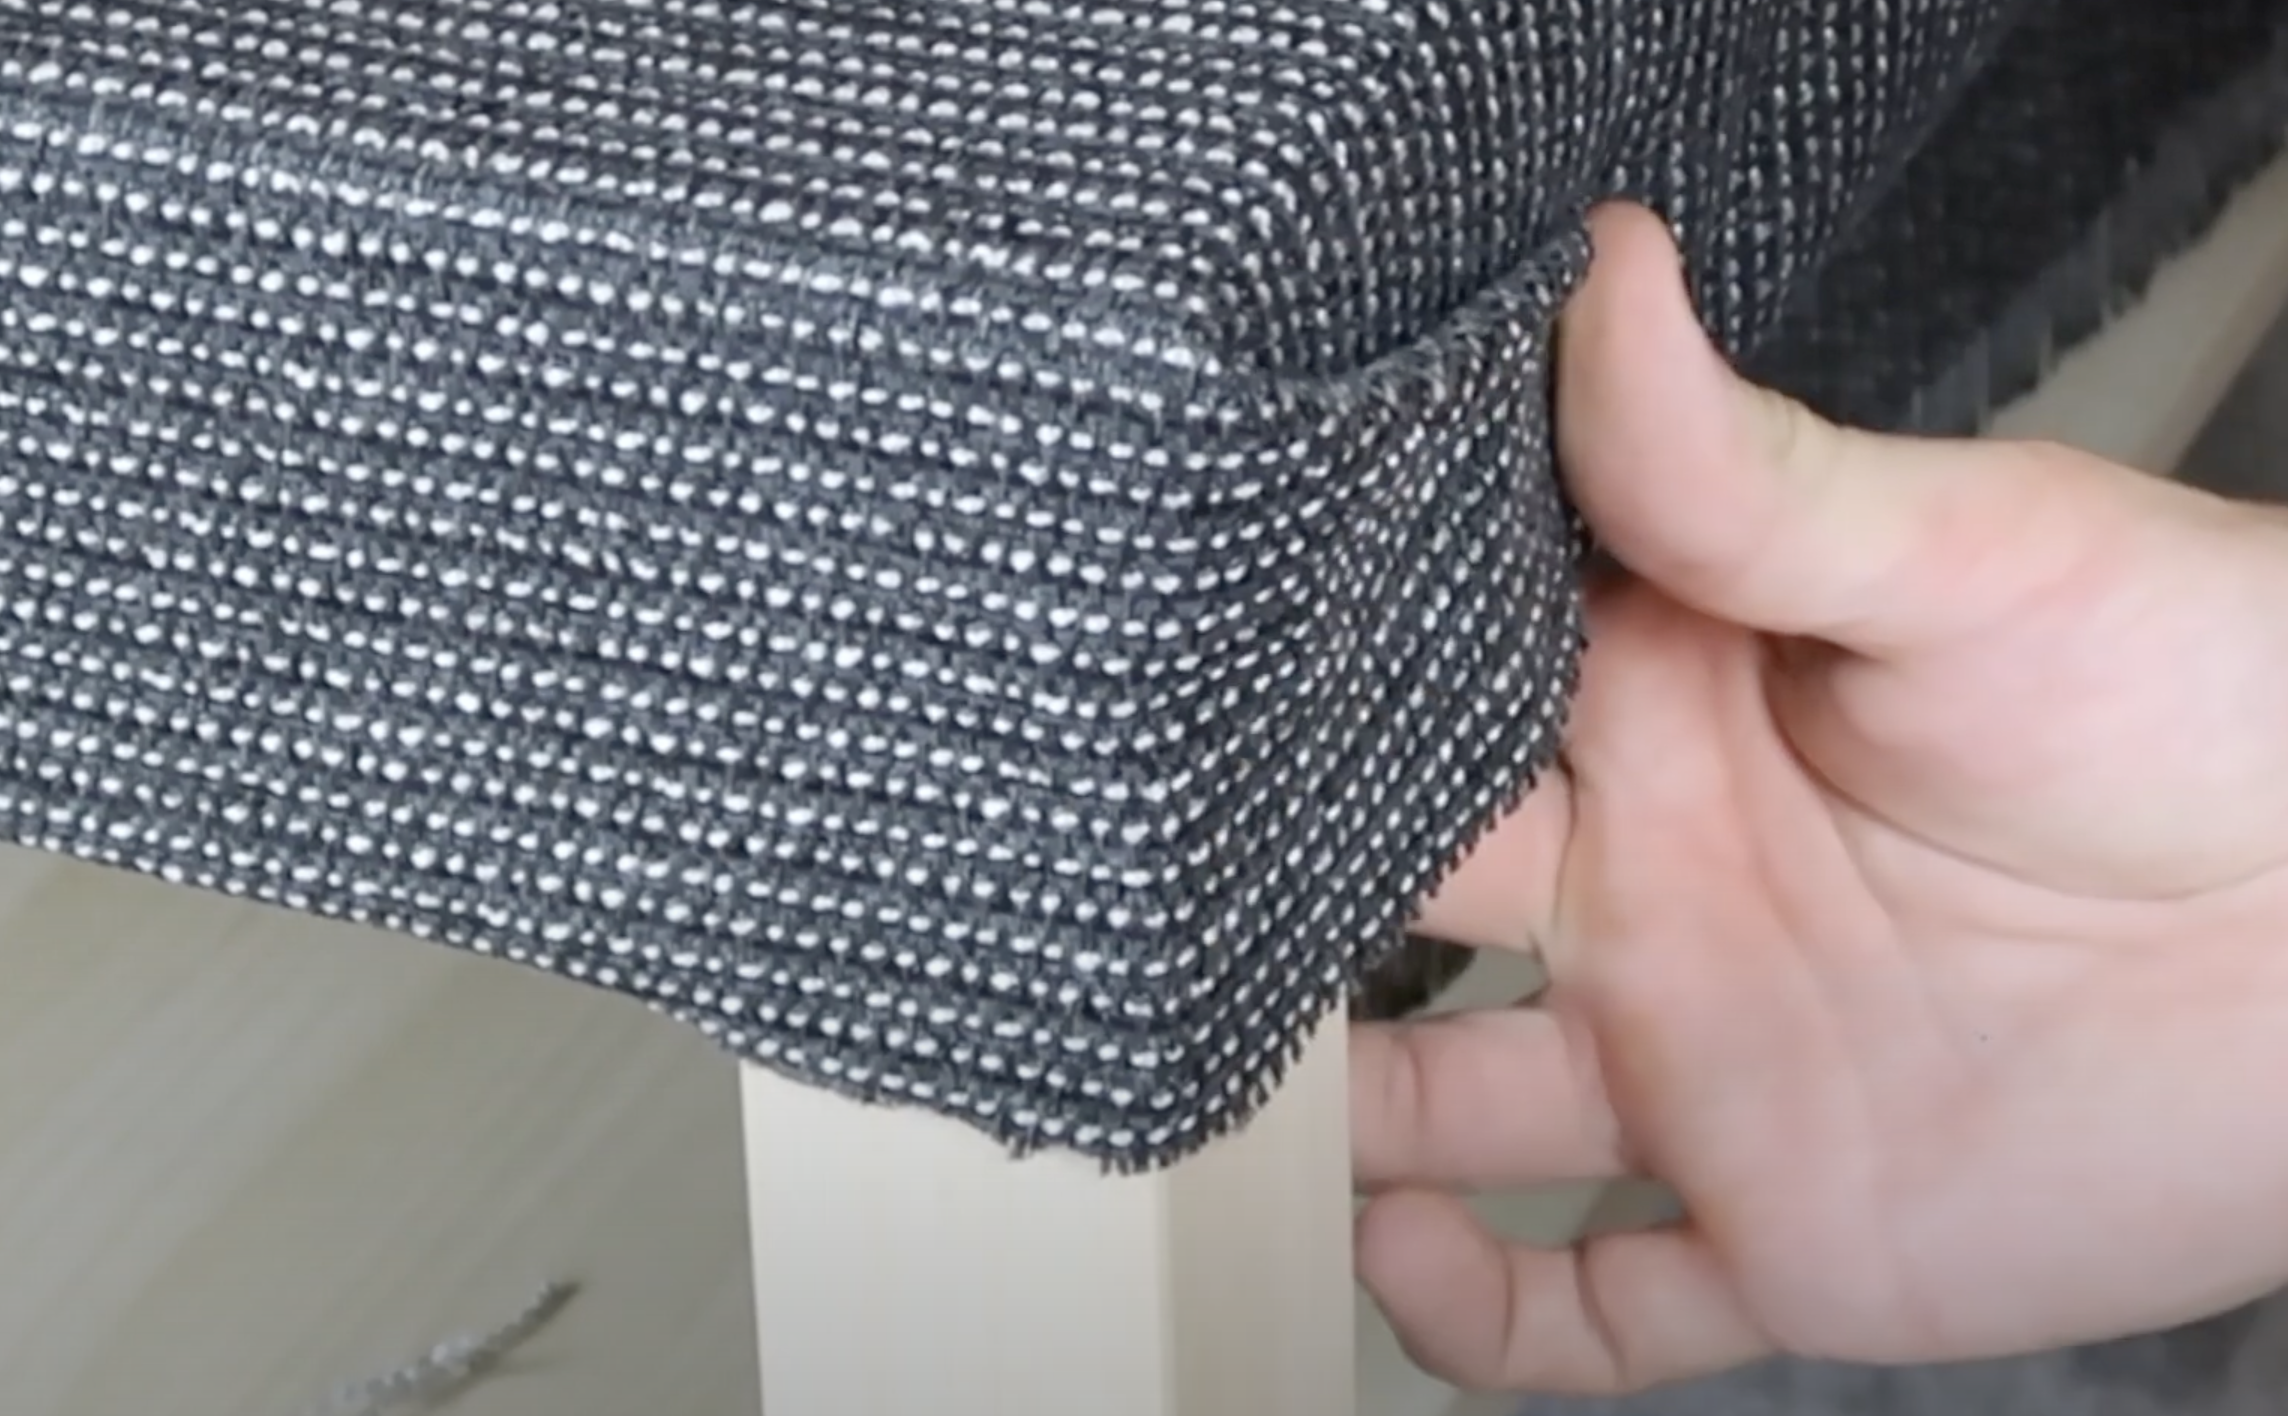
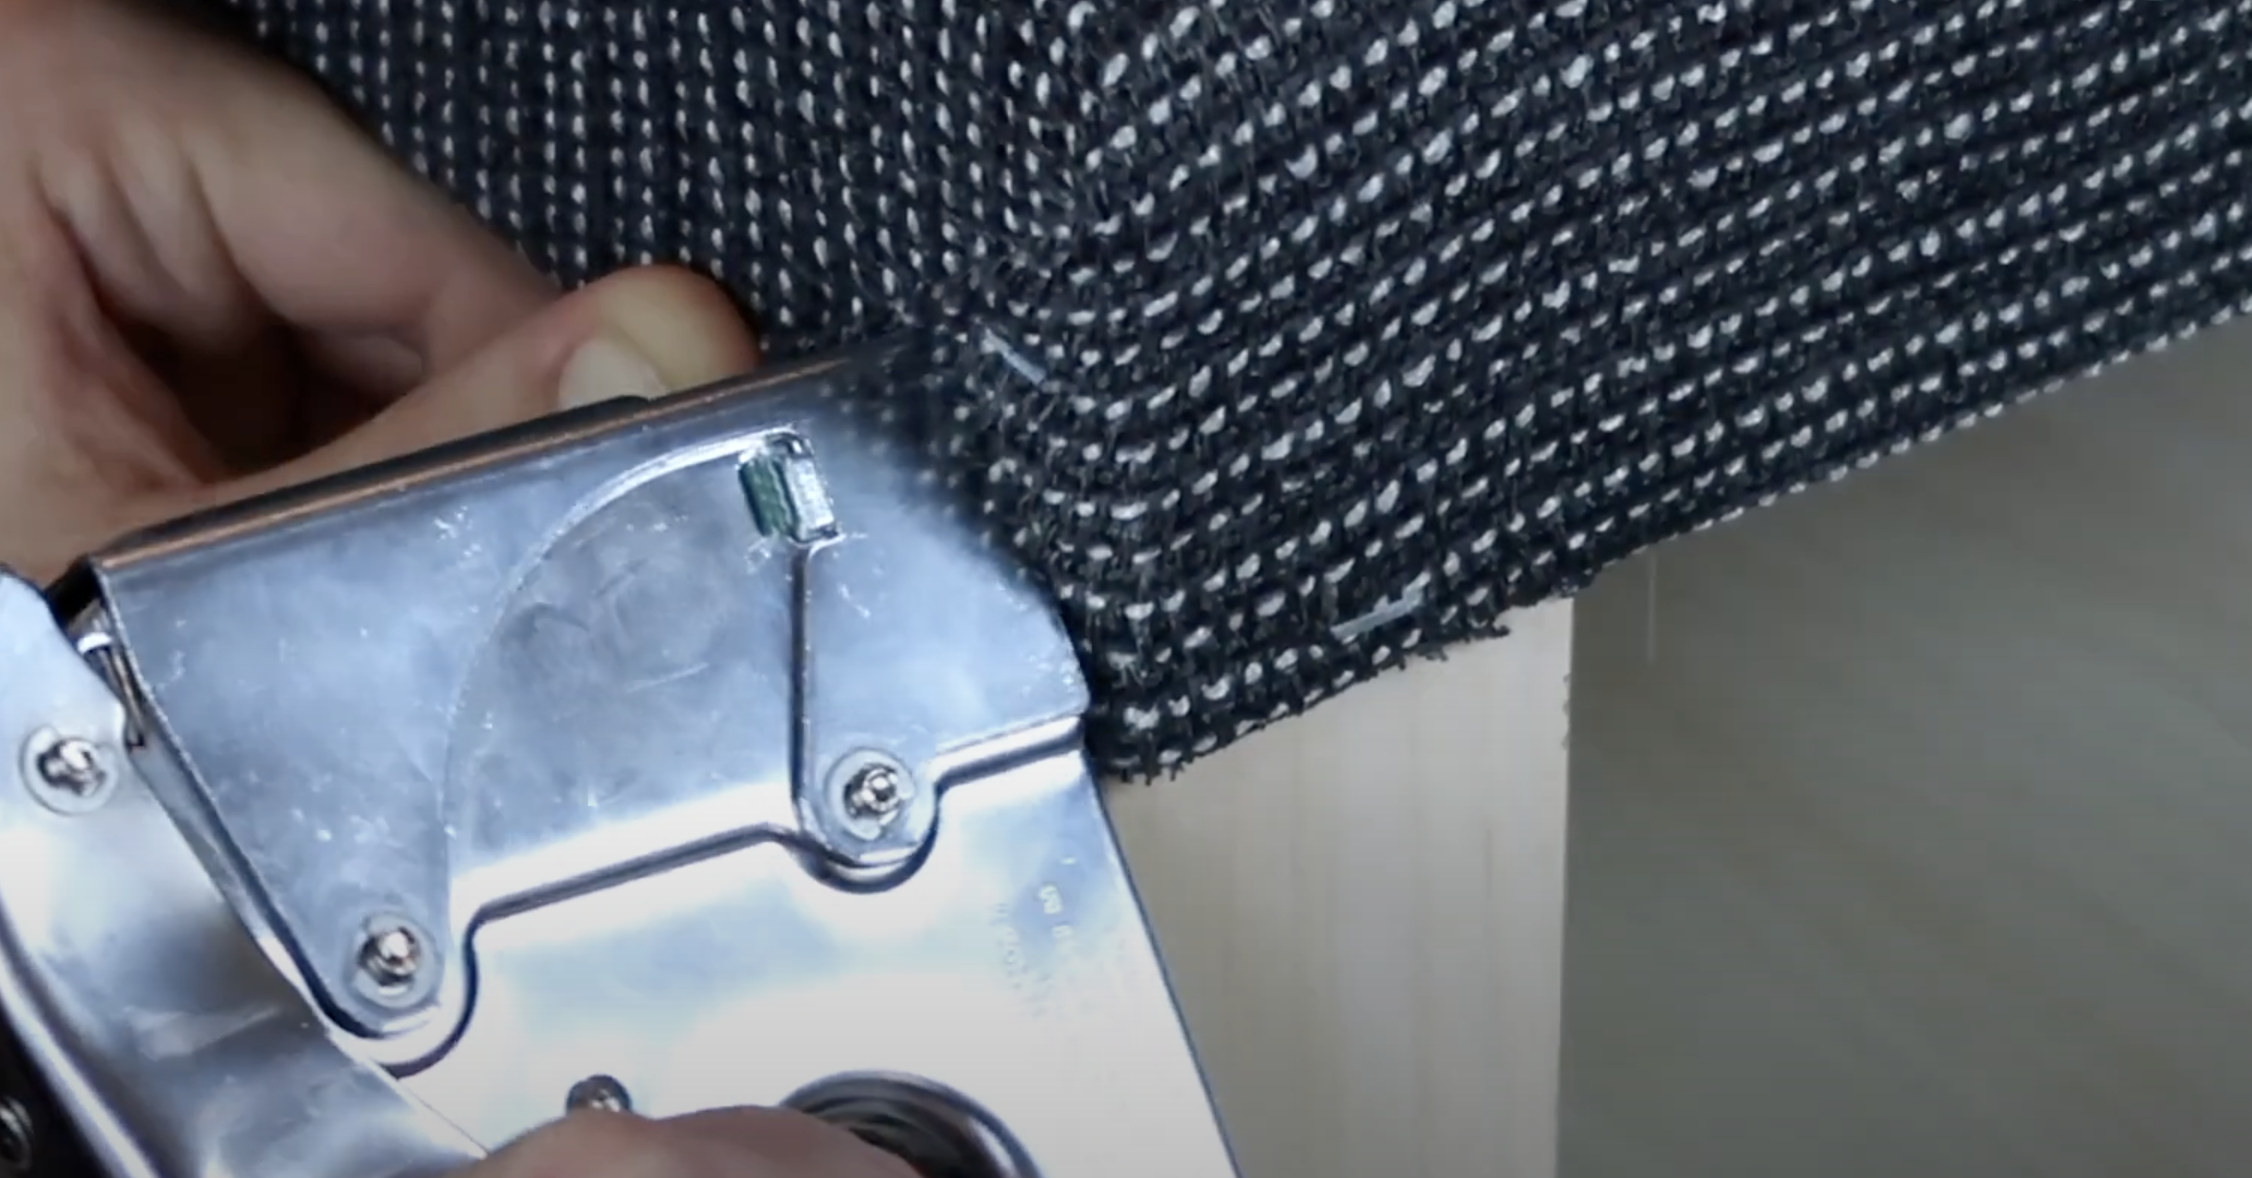
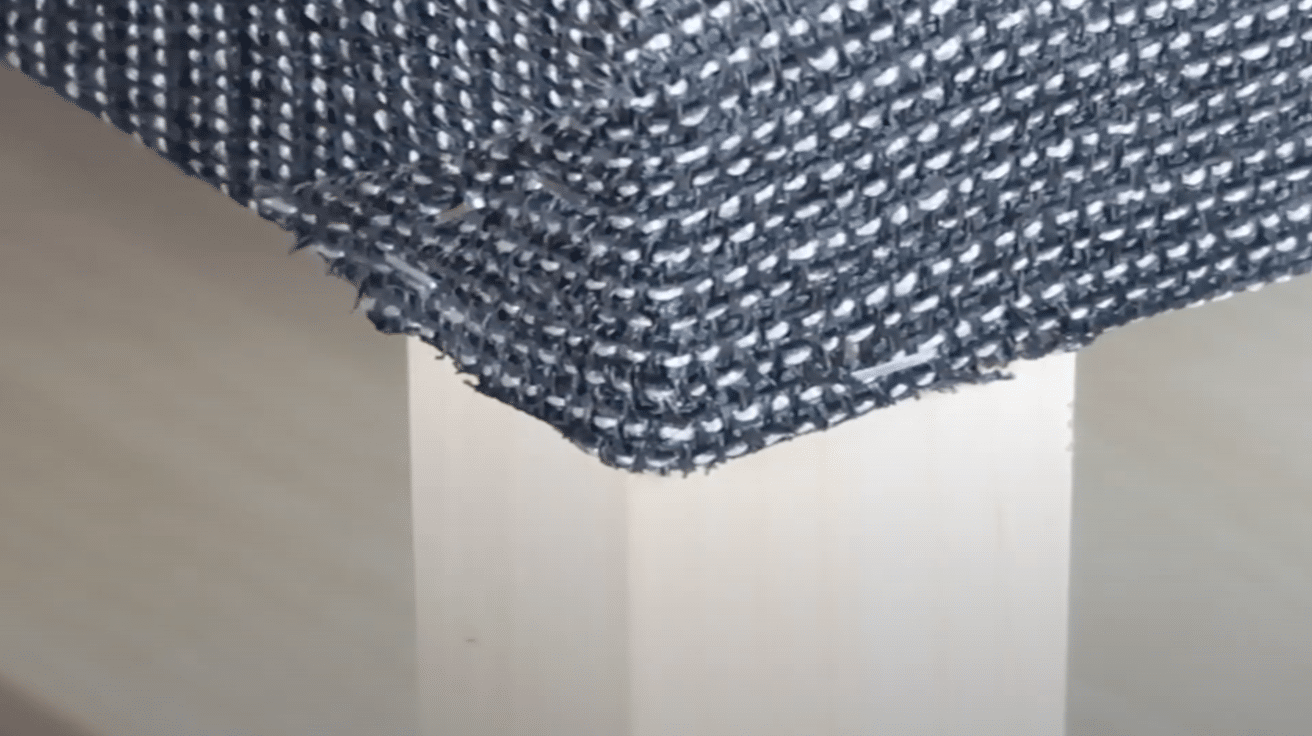
Step 3: Handle the Corners with Care
-
Fold one side of the corner fabric inward.
-
Then fold the other side over it for a clean overlap.
-
Staple firmly while keeping the fold tight.
Pro Tip: Work slowly around the corners—they’re the most visible part and make or break the final look.
Step 4: Add Extra Staples Strategically
-
Place extra staples near fold lines to prevent movement.
-
Hold the base fabric down as you add the top flap.
-
Make sure the layers stay tight when folded over.
Pro Tip: Add one staple and test the fold before committing—this helps prevent having to redo the whole section.
Step 5: Inspect and Adjust
-
Check all sides and corners for wrinkles or loose spots.
-
Add more staples or smooth out areas if needed.
-
Your goal is a tight, wrinkle-free surface.
Pro Tip: Run your hand over the fabric to feel any hidden bunching you might miss visually.
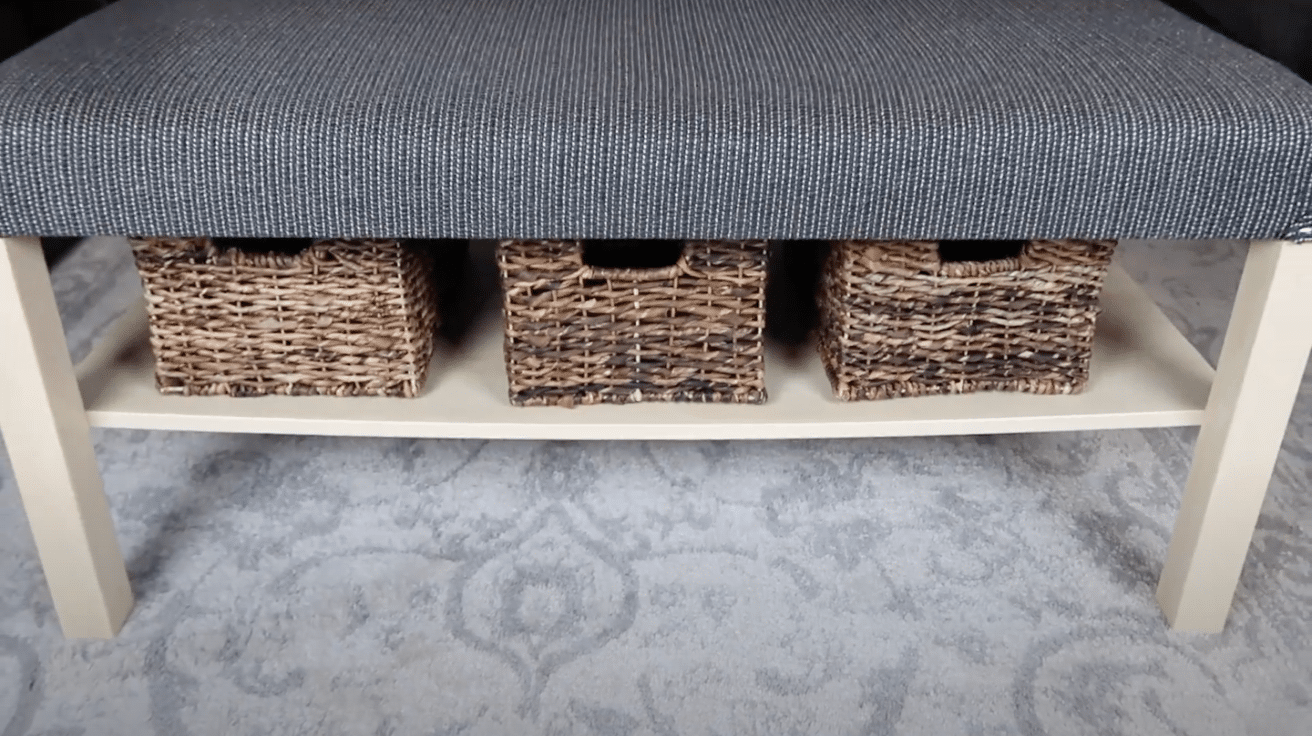
Step 6: Enjoy Your New Ottoman
-
Please place it in your favorite spot and admire your work.
-
Use it as a footrest, seat, or stylish storage.
-
Kick back and relax—your heels will love the soft cushion!
Pro Tip: Add small baskets underneath for bonus storage and a polished look.
Video Tutorial
Check out this video by @NextJeneration for a step-by-step guide on a DIY Outdoor Bar.
Things to Keep in Mind While Making Your DIY Ottoman
When creating your DIY ottoman, consider these important points to ensure a successful project:
-
Measure twice, cut once: Accurate measurements are crucial for a professional-looking result.
-
Weight capacity: Consider how the ottoman will be used—for feet only or as extra seating? Build accordingly.
-
Material selection: If the upholstery will see heavy use, choose sturdy wood for the frame and durable, stain-resistant fabric for the upholstery.
-
Foam density: Select the right foam firmness—too soft and it will compress quickly; too firm and it won’t be comfortable.
-
Tool requirements: Make sure you have all necessary tools before starting to avoid mid-project delays.
-
Time commitment: Set realistic expectations about how long the project will take from start to finish.
-
Workspace needs: Ensure you have enough space to work comfortably and safely.
-
Safety precautions: Wear appropriate protective gear when cutting materials or using power tools.
-
Fabric direction: Pay attention to patterns and ensure they align correctly on all sides.
-
Finishing touches: Plan for details like buttons, piping, or decorative nails that can elevate the final look.
-
Edge finishing: Decide how to finish the bottom edge—with fabric, decorative trim, or furniture feet.
-
Maintenance: Consider how easily your chosen materials can be cleaned before making final selections.
Final Thoughts
In this DIY Ottoman Coffee Table tutorial, we’ve walked you through the entire process—from sourcing materials to building the frame and completing the project.
You learned how to select high-quality fabric, adjust the size, and create a sturdy, well-designed piece of furniture that fits your space perfectly.
You can choose a simple design or try bright patterns—this project allows you to create your ottoman coffee table exactly as you want it.
Now that you know the basics, it’s time to get started on yours. We’d love to see what you make—send us pictures or share your experience, and help others want to try this useful project too!
Ready to begin? Get your materials and start building!
Want more inspiration? Browse our collection of DIY Project guides to personalize your space.