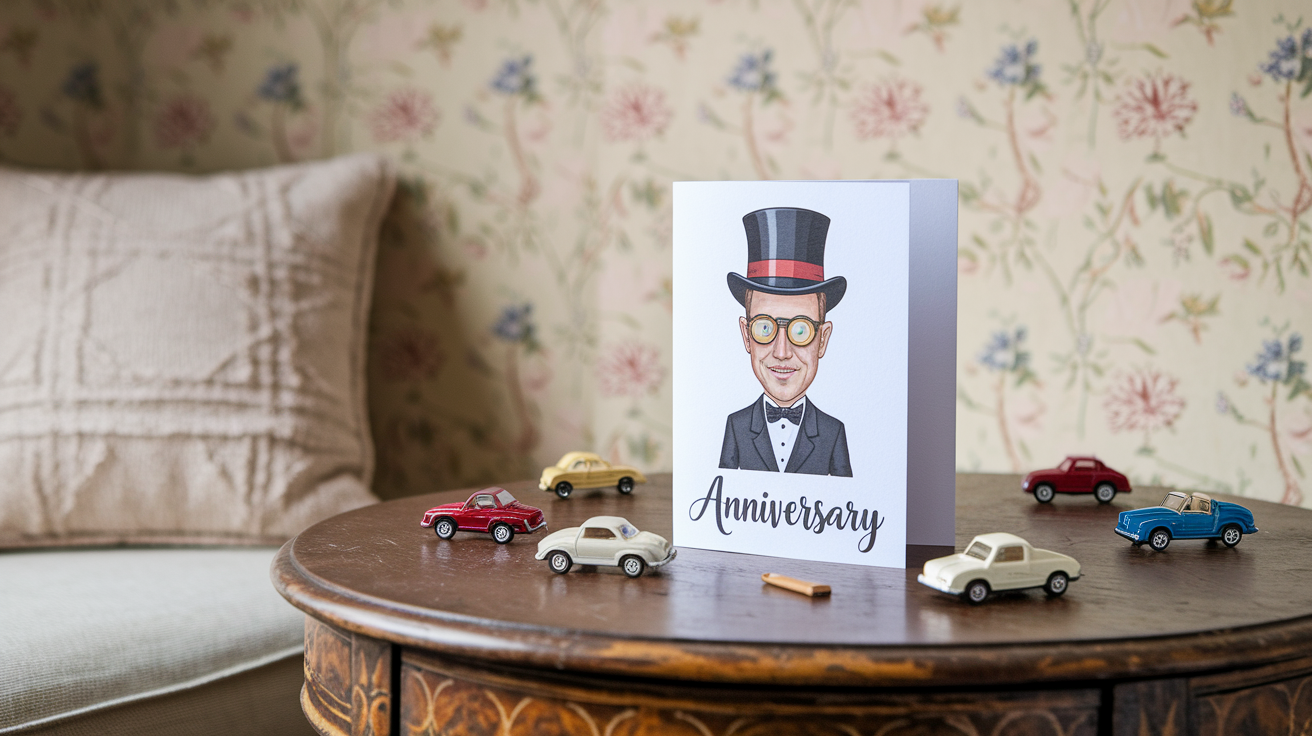
Anniversaries deserve more than a store-bought card. They deserve something personal, heartfelt, and made with love, just like your relationship.
DIY anniversary cards are the perfect way to show you care, whether you’re celebrating one year or fifty.
In this post, you’ll find DIY anniversary card ideas divided into helpful sections, from romantic and funny to classy and artsy.
Each idea includes a short description, a materials list, and simple, step-by-step instructions, so you can craft the perfect card, regardless of your skill level.
Get ready to grab some glue, pull out the scissors, and put your love into every detail!
Why Anniversary Cards Matter More Than Ever
Anniversary cards aren’t just paper—they’re personal stories, shared smiles, and reminders of how far you’ve come together.
In a world full of quick texts and digital likes, a handwritten card stands out as something real and lasting. It’s a way to pause, reflect, and say, “You still mean the world to me.”
While flowers fade and gifts are unwrapped, a thoughtful anniversary card often becomes the thing we save—tucked into drawers or boxes marked “special.”
It’s not about perfection; it’s about intention.
That’s what makes DIY cards even more powerful. They carry your time, your touch, and your words.
Romantic-Themed DIY Anniversary Cards
Looking to melt their heart? These romantic DIY card ideas are filled with sweet touches, heartfelt symbols, and timeless gestures to make your anniversary extra special.
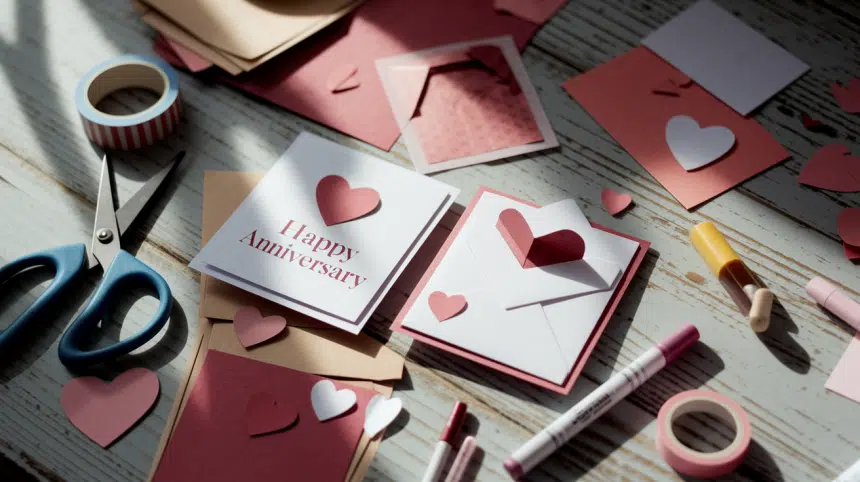
1. Heart Pop-Up Card
Description
This sweet pop-up card reveals layered hearts when opened. It’s charming, personal, and full of love. Ideal for making your partner smile as they open it.
Materials Required
| Material | Quantity |
|---|---|
| Red construction paper | 1 sheet |
| White cardstock | 1 sheet |
| Scissors | 1 pair |
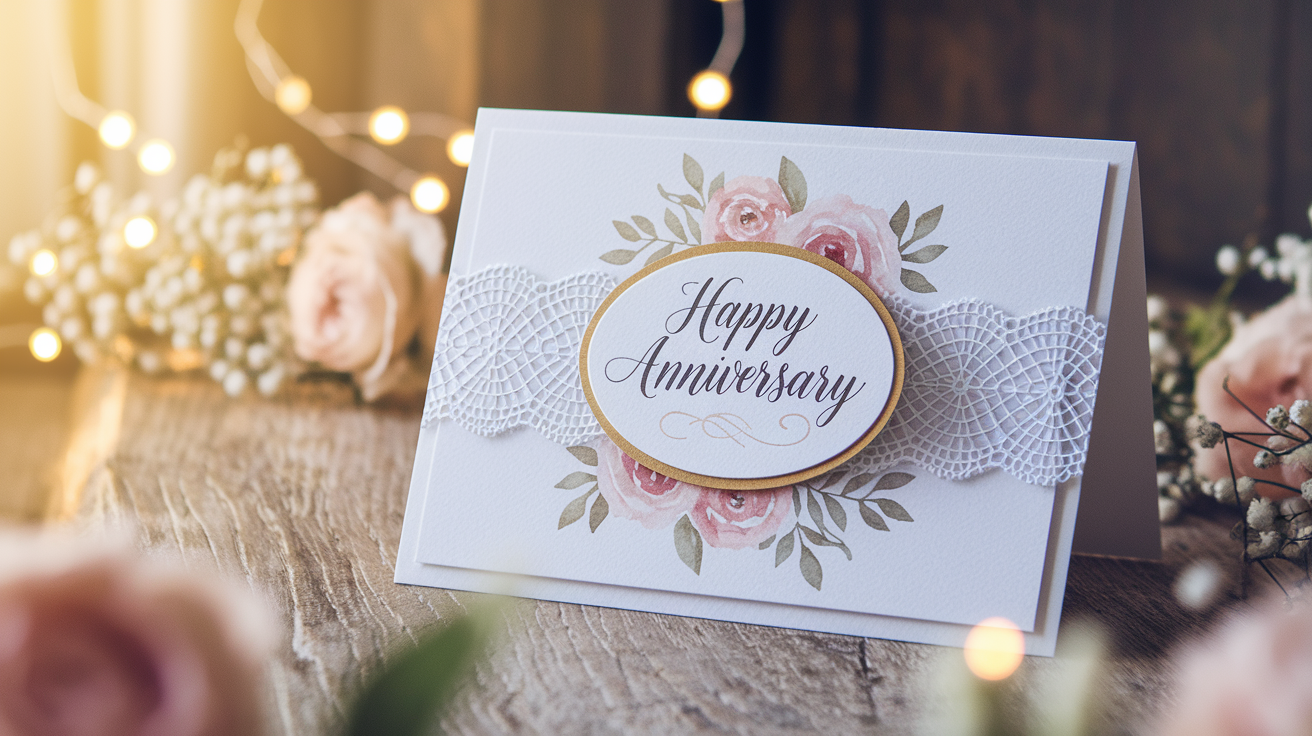
| Glue stick | 1 |
| Pencil | 1 |
Steps to Make it-
-
Fold the white cardstock to create the card base.
-
Cut multiple hearts from red paper in different sizes.
-
Fold a few in half and glue just one half for a 3D effect.
-
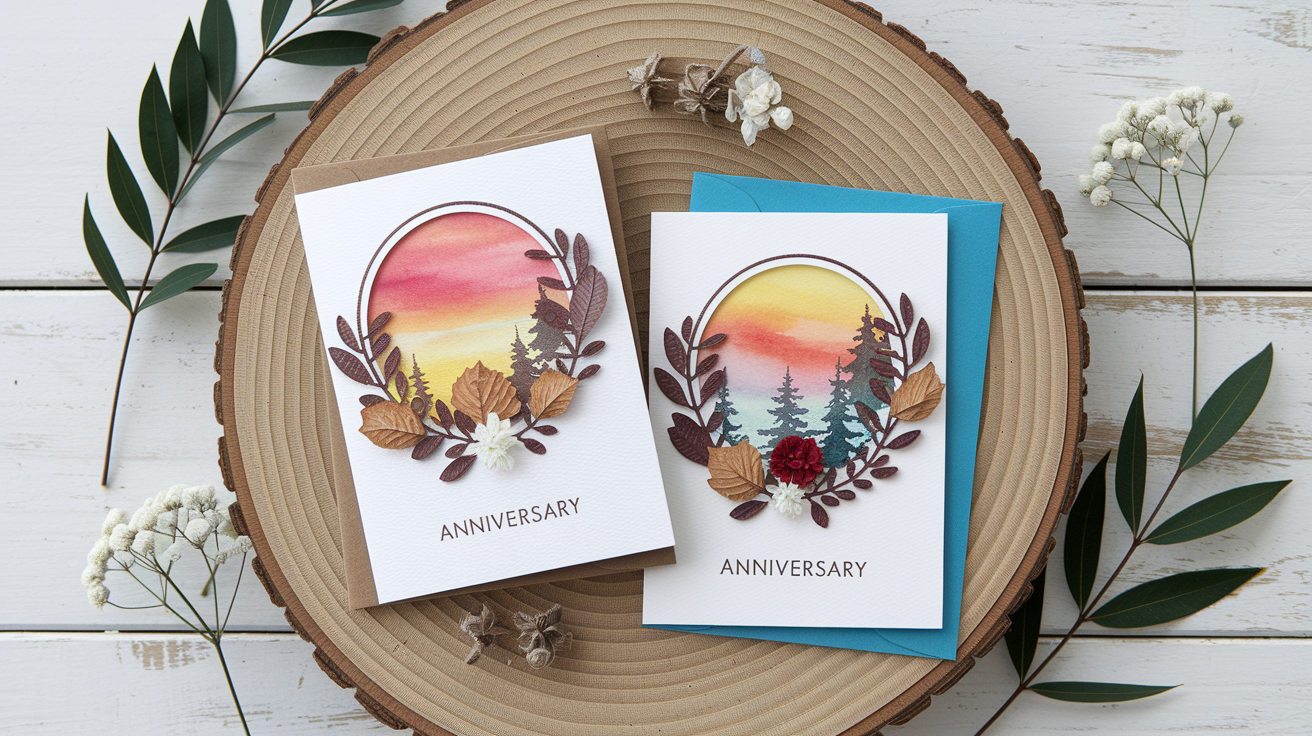
Decorate the cover with flat hearts.
-
Write a heartfelt message inside.
2. Love Coupon Card
Description
This interactive card holds mini “love coupons” your partner can redeem. Each coupon offers something thoughtful like a hug or date night. It’s fun and romantic at once.
Materials Required
| Material | Quantity |
|---|---|
| Cardstock paper | 1 sheet |
| Colored paper strips | 4–5 strips |
| Markers | Set |
| Scissors | 1 pair |
| Stapler or glue | 1 |
Steps to Make it-
-
Fold the cardstock to form the card base.
-
Cut colored paper into coupon-sized rectangles.
-
Write offers like “Movie Night” on each strip.
-
Staple or glue coupons into the card.
-
Decorate the card with hearts or doodles.
3. “52 Reasons I Love You” Card
Description
This idea uses a stack of mini cards to list 52 reasons you love your partner. It’s meaningful, personal, and something they’ll keep forever. A romantic gift from the heart.
Materials Required
| Material | Quantity |
|---|---|
| Deck of cards/small papers | 52 |
| Marker or pen | 1 |
| Hole punch | 1 |
| Ribbon or ring | 1 |
| Decorative paper | Optional |
Steps to Make it-
-
Write one reason you love them on each card or paper.
-
Punch holes and thread ribbon through to bind them.
-
Create a cute cover with a title.
-
Tie off with a bow or secure with a ring.
-
Present in a pouch or box.
4. Watercolor Heart Card
Description
This card uses soft watercolors to create beautiful heart shapes. It’s elegant, artsy, and shows effort. A perfect match for heartfelt emotions.
Materials Required
| Material | Quantity |
|---|---|
| Watercolor paper | 1 sheet |
| Watercolor paints | Set |
| Brush | 1 |
| Water cup & paper towel | 1 each |
| Black pen (for message) | 1 |
Steps to Make it-
-
Fold the watercolor paper to make a card.
-
Lightly sketch heart shapes in pencil.
-
Fill each heart with soft watercolors and let dry.
-
Add a sweet handwritten message in the center.
-
Personalize with small doodles or borders.
5. Love Letter Envelope Card
Description
A classic envelope-style card that opens to a sweet note inside. It’s easy to make, elegant, and gives a personal touch. Great for handwritten messages of love.
Materials Required
| Material | Quantity |
|---|---|
| Envelope template/paper | 1 sheet |
| Cardstock | 1 sheet |
| Glue | 1 stick |
| Pen or marker | 1 |
| Stickers or seal | Optional |
Steps to Make it-
-
Cut and fold envelope paper using a template.
-
Glue the envelope onto a folded cardstock base.
-
Write a short love letter or note and place inside.
-
Seal with a sticker or decorative seal.
-
Add designs or your names on the front.
6. Handprint Heart Card
Description
This card captures a moment in time using painted handprints. The hands form a heart, making it personal and sentimental. Great for keepsakes or memory boxes.
Materials Required
| Material | Quantity |
|---|---|
| Colored paper | 2 sheets |
| Paint (red or pink) | 1 bottle |
| Brush or sponge | 1 |
| Pen | 1 |
| Glue | 1 stick |
Steps to Make it-
-
Paint your hands and press two handprints to form a heart.
-
Let them dry and cut around the heart shape.
-
Glue onto folded cardstock.
-
Add your names and anniversary date.
-
Write a loving note inside.
7. String Art Heart Card
Description
This creative card uses string to form a heart shape on paper. It’s artistic and textured, and shows you put in extra effort. A lovely craft for craft-loving couples.
Materials Required
| Material | Quantity |
|---|---|
| Cardstock | 1 sheet |
| Embroidery thread | 1 roll |
| Needle | 1 |
| Pencil | 1 |
| Push pin or punch | 1 |
Steps to Make it-
-
Draw a heart outline lightly with pencil.
-
Punch small holes around the heart shape.
-
Thread needle and sew through holes randomly to create pattern.
-
Tie off at the back securely.
-
Add a message on the inside.
8. Love Timeline Card
Description
Celebrate your journey with a timeline of relationship milestones. It’s visual, nostalgic, and touching. A perfect way to look back on your story together.
Materials Required
| Material | Quantity |
|---|---|
| Cardstock | 1 sheet |
| Ruler & pencil | 1 each |
| Fine-tip pen | 1 |
| Stickers/photos | Optional |
| Colored markers | Set |
Steps to Make it-
-
Draw a horizontal line across the center of the card.
-
Mark key moments like first date or engagement.
-
Add small captions, drawings, or dates.
-
Decorate it with mini photos or stickers.
-
Write a loving conclusion at the end of the line.
9. Puzzle Piece Card
Description
Turn your message into a mini puzzle to be assembled. It’s interactive, clever, and a fun surprise. Great for playful, romantic gestures.
Materials Required
| Material | Quantity |
|---|---|
| Thick paper or board | 1 sheet |
| Marker | 1 |
| Scissors or craft knife | 1 |
| Envelope | 1 |
| Colored pens | Set |
Steps to Make it-
-
Write your message or draw a picture.
-
Cut the paper into puzzle-like pieces.
-
Place pieces in an envelope.
-
Add a tag that says “Put Me Together.”
-
Let your partner enjoy solving it!
10. Matchbox Love Notes
Description
This tiny box holds folded notes of love and affection. It’s cute, compact, and full of heart. Perfect for giving tiny doses of joy.
Materials Required
| Material | Quantity |
|---|---|
| Empty matchbox | 1 |
| Small paper strips | 10–15 |
| Pen or marker | 1 |
| Decorative paper | 1 small sheet |
| Glue | 1 stick |
Steps to Make it-
-
Cover the matchbox with decorative paper.
-
Write love notes on small paper strips.
-
Fold each note and place inside the box.
-
Label the box with “Open for Love.”
-
Gift it as a surprise keepsake.
Funny & Cute DIY Anniversary Cards
Add a dash of humor to your love story! These funny and adorable card ideas are perfect for couples who love to laugh and keep things lighthearted.
11. “You Stole a Pizza My Heart” Card
Description
A silly yet sweet pizza pun card that’s perfect for food-loving couples. It features a hand-drawn pizza slice with hearts as toppings. Great for adding a side of humor to your love.
Materials Required
| Material | Quantity |
|---|---|
| White cardstock | 1 sheet |
| Colored markers | Set |
| Pencil & eraser | 1 each |
| Glue (optional) | 1 stick |
Steps to Make it-
-
Fold cardstock to form your card base.
-
Sketch and color a pizza slice with heart toppings.
-
Write “You stole a pizza my heart” underneath.
-
Add fun doodles like cheese drips.
-
Outline with pen for bold detail.
12. Bee Mine Card
Description
This cheerful card features a smiling bee and the phrase “Bee Mine.” It’s a pun-filled way to say I love you. Cute and fun for lighthearted couples.
Materials Required
| Material | Quantity |
|---|---|
| Yellow & black paper | 1 each |
| Googly eyes | 2 |
| Cardstock | 1 sheet |
| Glue stick | 1 |
| Marker | 1 |
Steps to Make it-
-
Cut bee body and stripes from colored paper.
-
Glue stripes and googly eyes onto the bee.
-
Attach the bee to the card front.
-
Write “Bee Mine” in playful letters.
-
Add a trail of hearts behind the bee.
13. Avocado Couple Card
Description
This adorable card has a pair of avocados with faces and the message “You complete me.” It’s perfect for couples who love puns and healthy snacks.
Materials Required
| Material | Quantity |
|---|---|
| Green & brown paper | 1 each |
| Cardstock | 1 sheet |
| Pen or marker | 1 |
| Glue | 1 stick |
| Scissors | 1 pair |
Steps to Make it-
-
Cut two avocado shapes and a pit from paper.
-
Draw cute faces on each avocado.
-
Glue them side by side on the card.
-
Write “You complete me” below them.
-
Decorate with small hearts or leaves.
14. Punny Taco Card
Description
Spice things up with this taco-themed card that says “Let’s taco ‘bout our love.” It’s colorful, silly, and unforgettable. A fiesta of affection!
Materials Required
| Material | Quantity |
|---|---|
| Yellow & red paper | 1 each |
| Cardstock | 1 sheet |
| Pen or marker | 1 |
| Glue stick | 1 |
| Scissors | 1 pair |
Steps to Make it-
-
Cut a taco shell shape from yellow paper.
-
Add red, green, and brown toppings inside.
-
Glue taco onto the card front.
-
Write “Let’s taco ‘bout our love.”
-
Add hearts and smiley faces for fun.
15. Dino-Mite Card
Description
This prehistoric-themed card says “You’re dino-mite!” with a smiling cartoon dinosaur. It’s playful and quirky for couples who love cute creatures.
Materials Required
| Material | Quantity |
|---|---|
| Green paper | 1 sheet |
| Cardstock | 1 sheet |
| Googly eyes | 1 pair |
| Glue stick | 1 |
| Marker | 1 |
Steps to Make it-
-
Cut out a cartoon dino shape.
-
Glue it to the card and add googly eyes.
-
Write “You’re dino-mite!” below the dino.
-
Draw trees, volcanoes, or hearts around it.
-
Add a playful message inside.
16. Ice Cream Card
Description
Send a scoop of love with this ice cream card that reads “You make life sweeter.” Cute, colorful, and perfect for sweethearts.
Materials Required
| Material | Quantity |
|---|---|
| Brown & pink paper | 1 each |
| Cardstock | 1 sheet |
| Glue stick | 1 |
| Marker | 1 |
| Scissors | 1 pair |
Steps to Make it-
-
Cut a cone and scoop from colored paper.
-
Glue both onto the front of the card.
-
Add a face and sprinkles to the scoop.
-
Write “You make life sweeter.”
-
Decorate with mini hearts or stars.
17. Monster Love Card
Description
A quirky monster with stretchable arms says “I love you this much!” It’s funny, adorable, and great for playful couples.
Materials Required
| Material | Quantity |
|---|---|
| Colored paper | 2–3 sheets |
| Googly eyes | 2 |
| Glue stick | 1 |
| Scissors | 1 pair |
| Marker | 1 |
Steps to Make it-
-
Cut out a fun monster body and long arms.
-
Attach arms that spread when the card opens.
-
Add googly eyes and draw teeth or spots.
-
Write “I love you this much!”
-
Fill inside with silly doodles or notes.
18. “We’re the Perfect Match” Card
Description
This card shows two real matchsticks with the phrase “We’re the perfect match.” It’s clever, simple, and super charming.
Materials Required
| Material | Quantity |
|---|---|
| Cardstock | 1 sheet |
| Matchsticks (unused) | 2 |
| Red paper (for flames) | 1 small piece |
| Glue stick | 1 |
| Pen | 1 |
Steps to Make it-
-
Glue two matchsticks side-by-side.
-
Add tiny flame cutouts at the top.
-
Write “We’re the perfect match.”
-
Draw a heart around the matchsticks.
-
Write a spark-filled message inside.
19. “I Whale Always Love You” Card
Description
A blue whale, a splash of water, and a sweet pun make this card shine. It’s ocean-themed and wonderfully cheesy.
Materials Required
| Material | Quantity |
|---|---|
| Blue paper | 1 sheet |
| Cardstock | 1 sheet |
| Googly eye | 1 |
| Glue stick | 1 |
| Pen or marker | 1 |
Steps to Make it-
-
Cut a cute whale shape from blue paper.
-
Glue it to the card front and add a googly eye.
-
Draw water splashes above the whale.
-
Write “I whale always love you.”
-
Decorate with bubbles and waves.
20. Cactus Love Card
Description
A cute cactus couple stands side-by-side with the phrase “Stuck on you.” Funny, punny, and totally adorable.
Materials Required
| Material | Quantity |
|---|---|
| Green & pink paper | 1 each |
| Cardstock | 1 sheet |
| Pen or marker | 1 |
| Glue stick | 1 |
| Scissors | 1 pair |
Steps to Make it-
-
Cut two cactus shapes and a pot.
-
Glue them side-by-side on the card.
-
Draw faces and tiny prickles.
-
Write “Stuck on you” at the top.
-
Add heart-shaped flowers or accents.
Beautiful & Classy DIY Anniversary Cards
Sometimes simple and sophisticated say it best. These elegant DIY cards bring timeless beauty and charm, ideal for celebrating love in style.
21. Gold Foil Heart Card
Description
This card uses gold foil accents for a sleek, stylish touch. A shimmery heart adds instant elegance. Perfect for formal or milestone anniversaries.
Materials Required
| Material | Quantity |
|---|---|
| White cardstock | 1 sheet |
| Gold foil paper | 1 small sheet |
| Glue stick | 1 |
| Scissors | 1 pair |
| Pen (black or gold) | 1 |
Steps to Make it-
-
Cut a heart from gold foil paper.
-
Glue it centered on the front of the card.
-
Write a small elegant message underneath.
-
Add a border or dots for accent.
-
Write a thoughtful note inside.
22. Lace Overlay Card
Description
This delicate card features real lace for a romantic vintage vibe. It’s soft, feminine, and full of charm. Ideal for formal celebrations.
Materials Required
| Material | Quantity |
|---|---|
| Cardstock (light color) | 1 sheet |
| Lace ribbon or trim | 1 strip |
| Glue | 1 stick |
| Scissors | 1 pair |
| Pen or marker | 1 |
Steps to Make it-
-
Fold cardstock to create your base.
-
Cut lace to match the card front’s width.
-
Glue lace across the card cover.
-
Write a soft, romantic message in elegant script.
-
Add pearls or gems for a touch of glam.
23. Calligraphy Quote Card
Description
This handwritten card features a romantic quote in fancy calligraphy. It’s simple, timeless, and very personal. Best for lovers of words and elegance.
Materials Required
| Material | Quantity |
|---|---|
| White or cream cardstock | 1 sheet |
| Calligraphy pen or brush pen | 1 |
| Pencil & eraser | 1 each |
| Ruler (optional) | 1 |
Steps to Make it-
-
Lightly pencil in your quote with guidelines.
-
Trace over using a calligraphy or brush pen.
-
Erase pencil lines carefully.
-
Add flourishes or a decorative border.
-
Include a heartfelt message inside.
24. Minimalist Heart Outline Card
Description
A clean, simple card with just a heart outline and minimal text. It’s modern, elegant, and very chic. Perfect for people who love simplicity.
Materials Required
| Material | Quantity |
|---|---|
| White or pastel cardstock | 1 sheet |
| Fine-line pen | 1 |
| Ruler (optional) | 1 |
| Pencil (for sketching) | 1 |
Steps to Make it-
-
Lightly sketch a heart in the center.
-
Outline the heart neatly with pen.
-
Write a one-line message beneath it.
-
Keep space clean for effect.
-
Add a soft handwritten note inside.
25. Floral Embellishment Card
Description
This card uses faux flowers or pressed petals to add natural elegance. It’s romantic and classy with real texture. Ideal for spring or garden-themed anniversaries.
Materials Required
| Material | Quantity |
|---|---|
| Cardstock | 1 sheet |
| Pressed/fake flowers | Several |
| Hot glue or strong adhesive | 1 |
| Pen or marker | 1 |
Steps to Make it-
-
Choose and arrange flowers on the card front.
-
Secure each one carefully using glue.
-
Write a soft romantic phrase next to the flowers.
-
Let everything dry flat.
-
Add a sweet note inside.
26. Monogram Love Card
Description
Feature both your initials in a fancy monogram style. It’s personal, clean, and elegant. A great choice for minimal yet meaningful design.
Materials Required
| Material | Quantity |
|---|---|
| Cardstock | 1 sheet |
| Gold or black pen | 1 |
| Ruler (optional) | 1 |
| Pencil & eraser | 1 each |
Steps to Make it-
-
Sketch your initials in a stylish layout.
-
Add a plus sign or heart between them.
-
Trace over with gold or black pen.
-
Write “Together Forever” or similar underneath.
-
Finish with a personal note inside.
27. Embossed Initials Card
Description
This classy card uses embossing powder to raise your initials in shiny detail. It looks professional and rich. Ideal for milestone years like 10th or 25th anniversaries.
Materials Required
| Material | Quantity |
|---|---|
| Embossing pen | 1 |
| Embossing powder | 1 small jar |
| Heat gun | 1 |
| Cardstock | 1 sheet |
Steps to Make it-
-
Write your initials with the embossing pen.
-
Sprinkle embossing powder over the ink.
-
Shake off excess and heat it until it sets.
-
Add decorative dots or a date below.
-
Write a personal message inside.
28. Silhouette Couple Card
Description
This card shows a couple’s silhouette cutout in black on a white background. It’s classy, artistic, and romantic. A beautiful visual keepsake.
Materials Required
| Material | Quantity |
|---|---|
| Black paper | 1 sheet |
| White cardstock | 1 sheet |
| Scissors or craft knife | 1 |
| Glue stick | 1 |
| Pen | 1 |
Steps to Make it-
-
Cut out a couple silhouette from black paper.
-
Glue it onto the center of white cardstock.
-
Write a romantic phrase below.
-
Add a soft border or moon/sunset detail.
-
Finish with a handwritten message inside.
29. Vintage Stamp Collage Card
Description
Decorate your card with a collage of vintage-style stamps and old-world love charm. It’s unique, detailed, and full of character. Perfect for travel lovers or nostalgic souls.
Materials Required
| Material | Quantity |
|---|---|
| Cardstock | 1 sheet |
| Vintage-style stamps | Several |
| Glue stick | 1 |
| Pen | 1 |
| Scissors | 1 pair |
Steps to Make it-
-
Arrange stamps in a collage-style layout.
-
Glue them neatly to the card front.
-
Add a banner or text like “Our Love Travels Time.”
-
Outline key areas for emphasis.
-
Write a nostalgic note inside.
30. Black & White Photo Card
Description
This card features a black and white couple photo for timeless elegance. Simple, sentimental, and classic. Ideal for reflecting on cherished memories.
Materials Required
| Material | Quantity |
|---|---|
| Black & white photo | 1 |
| Cardstock | 1 sheet |
| Glue stick | 1 |
| Pen or fine marker | 1 |
| Washi tape (optional) | 1 roll |
Steps to Make it-
-
Center and glue the photo onto the card.
-
Frame it with washi tape or drawn border.
-
Write “Forever Us” or similar below the image.
-
Add small accents like hearts or dates.
-
Include a memory-filled message inside.
Nature-Inspired DIY Anniversary Cards
Celebrate your growing love with card designs inspired by the natural world. These earthy, colorful creations reflect the beauty found in nature—and in your relationship.
31. Leaf Print Card
Description
Use real leaves to create beautiful, natural prints on your card. It’s earthy, creative, and perfect for nature lovers. Each card comes out one-of-a-kind.
Materials Required
| Material | Quantity |
|---|---|
| Leaves (flat & clean) | 2–3 |
| Acrylic paint | Set |
| Cardstock | 1 sheet |
| Paintbrush | 1 |
| Paper towel | 1 |
Steps to Make it-
-
Paint one side of a leaf with acrylic paint.
-
Press it onto the front of the card firmly.
-
Lift gently to reveal the print.
-
Repeat with different colors or leaves.
-
Add a message like “Our love grows.”
32. Sunset Silhouette Card
Description
Create a colorful sunset background with a silhouette overlay. It’s bold, romantic, and inspired by outdoor beauty. A visual celebration of your love.
Materials Required
| Material | Quantity |
|---|---|
| Watercolor paper | 1 sheet |
| Watercolors | Set |
| Black marker or cutouts | 1 |
| Paintbrush | 1 |
| Glue (if using paper) | 1 stick |
Steps to Make it-
-
Paint a gradient sunset on the card front.
-
Let it dry completely.
-
Draw or glue a silhouette (trees, couple, birds).
-
Add stars or text above.
-
Write a meaningful note inside.
33. Nature Scene Pop-Up Card
Description
This 3D-style card shows trees, flowers, or a mountain pop-up inside. It brings a peaceful scene to life. Perfect for outdoor-loving couples.
Materials Required
| Material | Quantity |
|---|---|
| Green & brown paper | 2 sheets |
| Cardstock | 1 sheet |
| Scissors | 1 pair |
| Glue stick | 1 |
| Markers | Set |
Steps to Make it-
-
Fold your card and create simple pop-up tabs.
-
Cut trees, flowers, or hills from colored paper.
-
Glue them to the tabs inside the card.
-
Add sky and grass with markers.
-
Write a sweet message at the bottom.
34. Flower Petal Card
Description
Add real or faux flower petals for a soft, romantic design. It’s delicate, textured, and very natural. Ideal for spring or garden-themed anniversaries.
Materials Required
| Material | Quantity |
|---|---|
| Real or faux petals | Several |
| Cardstock | 1 sheet |
| Glue (liquid preferred) | 1 |
| Pen or marker | 1 |
Steps to Make it-
-
Arrange flower petals on the front in a heart or circle.
-
Glue each one gently in place.
-
Let it dry fully before handling.
-
Write a phrase like “Love in Bloom.”
-
Add your message inside.
35. Tree Rings Card
Description
Inspired by growth rings in trees, this design symbolizes lasting love. Artistic and earthy, it’s a subtle way to say “forever.”
Materials Required
| Material | Quantity |
|---|---|
| Brown & beige paper | 1 each |
| Pen or fine marker | 1 |
| Glue stick | 1 |
| Cardstock | 1 sheet |
Steps to Make it-
-
Cut a large circle and draw concentric rings.
-
Add initials in the center like a carved tree.
-
Glue the circle to your card.
-
Add a small leaf or branch drawing.
-
Write your message beneath it.
36. Mountain View Card
Description
This scenic card features paper-cut mountains under a sunrise or stars. It’s adventurous, calming, and visually beautiful. Great for hikers or nature adventurers.
Materials Required
| Material | Quantity |
|---|---|
| Blue & grey paper | 1 each |
| Yellow paper (for sun) | 1 small piece |
| Cardstock | 1 sheet |
| Glue stick | 1 |
| Scissors | 1 pair |
Steps to Make it-
-
Cut layered mountain shapes in various colors.
-
Arrange from darkest to lightest for depth.
-
Add a sun or moon in the sky.
-
Glue everything onto the card front.
-
Write a phrase like “Love on the horizon.”
37. Pressed Flower Card
Description
Use real pressed flowers to make a romantic, vintage-inspired card. It’s soft, natural, and timeless. A delicate craft with real beauty.
Materials Required
| Material | Quantity |
|---|---|
| Pressed flowers | Several |
| Cardstock | 1 sheet |
| Glue (tacky or spray) | 1 |
| Tweezers (optional) | 1 |
Steps to Make it-
-
Gently arrange pressed flowers on the card.
-
Use tweezers to place them with care.
-
Glue each flower lightly.
-
Let dry flat with a book over it.
-
Add your handwritten note inside.
38. Feather & Sky Card
Description
This dreamy card combines painted skies with a real feather. Soft, symbolic, and peaceful. Perfect for gentle, thoughtful messages.
Materials Required
| Material | Quantity |
|---|---|
| Watercolor paper | 1 sheet |
| Watercolors | Set |
| Real feather | 1 |
| Glue | 1 stick |
| Pen or marker | 1 |
Steps to Make it-
-
Paint a light sky (blue, pink, purple) background.
-
Let dry and glue a feather across the sky.
-
Write a phrase like “Light as love.”
-
Add tiny stars or birds with pen.
-
Finish with a message inside.
39. Wildflower Frame Card
Description
Create a border of wildflowers around your message using paper cutouts. It’s colorful, cheerful, and full of life. Great for nature fans.
Materials Required
| Material | Quantity |
|---|---|
| Colored paper | Several scraps |
| Cardstock | 1 sheet |
| Glue stick | 1 |
| Pen or marker | 1 |
| Scissors | 1 pair |
Steps to Make it-
-
Cut tiny flowers and leaves from colored paper.
-
Arrange them around the border of your card.
-
Glue in place to form a wildflower frame.
-
Write your anniversary message in the center.
-
Add final floral touches inside.
40. Garden Gate Card
Description
A folded paper gate opens to reveal a heart or flower garden inside. It’s interactive, whimsical, and romantic. A surprise garden of love!
Materials Required
| Material | Quantity |
|---|---|
| Cardstock | 1 sheet |
| Colored paper | Several small pieces |
| Glue stick | 1 |
| Pen or marker | 1 |
| Scissors | 1 pair |
Steps to Make it-
-
Fold the card into two front flaps like a gate.
-
Decorate the gate with vines or flowers.
-
Inside, create a garden with paper flowers.
-
Add a heart or bench in the center.
-
Write a loving reveal message inside the gate.
Funny DIY Anniversary Cards Just for Him
Need something that’ll make him laugh and feel loved? These creative, guy-approved DIY cards are full of jokes, puns, and charm—just like him.
41. Bacon Love Card
Description
This hilarious card shows crispy bacon strips with the phrase “Don’t go bacon my heart.” It’s goofy and perfect for a guy who loves breakfast jokes.
Materials Required
| Material | Quantity |
|---|---|
| White cardstock | 1 sheet |
| Brown & red paper | 1 each |
| Pen or marker | 1 |
| Glue stick | 1 |
| Scissors | 1 pair |
Steps to Make it-
-
Cut bacon shapes with wavy edges.
-
Glue them onto the card front.
-
Write “Don’t go bacon my heart.”
-
Add a smiley face on the bacon.
-
Write a funny note inside.
42. Beard Love Card
Description
Perfect for bearded guys, this card says “I love you more than your beard.” Funny, charming, and very specific to his look.
Materials Required
| Material | Quantity |
|---|---|
| Brown felt or paper | 1 small piece |
| Cardstock | 1 sheet |
| Glue stick | 1 |
| Pen or marker | 1 |
| Scissors | 1 pair |
Steps to Make it-
-
Cut a beard shape from brown felt or paper.
-
Glue it onto the card front.
-
Write the funny quote above or below it.
-
Add a little face outline or mustache.
-
Include a fun, flirty message inside.
43. Tool Box Card
Description
A card shaped like a tool box that says “You nailed it, honey.” It’s creative, masculine, and great for guys who love tools.
Materials Required
| Material | Quantity |
|---|---|
| Grey & brown paper | 1 each |
| Cardstock | 1 sheet |
| Marker or pen | 1 |
| Glue stick | 1 |
| Scissors | 1 pair |
Steps to Make it-
-
Cut a toolbox shape with tool handles.
-
Glue it to the front of the card.
-
Add “You nailed it, honey!”
-
Draw small tools like a hammer or screw.
-
Write a handy message inside.
44. Gaming Love Card
Description
This gamer-themed card says “I’d pause my game for you.” It’s relatable and super cute for your game-loving guy.
Materials Required
| Material | Quantity |
|---|---|
| Black & red paper | 1 each |
| Cardstock | 1 sheet |
| Glue stick | 1 |
| Pen or marker | 1 |
| Scissors | 1 pair |
Steps to Make it-
-
Cut out a gaming controller shape.
-
Add buttons and joysticks using paper or marker.
-
Glue it to the front of the card.
-
Write “I’d pause my game for you.”
-
Add a message like “You’re my player 2” inside.
45. Sock Love Card
Description
A fun card that says “We make the perfect pair” with cute sock cutouts. It’s cozy, quirky, and playful.
Materials Required
| Material | Quantity |
|---|---|
| Patterned paper | 2 scraps |
| Cardstock | 1 sheet |
| Glue stick | 1 |
| Pen or marker | 1 |
| Scissors | 1 pair |
Steps to Make it-
-
Cut two sock shapes from patterned paper.
-
Glue them side-by-side on the front.
-
Write “We make the perfect pair.”
-
Add stripes or polka dots to the socks.
-
Include a cozy message inside.
46. BBQ King Card
Description
This card celebrates your grill master with a fun message like “You’re sizzling hot!” Great for guys who love to BBQ.
Materials Required
| Material | Quantity |
|---|---|
| Red & black paper | 1 each |
| Cardstock | 1 sheet |
| Glue stick | 1 |
| Pen or marker | 1 |
| Scissors | 1 pair |
Steps to Make it-
-
Cut out a grill or steak shape.
-
Glue it on the card front.
-
Write “You’re sizzling hot!”
-
Add smoke curls or flames.
-
Write a spicy love note inside.
47. Mustache You Card
Description
Add a paper mustache and write “I mustache you to be mine forever.” It’s simple, silly, and always gets a laugh.
Materials Required
| Material | Quantity |
|---|---|
| Black paper | 1 small piece |
| Cardstock | 1 sheet |
| Glue stick | 1 |
| Pen or marker | 1 |
| Scissors | 1 pair |
Steps to Make it-
-
Cut a mustache shape from black paper.
-
Glue it in the center of the card.
-
Write the funny phrase above or below.
-
Add tiny hearts or a bowtie.
-
Write a charming message inside.
48. Sports Fan Card
Description
Customize this card with his favorite sport and write “I’m your biggest fan.” Great for sporty guys and easy to personalize.
Materials Required
| Material | Quantity |
|---|---|
| Colored paper | 2–3 sheets |
| Cardstock | 1 sheet |
| Pen or marker | 1 |
| Glue stick | 1 |
| Scissors | 1 pair |
Steps to Make it-
-
Cut shapes like a ball, bat, or goal post.
-
Glue them to the card based on his favorite sport.
-
Write “I’m your biggest fan.”
-
Add team colors or a jersey number.
-
Include a cheer-filled note inside.
49. “You Drive Me Crazy” Card
Description
This pun card uses a car theme to say “You drive me crazy (in the best way).” Great for car guys and full of charm.
Materials Required
| Material | Quantity |
|---|---|
| Grey & blue paper | 1 each |
| Cardstock | 1 sheet |
| Glue stick | 1 |
| Pen or marker | 1 |
| Scissors | 1 pair |
Steps to Make it-
-
Cut out a car shape and glue it on.
-
Add wheels and a little heart license plate.
-
Write “You drive me crazy (in the best way).”
-
Draw a road or background.
-
Write your heartfelt note inside.
50. Pizza Slice Flip Card
Description
This fun flip card opens like a pizza slice and reveals a cheesy love message inside. Deliciously adorable and great for laughs.
Materials Required
| Material | Quantity |
|---|---|
| Yellow & red paper | 1 each |
| Cardstock | 1 sheet |
| Glue stick | 1 |
| Marker or pen | 1 |
| Scissors | 1 pair |
Steps to Make it-
-
Cut the card into a triangle pizza slice shape.
-
Decorate with toppings like pepperoni and cheese.
-
Write “You’ve got a pizza my heart.”
-
Use the flap to hide the punchline inside.
-
Add a final note of love with extra cheese.
Artsy & Creative DIY Anniversary Cards
Let your creativity shine with these bold, artistic designs. Perfect for anyone who loves color, textures, and original flair in their love notes.
51. Galaxy Love Card
Description
This dreamy card features a hand-painted galaxy with stars and the message “You’re my universe.” It’s bold, romantic, and visually stunning.
Materials Required
| Material | Quantity |
|---|---|
| Watercolor paper | 1 sheet |
| Watercolors or acrylics | Set |
| White gel pen | 1 |
| Paintbrush | 1 |
| Cardstock | 1 sheet |
Steps to Make it-
-
Paint a dark galaxy background using purple, blue, and black.
-
Use a gel pen to dot tiny stars and constellations.
-
Let it dry completely and glue onto folded cardstock.
-
Write “You’re my universe” in the center or bottom.
-
Add a note that’s out of this world inside.
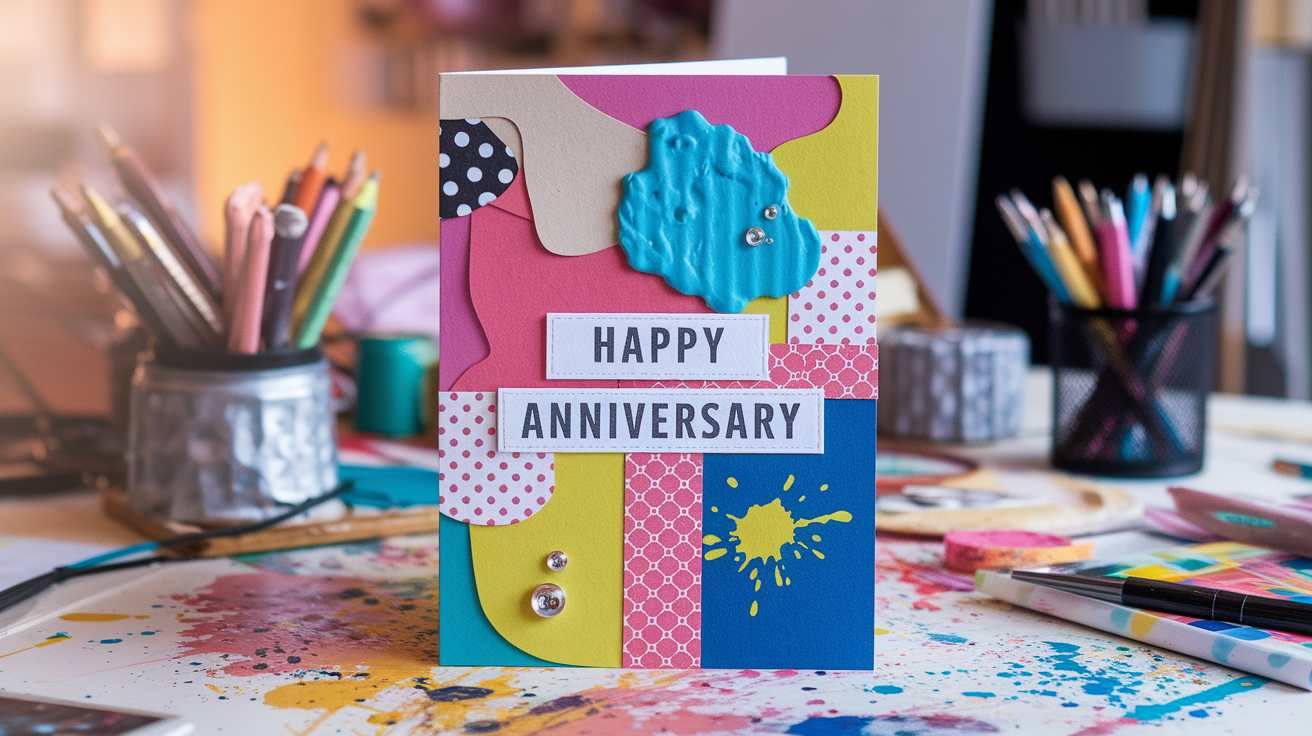
52. Abstract Love Shapes Card
Description
Play with abstract shapes, colors, and layers for a modern artistic look. It’s fun, stylish, and uniquely handmade. Great for modern art lovers.
Materials Required
| Material | Quantity |
|---|---|
| Colored cardstock | Multiple sheets |
| Scissors | 1 pair |
| Glue stick | 1 |
| Marker or pen | 1 |
| White base cardstock | 1 sheet |
Steps to Make it-
-
Cut geometric or organic shapes from colored paper.
-
Layer them creatively on the card front.
-
Glue everything down when you’re happy with the layout.
-
Write a short, bold message like “Love in layers.”
-
Add fun shapes or textures inside.
53. Paint Splatter Card
Description
This card has a bold paint splatter background and a simple heart or message over it. It’s vibrant, expressive, and one-of-a-kind.
Materials Required
| Material | Quantity |
|---|---|
| Watercolor or acrylic paint | Set |
| Cardstock | 1 sheet |
| Paintbrush or toothbrush | 1 |
| Masking tape (optional) | 1 roll |
| Pen or marker | 1 |
Steps to Make it-
-
Splatter paint across the card using a flicking motion.
-
Let dry completely (cover areas if you want clean space).
-
Add a large heart or quote on top with marker.
-
Remove tape if used for borders.
-
Write your message inside.
54. Pop Art Comic Card
Description
Create a comic strip or pop art scene featuring both of you. It’s colorful, witty, and full of character. Perfect for art lovers with humor.
Materials Required
| Material | Quantity |
|---|---|
| Colored markers | Set |
| White cardstock | 1 sheet |
| Ruler | 1 |
| Pen or fineliner | 1 |
| Speech bubble cutouts | Optional |
Steps to Make it-
-
Divide the card front into comic strip boxes.
-
Draw scenes or write funny love captions.
-
Add bold colors and thick outlines.
-
Use speech bubbles to deliver a punchline.
-
Finish with a comic “sound effect” and note inside.
55. Tape Art Heart Card
Description
Use painter’s tape to create clean heart designs with bold painted backgrounds. It’s graphic, modern, and visually cool.
Materials Required
| Material | Quantity |
|---|---|
| Painter’s tape | 1 roll |
| Acrylic or watercolor paint | Set |
| Paintbrush | 1 |
| Cardstock | 1 sheet |
| Pen or marker | 1 |
Steps to Make it-
-
Place tape strips in a heart or geometric shape.
-
Paint over the taped area with bold colors.
-
Let dry, then peel off the tape carefully.
-
Reveal clean shapes beneath.
-
Add a simple message and note inside.
56. 3D Paper Sculpture Card
Description
This dimensional card uses layered paper to create a 3D scene or object. It’s artistic, tactile, and visually impactful.
Materials Required
| Material | Quantity |
|---|---|
| Colored paper | Multiple sheets |
| Craft knife or scissors | 1 |
| Foam tape or glue dots | Several |
| Cardstock | 1 sheet |
| Pencil & ruler | 1 each |
Steps to Make it-
-
Cut out layered shapes (like hearts, clouds, flowers).
-
Stack layers with foam tape between each.
-
Mount onto the card front.
-
Add highlights or shadows with pen.
-
Write a message around or inside the design.
57. Washi Tape Stripes Card
Description
Use colorful washi tape to create a bold striped or diagonal design. It’s fast, artistic, and super satisfying.
Materials Required
| Material | Quantity |
|---|---|
| Washi tape | Several rolls |
| White cardstock | 1 sheet |
| Pen or marker | 1 |
| Scissors | 1 pair |
| Ruler (optional) | 1 |
Steps to Make it-
-
Place washi tape across the card in a striped pattern.
-
Press down firmly and trim any excess edges.
-
Write a message over or between the stripes.
-
Add small heart stickers or doodles.
-
Finish with a matching note inside.
58. Mixed Media Love Card
Description
Combine paper, fabric, buttons, and thread in one layered design. It’s textural, creative, and totally unique. A collage of your love!
Materials Required
| Material | Quantity |
|---|---|
| Cardstock | 1 sheet |
| Fabric scraps | Few pieces |
| Buttons or thread | Several |
| Glue (tacky or fabric) | 1 stick |
| Pen or marker | 1 |
Steps to Make it-
-
Arrange fabric, buttons, and paper shapes on the card.
-
Glue everything down securely.
-
Stitch through fabric if desired for texture.
-
Write a sweet message using pen or thread.
-
Add your heartfelt note inside.
59. Torn Paper Heart Card
Description
Use torn edges and layered colors to create a heart with texture. It’s artsy and expressive with a homemade touch.
Materials Required
| Material | Quantity |
|---|---|
| Colored paper | 2–3 sheets |
| Cardstock | 1 sheet |
| Glue stick | 1 |
| Pen or marker | 1 |
Steps to Make it-
-
Tear strips or chunks of colored paper.
-
Arrange them in the shape of a heart.
-
Glue onto the card with overlap.
-
Add a phrase like “Love is layered.”
-
Write your personal message inside.
60. Negative Space Card
Description
Create a clean, artistic design by cutting a heart shape out of the front. The contrast of the space makes it pop. Simple, modern, and elegant.
Materials Required
| Material | Quantity |
|---|---|
| Cardstock | 2 sheets |
| Craft knife or scissors | 1 |
| Colored paper (back layer) | 1 sheet |
| Glue stick | 1 |
| Pen or marker | 1 |
Steps to Make it-
-
Cut a heart shape out of the front panel.
-
Back it with colored or patterned paper.
-
Glue layers together.
-
Add a minimalist phrase on the front.
-
Write your heartfelt message inside.
Sentimental & Keepsake DIY Anniversary Cards
Looking for something deeply meaningful? These keepsake-worthy cards are designed to hold memories, emotions, and little treasures that last far beyond the day.
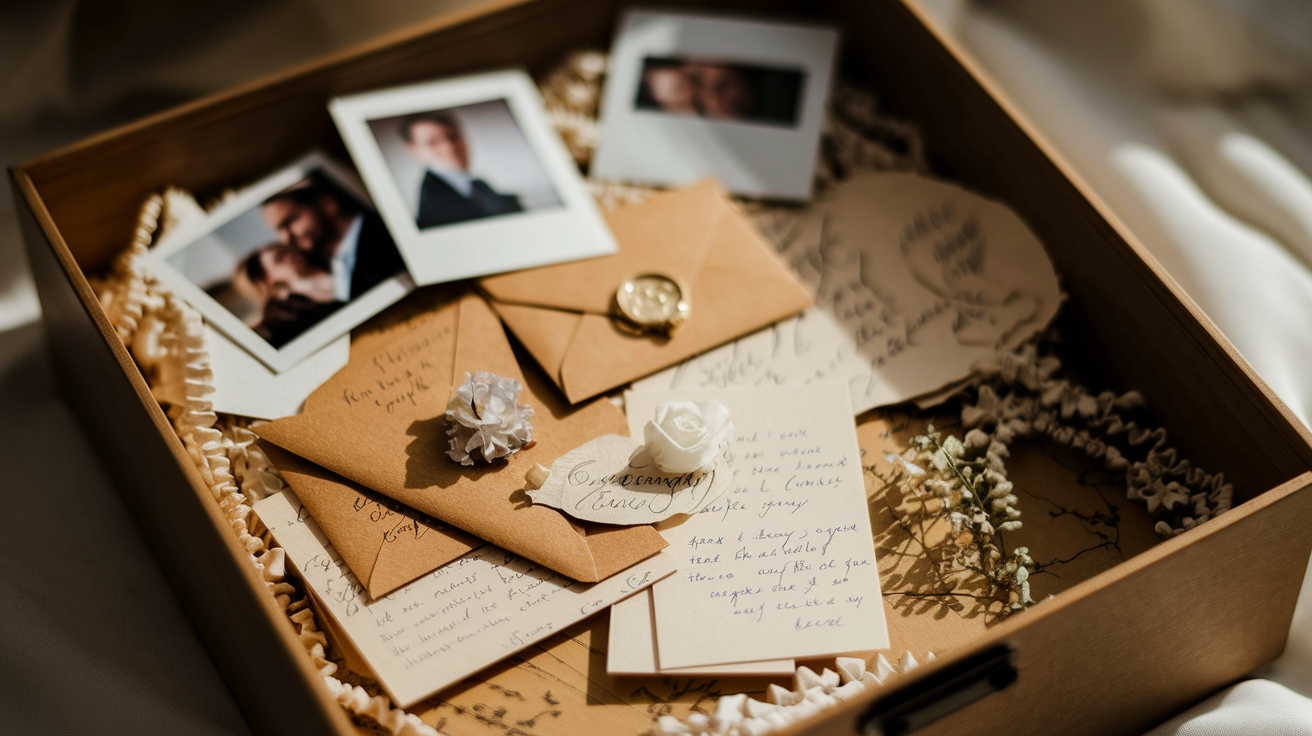
61. Photo Memory Card
Description
Include a small printed photo from a special memory together. It’s simple, timeless, and deeply personal. A card they’ll want to keep forever.
Materials Required
| Material | Quantity |
|---|---|
| Printed photo | 1 |
| Cardstock | 1 sheet |
| Glue stick | 1 |
| Pen or marker | 1 |
| Washi tape (optional) | 1 roll |
Steps to Make it-
-
Glue the photo on the front of the card.
-
Frame it using washi tape or hand-drawn border.
-
Write a caption or title below the photo.
-
Add hearts or date stamps around it.
-
Write your message inside the card.
62. Map Location Card
Description
This card uses a cutout of a map showing where you first met or got married. It’s thoughtful, nostalgic, and uniquely yours.
Materials Required
| Material | Quantity |
|---|---|
| Old map or printout | 1 small piece |
| Cardstock | 1 sheet |
| Scissors | 1 pair |
| Glue stick | 1 |
| Marker or pen | 1 |
Steps to Make it-
-
Cut out a heart or circle around the special location.
-
Glue it to the front of the card.
-
Write a title like “Where Our Story Began.”
-
Add a date or initials.
-
Write your message inside.
63. Envelope of Notes Card
Description
This card has a mini envelope filled with little notes or love messages. It’s interactive, sweet, and filled with tiny surprises.
Materials Required
| Material | Quantity |
|---|---|
| Mini envelope | 1 |
| Cardstock | 1 sheet |
| Paper strips | 5–10 |
| Glue stick | 1 |
| Pen | 1 |
Steps to Make it-
-
Write little notes or reasons why you love them.
-
Fold each note and place inside the envelope.
-
Glue the envelope onto the card front.
-
Label it “Open Me” or “Little Reasons I Love You.”
-
Add your final message inside.
64. Anniversary Countdown Card
Description
Create a mini countdown inside the card with flaps revealing memories. It’s fun, creative, and nostalgic. Great for milestone anniversaries.
Materials Required
| Material | Quantity |
|---|---|
| Cardstock | 1 sheet |
| Small squares of paper | 5–7 pieces |
| Glue stick | 1 |
| Pen or marker | 1 |
| Scissors | 1 pair |
Steps to Make it-
-
Write a memory or message on each small paper.
-
Glue them with just the top edge inside the card.
-
Label each flap “1 day left,” “2 days,” etc.
-
Decorate with numbers or doodles.
-
Finish with a special message under the last flap.
65. Couple’s Bucket List Card
Description
This card includes a list of things you want to do together. It’s adventurous, inspiring, and future-focused. A perfect keepsake for dreamers.
Materials Required
| Material | Quantity |
|---|---|
| Cardstock | 1 sheet |
| Pen or marker | 1 |
| Washi tape (optional) | 1 roll |
| Stickers (optional) | A few |
Steps to Make it-
-
Write “Our Bucket List” on the front or top inside.
-
List 5–10 activities or dreams together.
-
Add hearts or boxes to check off.
-
Decorate with travel-themed stickers.
-
Add a final note encouraging your future.
66. Polaroid Frame Card
Description
Make a faux polaroid-style photo frame with a romantic message. It’s stylish, simple, and picture-perfect.
Materials Required
| Material | Quantity |
|---|---|
| White cardstock | 1 sheet |
| Printed mini photo | 1 |
| Pen or marker | 1 |
| Glue stick | 1 |
| Scissors | 1 pair |
Steps to Make it-
-
Cut a polaroid-style rectangle from cardstock.
-
Glue a photo where the photo area goes.
-
Write a caption underneath the “photo.”
-
Attach to the front of a folded card.
-
Add your handwritten message inside.
67. Anniversary Scrap Card
Description
A tiny scrapbook-style card with cutouts, tags, and textures. It’s fun to flip through and filled with sweet bits of your story.
Materials Required
| Material | Quantity |
|---|---|
| Patterned paper | A few sheets |
| Stickers or tags | Several |
| Glue stick | 1 |
| Scissors | 1 pair |
| Cardstock | 1 sheet |
Steps to Make it-
-
Layer small paper cutouts on the card.
-
Add tags, captions, and photos if desired.
-
Use glue to attach everything securely.
-
Add small romantic quotes or dates.
-
Write your note among the scrapbook elements.
68. Fold-Out Photo Strip Card
Description
A fold-out card that opens like a photo strip showing 3–4 couple pics. Sentimental, playful, and perfect for photo lovers.
Materials Required
| Material | Quantity |
|---|---|
| Printed mini photos | 3–4 |
| Paper strip | 1 long piece |
| Cardstock | 1 sheet |
| Glue stick | 1 |
| Marker | 1 |
Steps to Make it-
-
Fold a strip of paper accordion-style.
-
Glue photos on each section.
-
Attach the strip inside the card to unfold.
-
Add captions below each photo.
-
Write a message under the last fold.
69. Key to My Heart Card
Description
Attach a small decorative key and write “You’re the key to my heart.” It’s symbolic, elegant, and easy to make.
Materials Required
| Material | Quantity |
|---|---|
| Small metal or paper key | 1 |
| Ribbon or string | 1 piece |
| Cardstock | 1 sheet |
| Glue or tape | 1 stick/roll |
| Pen or marker | 1 |
Steps to Make it-
-
Tie a string around the key.
-
Tape or glue the key to the card front.
-
Write “You’re the key to my heart.”
-
Add a heart drawing around the key.
-
Write your personal message inside.
70. Message in a Bottle Card
Description
Mini bottle on a card with a rolled-up love note inside. It’s romantic, interactive, and perfect for ocean or travel lovers.
Materials Required
| Material | Quantity |
|---|---|
| Mini glass/plastic bottle | 1 |
| Tiny paper scroll | 1 |
| Ribbon or twine | 1 piece |
| Cardstock | 1 sheet |
| Glue (strong) | 1 stick |
Steps to Make it-
-
Write a tiny love note and roll it up.
-
Place it inside the mini bottle.
-
Glue the bottle to the card front.
-
Write “A message just for you.”
-
Add ocean waves or map background if desired.
71. Love Calendar Card
Description
Mark your anniversary date on a mini calendar to highlight the special day. It’s thoughtful, visual, and great for yearly traditions.
Materials Required
| Material | Quantity |
|---|---|
| Printed monthly calendar | 1 small page |
| Pen or heart sticker | 1 |
| Cardstock | 1 sheet |
| Glue stick | 1 |
| Marker | 1 |
Steps to Make it-
-
Print or draw the month of your anniversary.
-
Mark your date with a heart or sticker.
-
Glue the calendar to the card front.
-
Write “The day everything changed.”
-
Add a reflective note inside.
Conclusion
A handmade anniversary card speaks louder than words—it shows time, care, and creativity.
These anniversary card ideas are here to inspire you to go beyond the ordinary. Each one can be tailored to your love story, your partner’s personality, and your shared memories.
You don’t need to be an artist to make something meaningful—just someone with love and intention.
Take your time, enjoy the process, and most of all, have fun with it. And when you give your DIY card, don’t be surprised if it becomes something your partner saves for years to come.
Because in the end, the best gifts are the ones that come straight from the heart—crafted by hand, and given with love.