Do you walk past those flat, dull hollow core doors in your home and wish they had more style? Basic hollow core doors serve their purpose but often lack visual appeal. You can turn these blank canvases into stunning design elements with simple, affordable makeovers.
No need to replace them – just update them! This guide shares seven proven door conversion ideas that anyone can do, from adding molding for classic charm to applying peel-and-stick wallpaper for bold statements.
We’ll walk through each option with clear before-and-after descriptions, materials lists, and step-by-step instructions. Whether you want traditional elegance or modern flair, these door makeovers will help you create custom looks without the custom price.
Get ready to see your doors in a whole new light!
What are Hollow Core Doors?
Hollow core doors are lightweight interior doors made with a frame of wood or composite material and two thin facing panels, with mostly space inside.
Unlike solid wood doors, they contain a honeycomb cardboard or lattice structure between the facings to maintain shape while reducing weight and cost.
These doors are popular in many homes because they’re affordable, easy to install, and sufficient for most interior uses where sound insulation isn’t critical. Their simple, flat design makes them perfect candidates for decorative upgrades like those covered in this blog.
While not as sturdy or sound-dampening as solid doors, hollow core doors meet the needs of most homeowners looking for functional, budget-friendly door solutions for bedrooms, bathrooms, and closets.
7 Before and After Makeover Ideas for Hollow Core Doors
Change your plain hollow core doors into stylish, statement-making features with these 7 easy and budget-friendly makeover ideas!
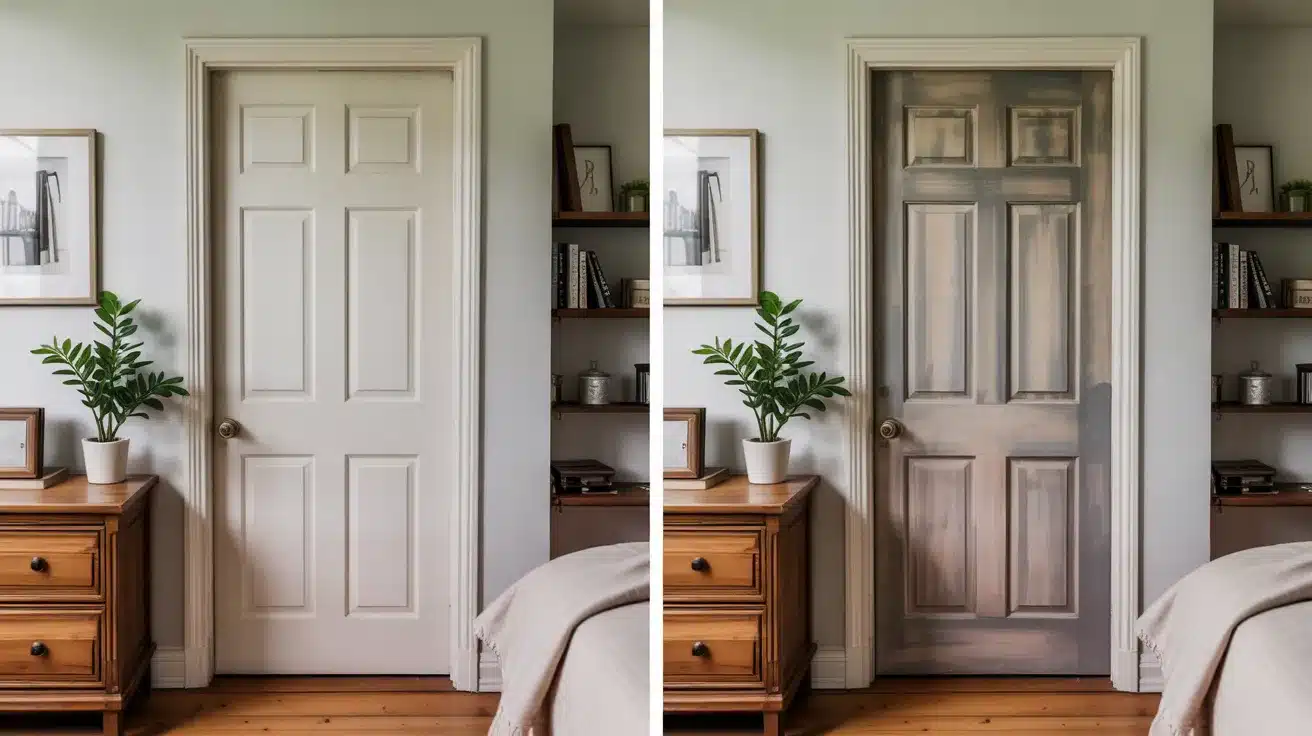
1. Add Molding for a Classic Look
Before: Your hollow core door sits flat and plain in the doorway, its smooth surface lacks detail, making it look basic and mass-produced. The plain face fails to match your home’s charm and style.
How to Create a High-End Look:
- Choose the right molding type
- Measure with care
- Attach with a strong bond
After: The added wood or polyurethane trim creates depth and visual appeal. The door now sports a raised-panel look that fits with your home’s style. Paint it to match your trim for a put-together feel.
2. Peel and Stick Wallpaper for a Bold Statement
Before: The door stands dull and lifeless in your space, its flat, plain surface draws no attention and adds nothing to your room’s look. It seems like a missed chance for style.
How to Make It Pop:
- Select eye-catching patterns
- Clean the surface fully
- Apply with smooth strokes
After: Your door now stands out with color and pattern, and the sticky wallpaper turns a boring door into a room highlight. Guests notice and comment on this simple yet striking change to your space.
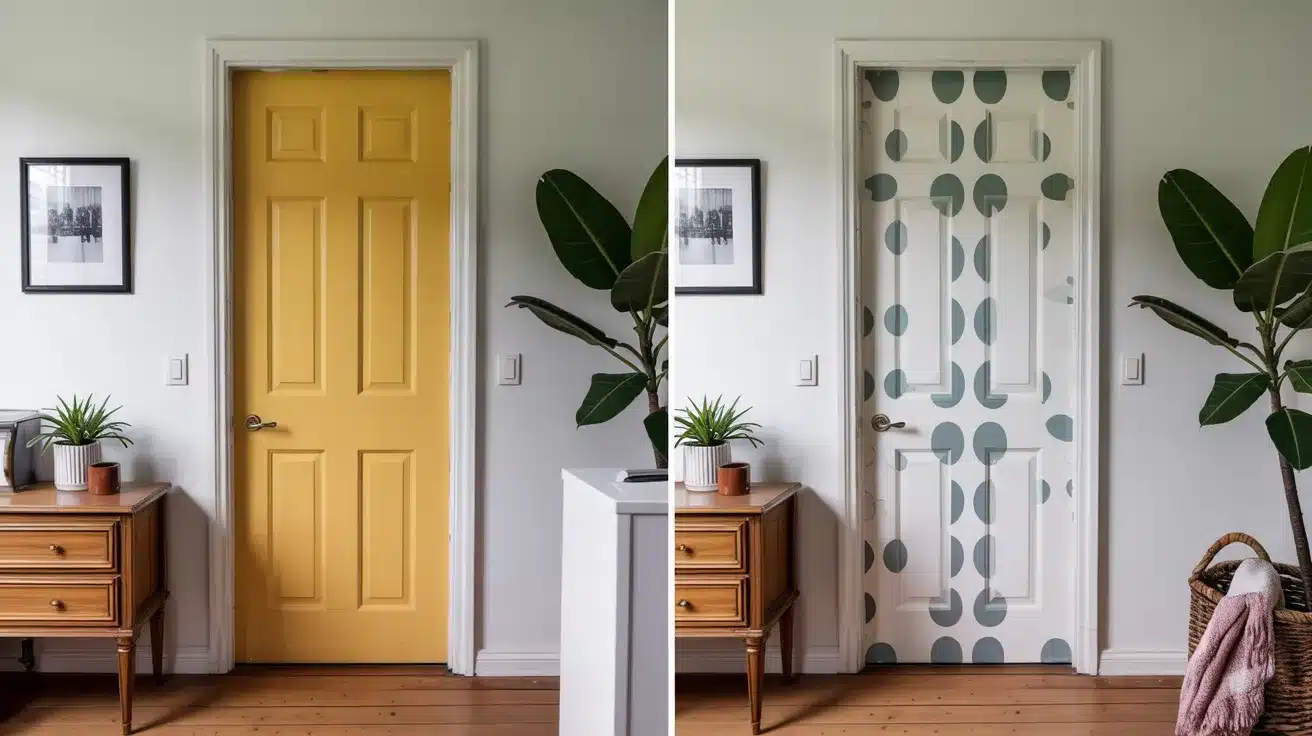
3. Paint with a Unique Pattern or Color Block

Before: A basic white or beige door fades into the wall, the single-color finish lacks style and feels dated. The door seems like an afterthought rather than a design choice.
How to Create Visual Interest:
- Plan your design first
- Tape with care
- Use quality paint
After: Bold colors or sharp patterns now catch the eye, the door shows off your style sense, and stands as a room feature. What was once bland now adds flair to your home’s look.
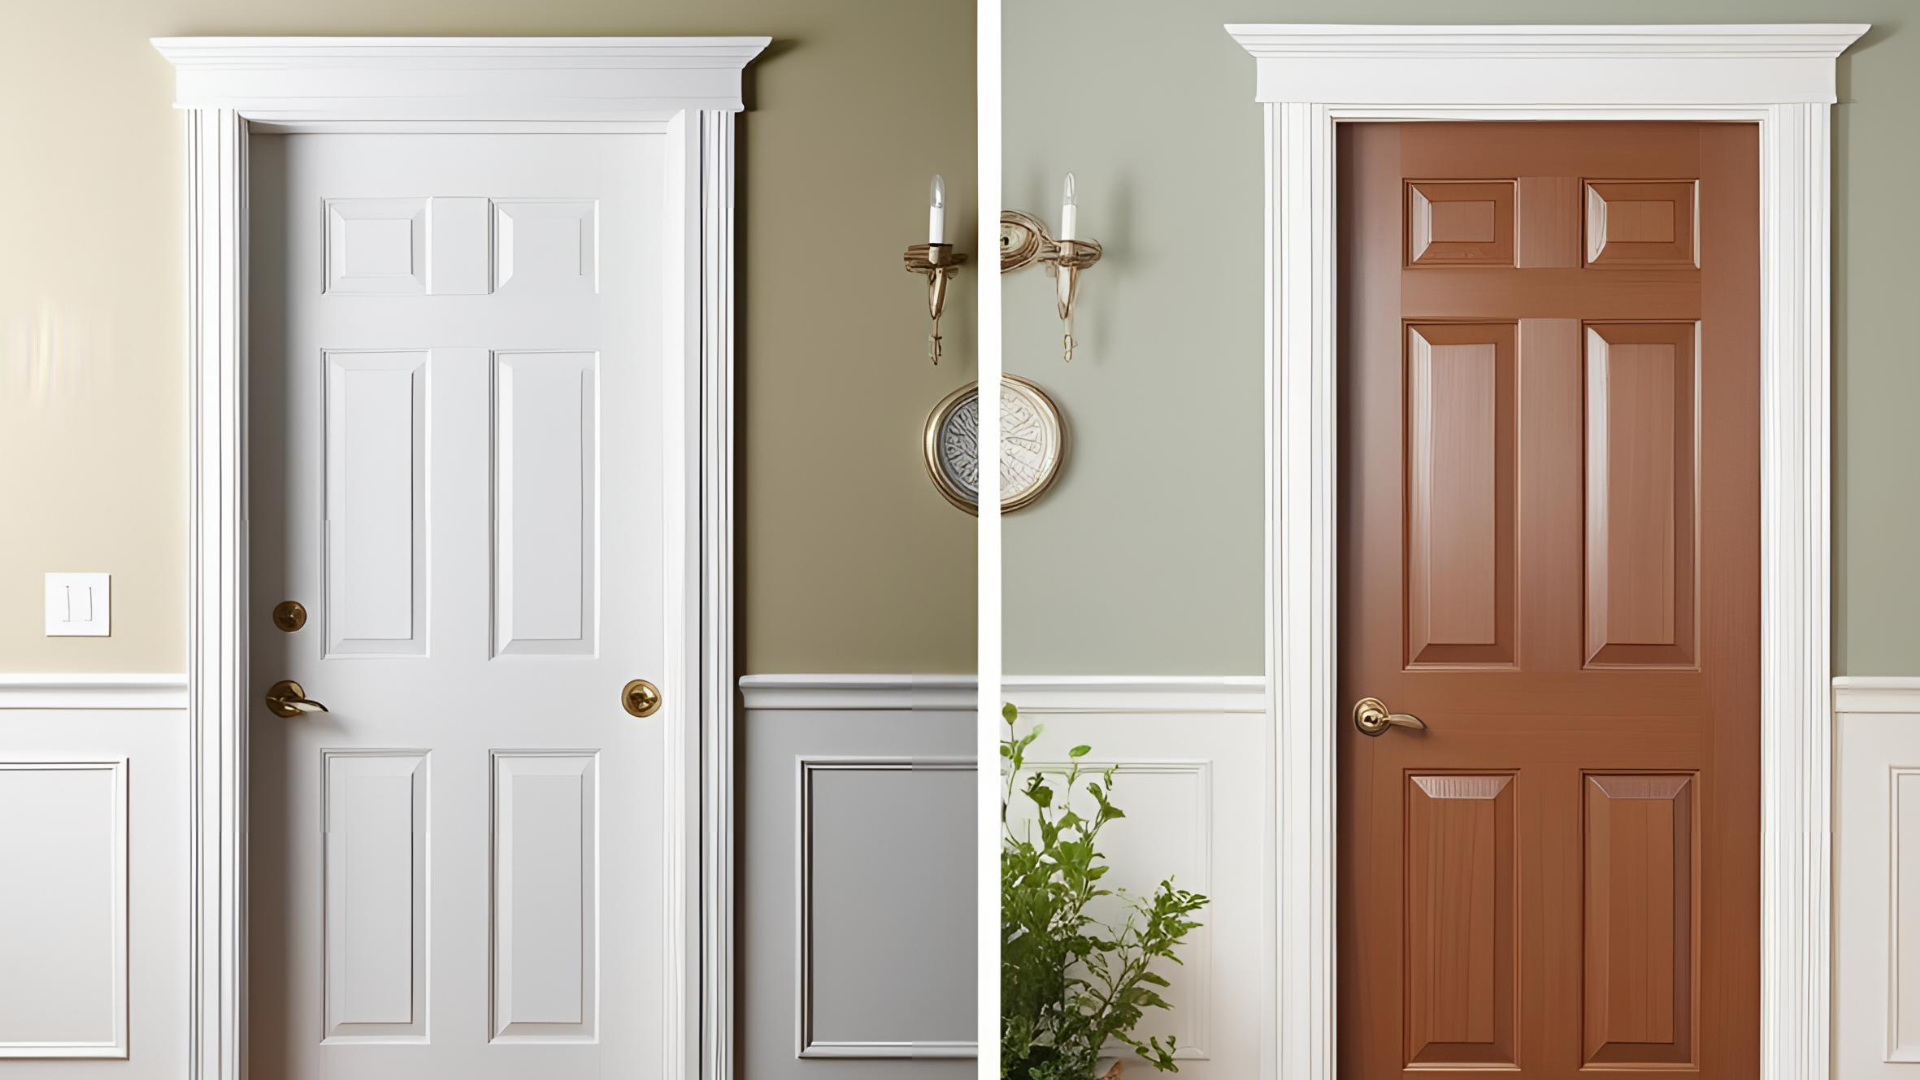
4. Add Faux Wood for a Rustic Transformation
Before: Your door has a smooth, flat look that lacks warmth. The basic finish fails to add charm or character to your space. It feels out of place with your homey style.
How to Add Warmth:
- Choose the right wood tone
- Plan your layout
- Secure with strong glue
After: The door now glows with wood-like warmth, the faux panels add depth and texture that bring a cozy, handmade feel. Your once-plain door now fits perfectly in your home’s style.
5. Create a Fabric Upholstered Door

Before: The door stands hard and plain with no softness. Its flat face lacks texture and feels cold. The stiff surface seems at odds with your soft, comfy room style.
How to Add Softness:
- Pick fabric that suits your style
- Cut with extra room to work
- Pull tight when attaching
After: Soft fabric now covers the once-hard surface, the padding adds depth, while the cloth brings color and texture. Your door feels linked to your curtains and cushions, tying the room together.
6. Add Glass Inserts or Decorative Panels
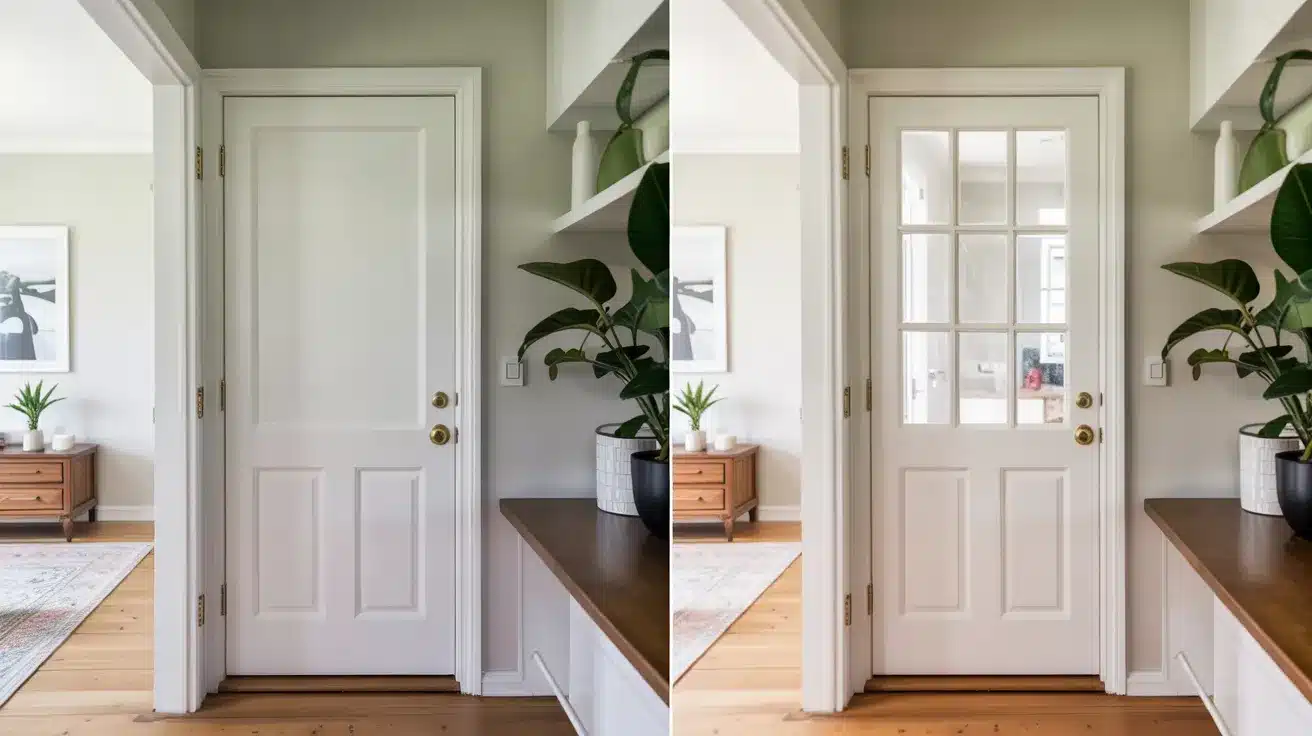
Before: The solid door blocks light and feels closed off. The blank surface seems heavy and dark. Your space loses flow and feels cut up by this solid wall.
How to Let Light Flow:
- Choose the right panel type
- Measure twice, cut once
- Seal edges well
After: Light now flows through the glass panels, making your space feel more open. The door adds style while still doing its job. Rooms on both sides feel more linked and bright.
7. Add Stenciled Art or a Graphic Design

Before: The door stands blank like an empty canvas, its plain face shows no hint of your taste or style, the missed chance for a personal touch feels stark.
How to Show Your Style:
- Start with a light sketch
- Work from top to bottom
- Build color in layers
After: Your door now shows off a hand-made design that tells your story. The art adds a personal touch unlike any store-bought door. Guests see your style the moment they spot this unique piece.
Key Steps to Transform Your Hollow Core Door on a Budget
- Remove the Door (Optional but Recommended): Lay your door flat on sawhorses after taking it off hinges and removing all hardware for better work access.
- Clean Thoroughly: Wipe down with degreaser to remove all dirt and oils before you start any work.
- Sand Lightly: Run fine-grit sandpaper over the whole surface to help new materials stick better.
- Prime: Coat with a good primer to block stains and create an even base for your chosen finish.
- Apply Your Makeover: Follow the steps for your chosen method, giving proper time between stages.
- Reinstall Hardware: Put back all knobs, handles, and other parts once everything is dry.
- Rehang the Door: Set the door back on its hinges when all work is finished.
Perfecting Your Door Makeover: Style, Color, and Texture Tips
| Category | Advice |
|---|---|
| Matching with Home Décor | Consider the existing theme of your home. A modern door makeover may not suit a traditional or farmhouse-styled space, so choose a style that complements your interior design. |
| Color Schemes | Neutral colors are versatile, but bold colors can provide a focal point in a room. |
| Texture and Finish | Decide if you want a smooth, sleek finish or a textured, rustic look to match the vibe of the room. |
Conclusion
Plain hollow core doors don’t need to stay plain. With the ideas shared here, you can change how your doors look and feel without buying new ones. Each method offers a way to match your style and budget.
The best part? These projects don’t need special skills. You can finish most in a weekend with basic tools and materials. Just follow the key steps: remove, clean, sand, prime, apply your chosen look, and rehang.
Think about which rooms would benefit most from door updates. A painted pattern might work well in a child’s room, while molding might suit your living areas. Mix and match ideas to create doors that truly feel like yours.
Why stop at just one door? Once you see how much difference a door makeover makes, you might want to try these ideas throughout your home. Your doors can become key parts of your home’s style instead of things you hardly notice.
What will your doors look like tomorrow? The choice is yours. Pick a method and start your door makeover this weekend!
Frequently Asked Questions
How Much Time Does a Door Makeover Take?
Most Door Projects Take 1-2 Days, with Much of That Time Spent Waiting for Paint or Glue to Dry.
Can I Do These Makeovers if My Door Has Minor Damage?
Yes, you Can Fix Small Holes or Dents with Wood Filler Before Starting Your Makeover Project.
Will These Changes Affect How My Door Opens and Closes?
When Adding Thick Materials Like Molding, Test Fit Your Door to Make Sure It Still Swings Freely.
Are These Makeovers Good for Rental Homes?
Some options, like peel-and-stick wallpaper, can be removed later, making them better for rentals than permanent changes.