

Furnishing and designing the home or any space has become quite a tedious task in today’s day and age. But once chosen, it does not have to be forever.
According to the many cabinet trends, the grooved patterns are making quite a noise. Grooved cabinets give out a subtle aesthetic character to the kitchen and the home. But are you having second thoughts about this design?
The most common hesitation that people face before opting for a grooved design pattern is – how will we clean the dirt? Also, nowadays, numerous trendy colors keep changing. So, do we really wish to stick to just one color? Don’t worry; we have a solution. Contact paper for cabinets is the best way to enjoy trendy grooved cabinet designs with changing color tones.
Step-By-Step Guide to Update Cabinets with Contact Paper
Tools Required
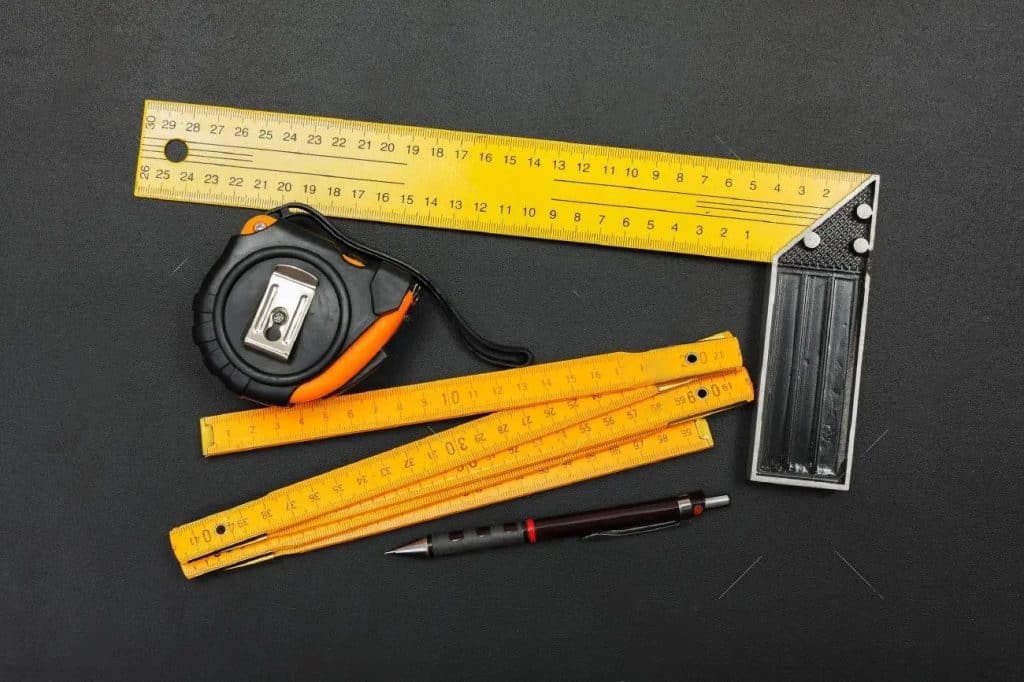
Before we get started with our DIY project, it is better to arm ourselves. Gather everything required together so that we don’t waste any time while using the contact pair for cabinets. The tools need are:
| Measuring tape | Pencil |
| Contact paper of the selected color | Squeegee |
| A cutter or scissor | Ruler |
Now with these tools handy and keeping a check on your creative side here, we present to you a step-by-step guide to how you can execute the task of updating your cabinets with contact papers.
Step 1: Selecting the Perfect Shade

Out of so many shades available, we have to select the best possible option for our cabinets. It is important to take into consideration the overall furniture and wall color of the space. The wall colors, other furniture colors, the kitchen marble top color, if the cabinets are in the kitchen – all have a specific color tone.
They are permanent, and we cannot change them. So it is very important to select a shade of contact paper for cabinetsthat go well with the entire look of the home. You wouldn’t want a weird-colored cabinet at your home, now would you?
So, skim through the entire shade card and pick your favorite. A gentle reminder – it is not important to change the color of the cabinet. Suppose the only problem that you are facing is with the dirt part. Then select a similar shade of contact paper as the cabinet and enjoy a dirt-free grooved cabinet.
Step 2: Measuring Right
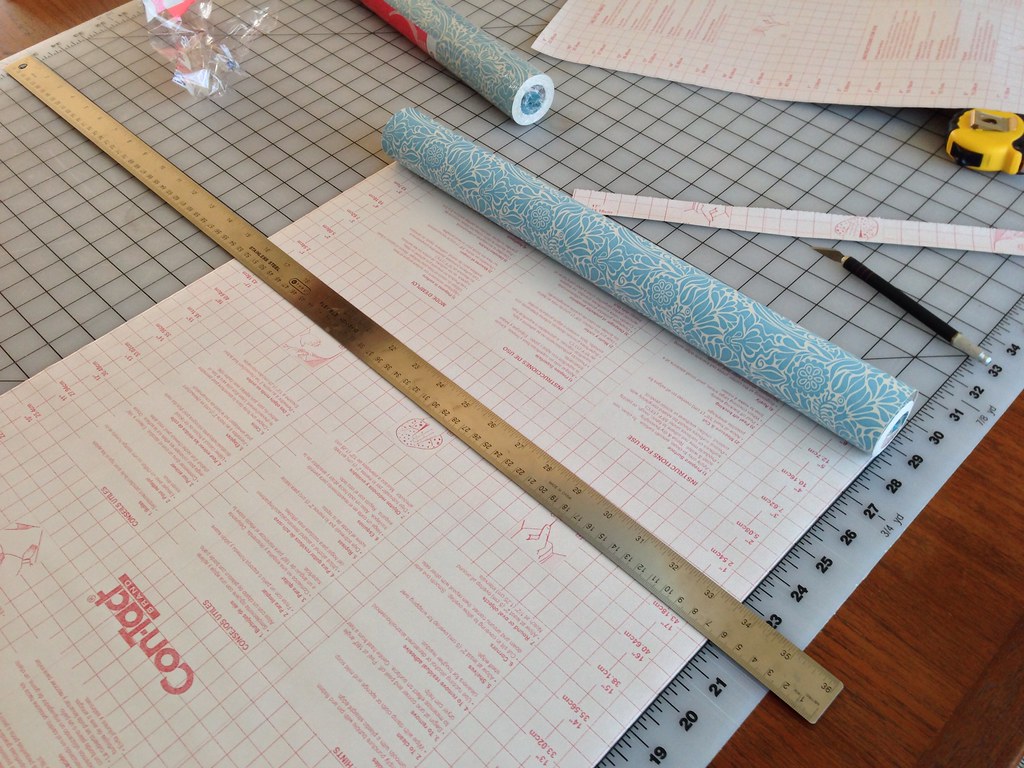
Once the suitable color is chosen for the contact paper for cabinets, get started with the measurements. With the help of the measuring tape, measure the door of the cabinets properly and note them down. Once all the measurements are noted down, take out the contact paper. Turn the contact paper over. Now, we will start marking the desirable measurements on the back side of the contact paper for cabinets.
With a ruler and a pencil, draw straight lines for the measurements. To be on the safe side, leave an extra quarter of an inch or an inch on all sides. This will help in covering the edges later on and give a complete finish to the paper. Apart from that, make sure, when you are measuring the cabinet, make sure to measure the depth of the grooved lines on the cabinet. We would suggest you measure the approximate length with the help of the contact paper itself. The contact paper will allow proper calculation, including the groove depth.
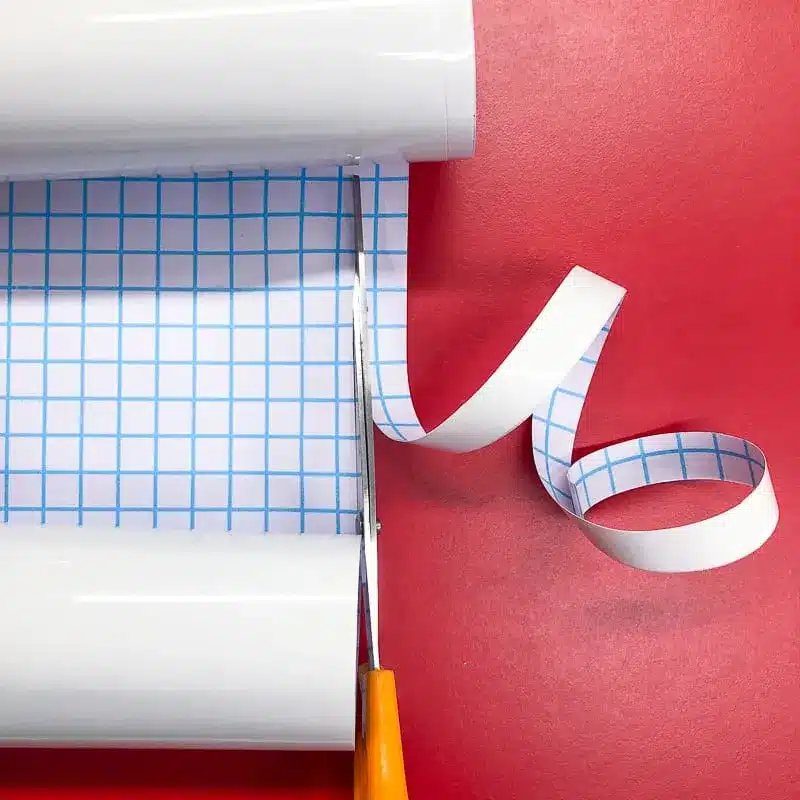
Step 3: Cut the Right Size

Once all the measurements are marked on the contact paper, get ready to cut them out. Cutting the contact paper for cabinets is a task requiring precision and focus. With the help of a ruler and cutter, make straight cuts to the contact paper.
If you are comfortable with a pair of scissors, then you can go ahead with it. Just make sure that the lines are cut as per the markings made. If the cutting is compromised, then we will have to restart the entire process.
Don’t forget to make markings for the cabinet handle. Do not cut these markings. Cut them while sticking the contact paper so that it is precise and stick it instantly.
Step 4: Sticking the Contact Paper
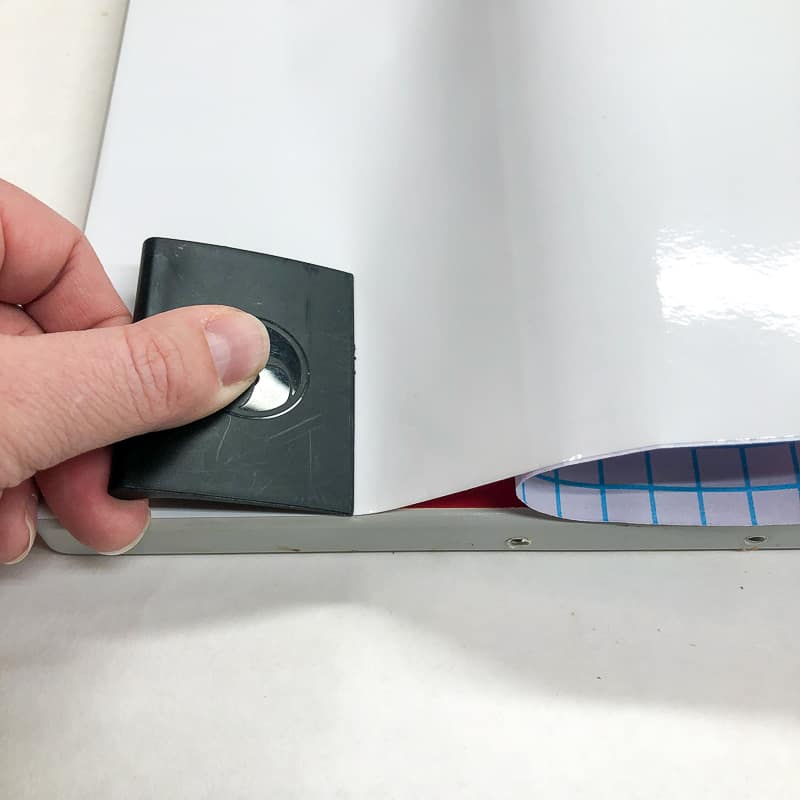
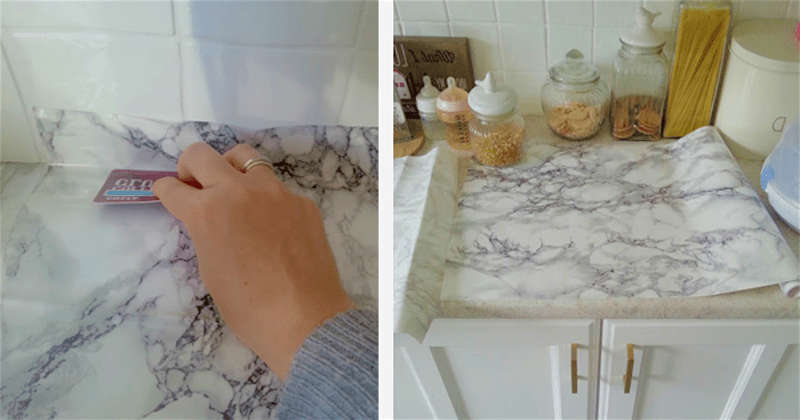
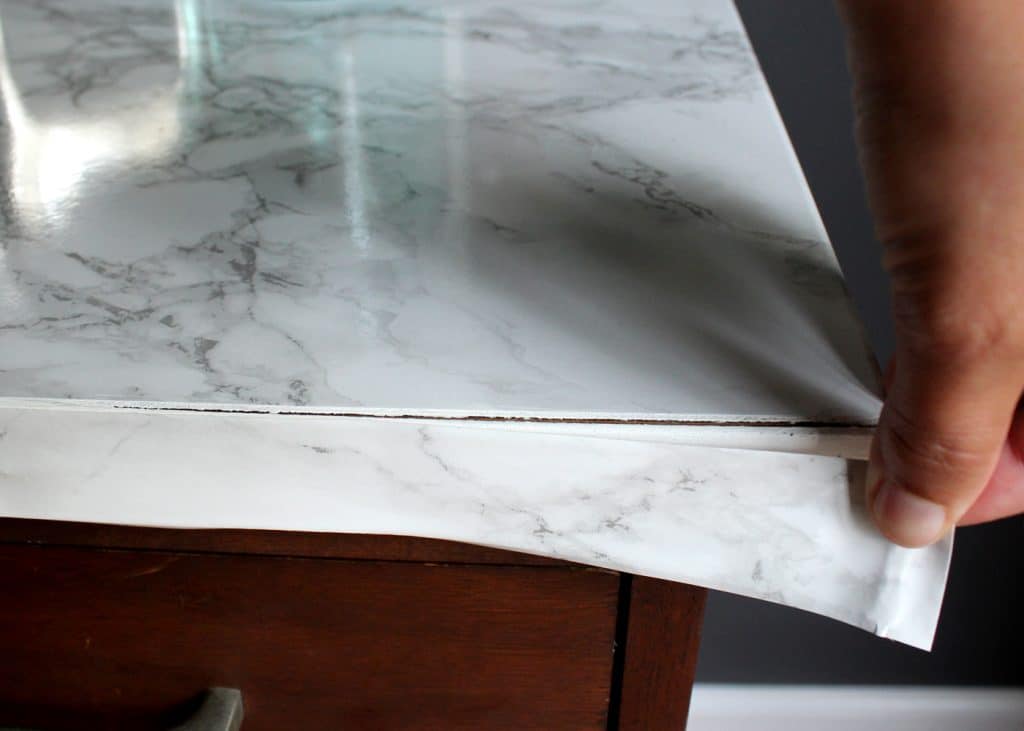
The contact paper for cabinets has a layer of strong adhesive protected by another paper. We have to peel off the paper behind the colored contact paper before sticking them. Make sure to peel the paper only when you are about to stick it to the cabinet. Peeling it before will make it hard to handle and will eventually become a waste.
It is advisable to peel a small portion of the paper, stick the exposed area and then slowly peel off the rest of the paper while sticking it simultaneously. This will help in achieving minimum crease.
For better results, use a squeegee and another person for help. This way, one person can hold the contact paper, and the other person can work with the squeegee. The involvement of two people will fasten the process with good results.
Step 5: Fixing the Grooves
While sticking the contact paper for cabinets, be careful with the grooves. When you find a groove, put the contact paper over it but do not stick. Now with the help of a squeegee, put the contact paper inside the groove appropriately.
This way, there will be no space between the wood and the contact paper, and we will be able to retain the grooved pattern of the cabinet. Using a squeegee makes the process clean and smooth. If the squeegee is big for the grooved area, take a thin pen with a closed can or a pencil to achieve the same. The bottom end of the steel chopsticks can be a good choice as well.
Step 6: Checking for Gaps
It is very much possible to have left a few spaces, maybe because of paper shortage, wrong measurements, or tough access to the area. So, after sticking up the contact paper for cabinets, check for gaps.
It is possible to find gaps on the sides of the cabinet door, especially where two doors meet. Cut out small pieces as per the gap and stick them up. If the place is very tough to reach or cover, you may leave it.
Step 7: Dealing with the Extras
The contact paper for cabinets needs to be groomed after sticking them. Once all the gaps are filled with paper, and no area is to be seen, start with the extras. You are bound to find some tiny extensions if the paper is hanging out from the cabinet.
Take the cutter or scissors and cut the access out. You may also stick them around the edges simply by flooding them and attaching them to the surface. A simple way to deal with fixing the extras.
Step 8: Rounding up the Edges
In the pursuit of sticking the contact paper for cabinets, do not miss out on the edges. It is a common mistake that we all tend to make. We are so focused on covering up the large areas of the cabinets that we miss out on small detailing.
Do you remember that we had asked you to leave an extra quarter of an inch all around the sides of the paper? Well, it was said so to round up the edges. If you have missed that, then try to cut around the contact paper having at least half an inch as the breadth.
Then neatly stick it, first on the edge and then the sides adjoining it. The rounded-up edges are ready. This process also helps in preventing future cuts through sharp edges.
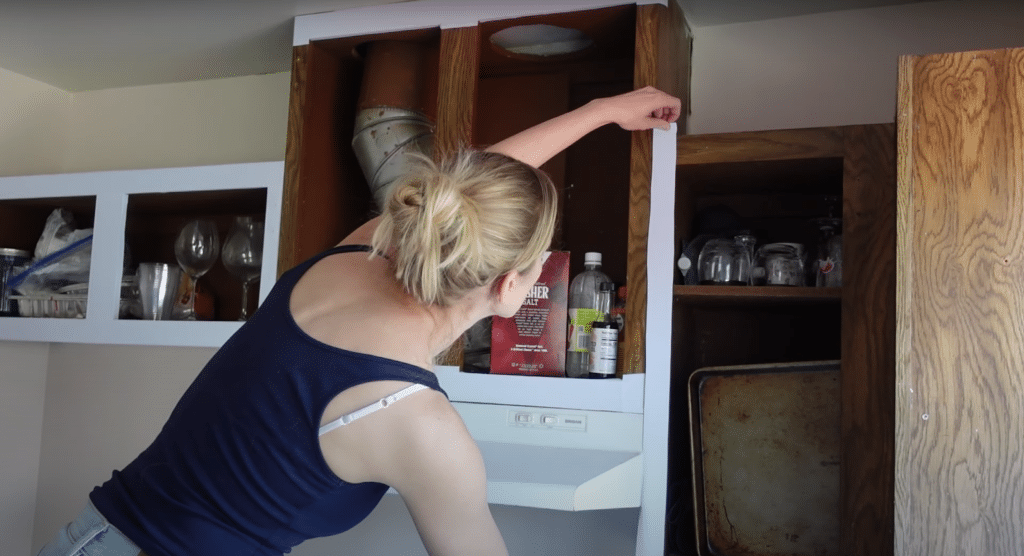
Step 9: Enjoy the Beautiful Cabinet
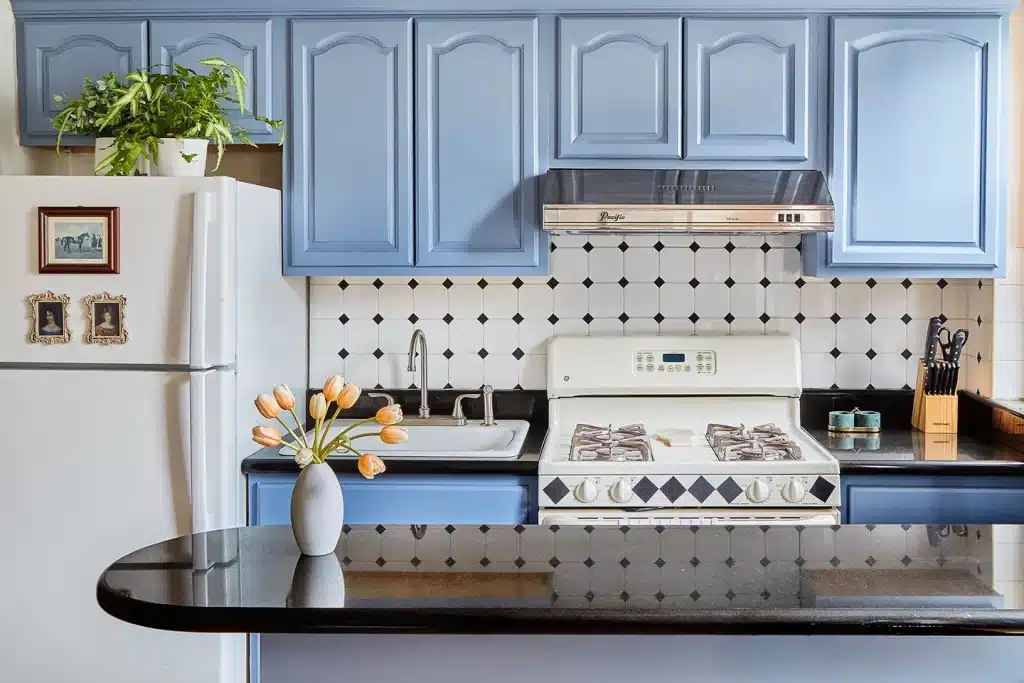
Once the entire process of contact paper for cabinets gets over, you are ready to enjoy the new color for your cabinets. A change of color will help you bring in a new character and look to the home.
The updated contact paper for cabinets having grooved designs will make the cabinets clean and easy to maintain. The contact paper will solve the dirt problem and give the grooves a proper finish as well.
Essential Tips to Adhere Before Updating Your Cabinet
- Understand the color of the room the cabinet is present in before finalizing the new color. It should be done after taking into consideration the other colors of the room and how well they will go with them.
- Rub the cupboard with sandpaper before sticking the contact paper. This will help in creating an even plane for the contact paper to glide through easily. This should be done only when the cabinet is made up of wood. If laminates or another type of sheet is stuck, you may skip this step.
- Do not peel off the paper that acts as a cover for the adhesive on the contact paper before. As we discussed before, this will lead to creating numerous small stuck-ups in the paper, making it unfit for use.
- A squeegee or a tool similar to a squeegee is important to get an even look. It may seem unimportant at first, but it is only while sticking that we realize that it comes in very handy. The tool helps in creating an even look without much effort. It also helps in removing leftover air spaces or gaps under the contact paper.
Conclusion
Here we have listed a step-by-step guide to update your boring cabinets and give them a new look. The grooved cabinets come under the perfect criteria to have contact paper. The contact paper will give an even look to the cabinets even when the cabinets are grooved.
Putting contact paper on the grooved cabinet has long-term benefits. The contact paper will smoothen the edges around the grooved area and give the surface a plain and rich look. Try this DIY project on your grooved cabinets, and let us know about your experience in the comment section below!
DIY projects look to be very tedious to take up at first. But the most beneficial aspect of taking up a DIY project is the satisfaction it gives after the work is complete. Try this DIY project and see the magnificent transformation changing the entire outlook of your home with just minimal effort.
Frequently Asked Questions
Why Should We Use Contact Paper?
Contact paper is a self-adhesive paper that comes in a variety of colors and patterns. The easy-to-peel and stick feature of the contact paper makes it a highly desirable choice of paper for furniture. The contact paper for cabinets is easy to clean and waterproof. The paper does not leave any damage to the surface it is stuck on or leave any sticky residue after being peeled off.
How to Prepare the Surface Before Sticking Contact Paper?
The surface of the wood on the cabinet can be uneven due to exposure or any other reason. So it is best to rub the wood surface with sandpaper and smoothen the entire surface. But in case there are laminates or other types of sheets stuck on, then we need not rub the surface with sandpaper. It will do more bad than good.
Will Kitchen’s Heat Destroy the Contact Paper?
Well, every object or product has its limitations. Though the contact paper is oil-free and waterproof, it is not heatproof. If the contact paper is stuck away from the heat or stove, then we do not have much problem. But continued exposure to heat waves will make the paper on the edges start coming out.