
Have you ever watched someone gently swaying in a handcrafted rocking chair and felt that sense of peaceful countryside living? Most people assume custom rocking chairs require advanced woodworking skills.
But here’s the truth: You can build a comfortable, rustic rocking chair for just $10 in materials using basic tools. This simple weekend project creates not only a functional piece of furniture but also a conversation starter that adds charm to any porch.
Ready to create something with your own hands that family and friends will admire for years?
Let me show you how to build a rocking chair that combines rustic appeal with surprising comfort in under an hour. With just a few 2x4s, some screws, and basic tools like a skill saw and drill, you’ll soon be enjoying the satisfaction of rocking in a chair you made yourself.
Why DIY Rocking Chairs Are Worth It?
-
Significant Cost Savings: Build a comfortable rocking chair for around $10 in materials, compared to $150+ for store-bought options.
-
Customizable Dimensions: Craft a chair with the ideal seat depth, width, and back angle for optimal comfort.
-
Minimal Tools Required: Accomplish this project with basic tools; even beginners can succeed without specialized woodworking equipment.
-
Quick Project Completion: Build a functional rocking chair in under an hour using simple techniques.
-
Rustic Charm: Embrace the natural, handcrafted aesthetic that adds character to any porch or living space.
-
Practical Skill Building: Develop valuable woodworking skills that can be applied to other home projects.
Tools and Materials Needed
Tools
| Tool | Purpose |
|---|---|
| Skill Saw | Used for making precise cuts, such as cutting the 2×4 lumber to the desired lengths for the chair frame. |
| Bandsaw (Vivore) | Used for cutting more intricate or curved parts of the chair, possibly for the rocker portion or curved details. |
| Drill | Used for pre-drilling holes in the wood to prevent splitting and to make screw insertion easier. |
| Tap Tool | Used for recessing holes to create a smooth and flush surface for screw heads, ensuring a neat and sturdy assembly. |
Materials
| Material | Purpose |
|---|---|
| 2×4 Lumber | The main material for building the frame and structure of the rocking chair typically requires about four 2x4s. |
| Screws | Used for securely fastening the chair’s parts together. |
DIY Rocking Chair: Detailed Step-by-Step Guide
Step 1: Create the Rockers
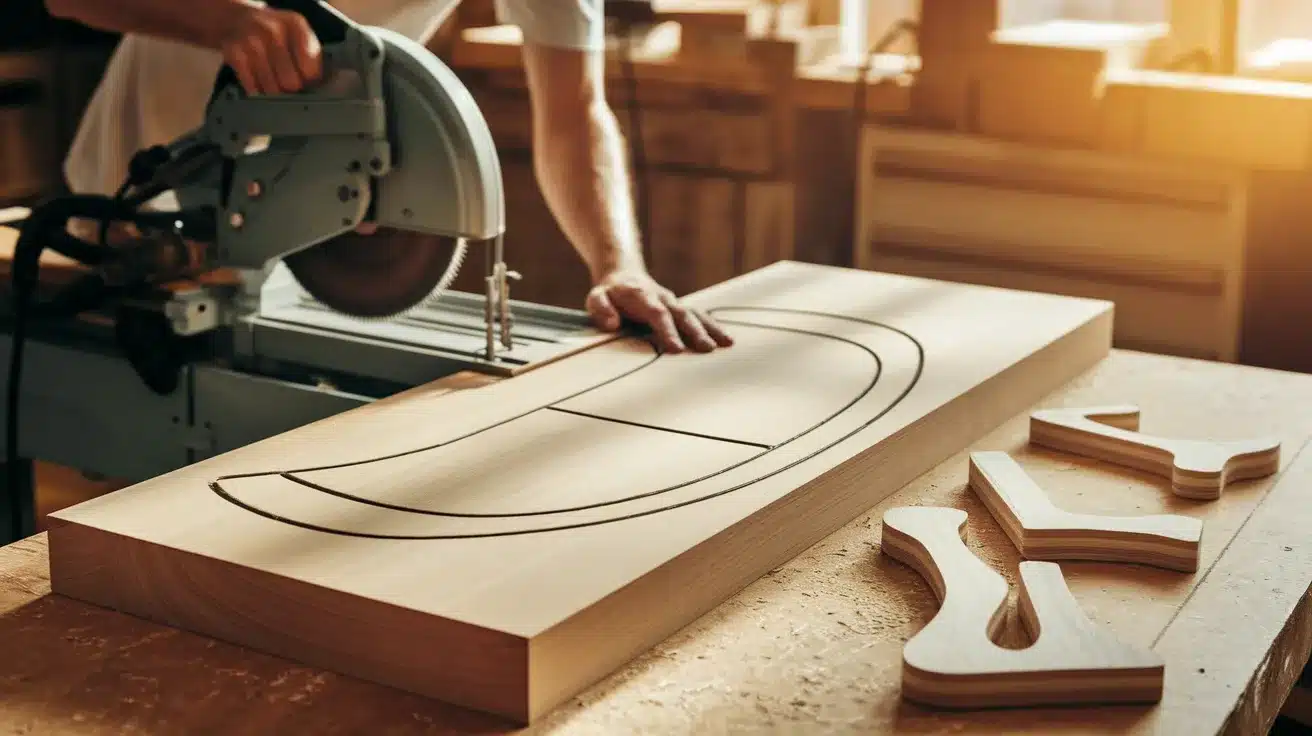
Start by taking a 3-foot section of 2×4 lumber and freehand drawing a rocker shape on it. Aim to create the largest, smoothest curve possible, as this will determine how well your chair rocks. Use a skill saw to make initial shortcuts along your drawn line. This helps remove excess material, making the final cutting easier.
Then, use a bandsaw to carefully cut out the complete rocker shape, following your drawn line. Take your time with this cut as it’s the foundation of your chair.
Once you’ve created one rocker that works well, use it as a template to trace the same shape onto three more pieces of 2×4, giving you a total of four identical rockers.
Pro Tip: When tracing your template rocker onto new boards, cut slightly outside your pencil line to ensure all rockers match in size. You can always sand down small imperfections later, but you can’t add wood back if you cut too much off.
Step 2: Rip the 2x4s
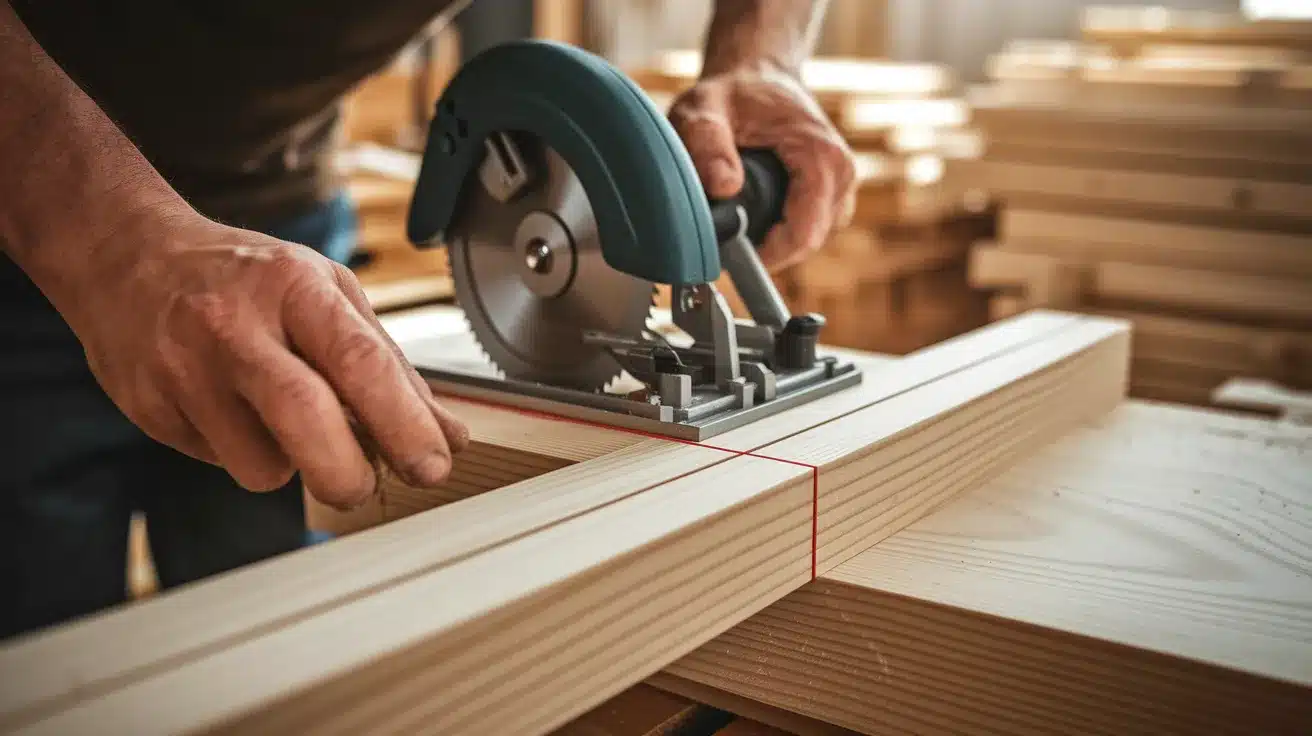
For a more elegant, classic rocking chair appearance, you’ll want to use thinner wood than full 2x4s. Measure and mark the center line of your 2x4s at 1¾ inches.
Use a chalk line or straight edge to mark a straight line from one end to the other. Carefully rip the 2×4 along this line, creating two thinner boards from each 2×4.
This process yields narrower pieces that retain structural strength while offering a more refined appearance than bulky 2x4s. You’ll use these ripped boards for most of the chair frame.
Pro Tip: Take your time with these rip cuts and use a guide if possible. Precision at this stage affects the entire chair’s stability, appearance, and comfort. If you don’t have a table saw, a circular saw with a straight edge guide can work, though it requires more care.
Step 3: Cut the Frame Boards

For a comfortable sitting position, measure 18 inches from the bottom of where you’ll sit (shorter people might prefer 16-17 inches). This measurement helps determine where to place your front support. Cut your front vertical supports to the appropriate length, positioning them about 2 inches back from the front edge of the rocker.
For the back supports, cut boards approximately 44 inches long; these will form the tall back of your rocking chair. Important: cut a 10-degree angle at the bottom of these back supports.
Position these back supports about 8 inches in from the back edge of the rocker. The combination of front and back support positioning creates the chair’s natural recline angle.
Pro Tip: The 10-degree angle cut at the bottom of your back supports is crucial for comfort. Without this angle, your chair back would be too upright, making relaxing difficult. If you don’t have an angle gauge, you can create a simple template by marking 1 inch up from the bottom edge on one side of your board.
Step 4: Assemble the Side Frames
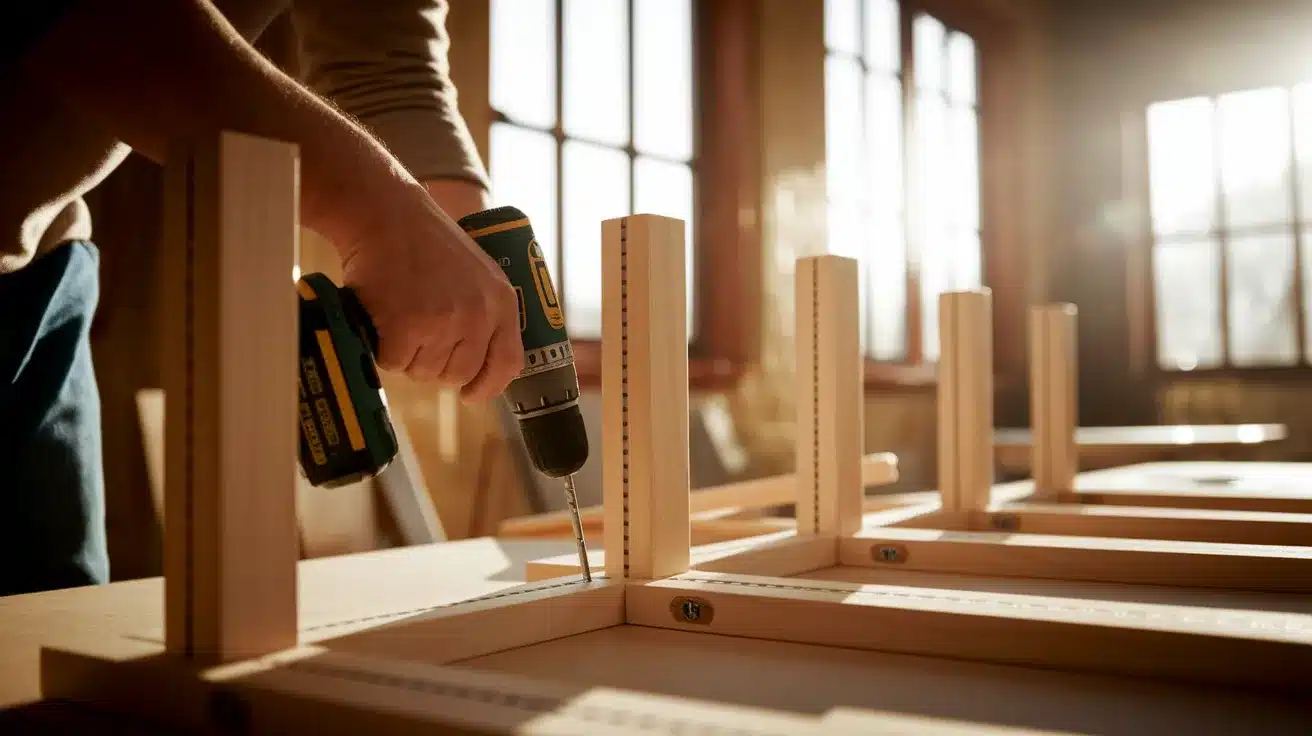
Before attaching any pieces, pre-drill holes where the vertical supports will connect to the rockers; this prevents the wood from splitting. Use a countersink bit or tap tool to create recessed holes so the screw heads won’t protrude and cause discomfort.
Position the front and back supports on each rocker according to your measurements, then double-check their placement before securing them.
Attach them using screws appropriate for outdoor furniture. Make sure both side frames are assembled identically; any differences will cause your chair to rock unevenly or feel lopsided.
Pro Tip: Double-check your measurements and square alignment before final tightening of screws. A small misalignment at this stage will be magnified in the finished chair. If possible, assemble both frames side by side to ensure visual consistency, and check that they rock identically when placed on a flat surface.
Step 5: Determine Seat Position

To find the perfect seat position, temporarily position your two side frames upright and parallel to each other. Place a board across the frames where you’ll sit . Ensure this board is square (perpendicular) to the front supports.
Mark the points where this board intersects both the front and back supports on both frames. These marks indicate where your seat boards will attach.
The seat placement is crucial for comfort. If it’s too high, your feet won’t touch the ground properly when rocking. If it’s too low, you’ll feel like you’re sitting too deep. Take time to adjust if needed, perhaps sitting on the board to test the height before finalizing.
Pro Tip: Before permanent attachment, do a sit-test with the chair frames propped up. Your feet should just touch the ground when seated, allowing for gentle rocking. If you’re building for someone significantly taller or shorter than average, adjust these measurements accordingly comfort is more important than following exact dimensions.
Step 6: Connect the Frames
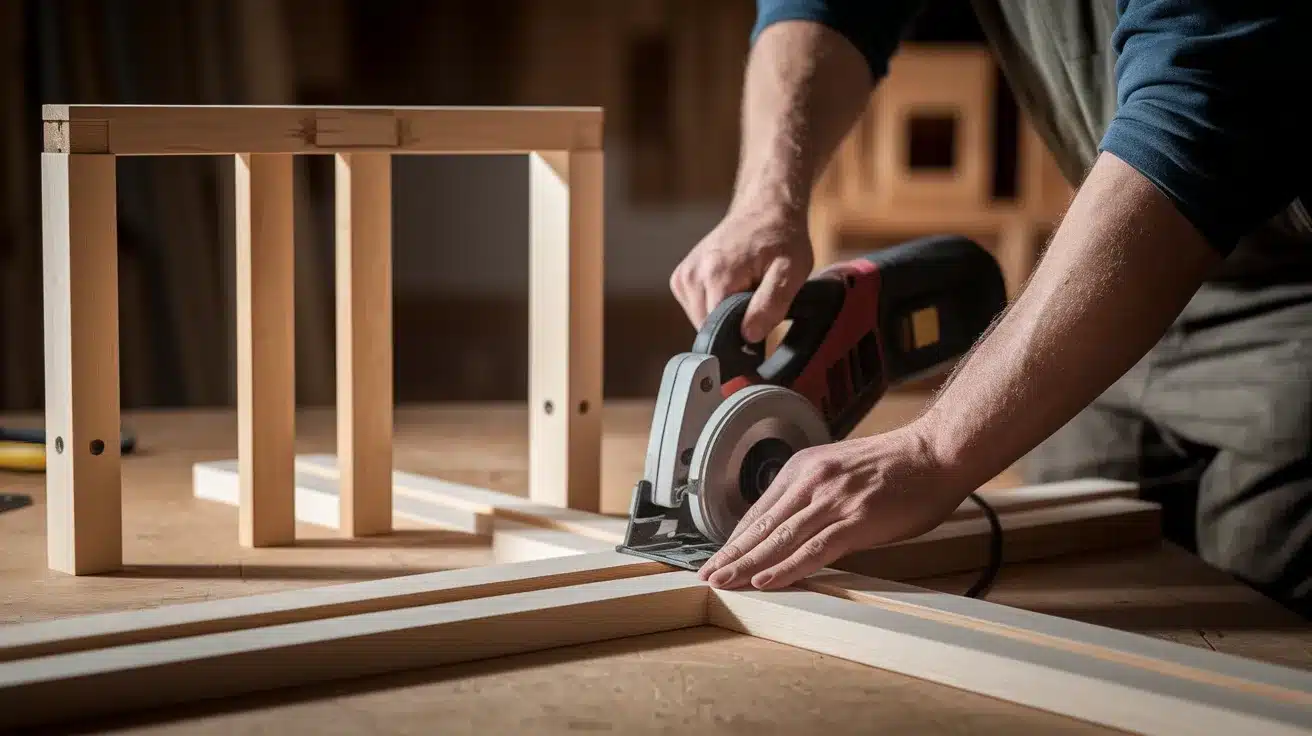
Cut the connecting boards to approximately 17 inches in length from your ripped 2x4s. These will join your two side frames together, creating a chair that’s approximately 19 inches wide (17 inches plus the thickness of the side frames). This width comfortably accommodates most adults.
Attach these horizontal connecting boards to the front and back of the seat area, and potentially one to the top of the back supports, to create a solid frame. Use pre-drilled, countersunk holes and appropriate screws.
The chair should now begin to take its final shape, with a solid frame that maintains its form when moved.
Pro Tip: A slightly wider chair (19 inches) is more comfortable for most adults than a narrow one. However, if building for a child or a smaller adult, you might reduce this width.
Step 7: Add Seat and Back Boards
Using more of your ripped 2×4 boards, create the seat by attaching horizontal boards across the frame where you’ll sit. Space them about ½ inch apart for comfort and drainage if used outdoors. Pre-drill and countersink all holes before attaching with screws.
For the backrest, attach vertical or horizontal boards along the back supports, following the natural angle created by your 10-degree cut.
Ensure there are no sharp edges or protruding screws that could catch clothing or cause discomfort.
Pro Tip: Leave small gaps between boards to allow for water drainage if the chair will be used outdoors. This prevents water pooling that can lead to rot and extends the life of your chair. It also prevents the uncomfortable feeling of sitting on a wet surface after rain.
Step 8: Final Testing and Adjustments

Place your completed chair on a flat surface and test its stability and rocking motion. The chair should rock smoothly without tipping too far forward or backward. Test by sitting in different positions to ensure comfort and stability.
If the rocking motion feels uneven, check that your rockers are identical and that the chair is symmetrically constructed. Make any necessary adjustments to improve the motion.
Sand rough edges if desired, though embracing a rustic look requires minimal finishing.
Pro Tip: For longer durability in outdoor settings, apply a clear exterior polyurethane or outdoor wood sealant. While this adds to your initial $10 investment, it dramatically extends the life of your chair by protecting against moisture, UV damage, and insect intrusion.
Adding Personal Touches to Your DIY Rocking Chair
1. Customizations for a Personal Touch
Cushions & Padding- Add comfortable cushions to your seat and backrest using foam padding wrapped in weatherproof fabric. Secure with ties or velcro straps for easy removal and cleaning.
Finishing Options- Apply wood stain in natural tones, such as oak, walnut, or mahogany, to enhance the wood grain while protecting it. For a more dramatic look, paint your chair with exterior latex paint in a color that matches your home’s color scheme.
Decorative Elements- Add visual interest with carved details on armrests or back slats. Simple patterns like leaves, geometric shapes, or family initials personalize your chair.
2. Rocking Chair Maintenance Tips
Routine Wood Care- Every 6-12 months, clean your chair with mild soap and water, then apply furniture oil or wax to maintain the wood’s moisture and prevent cracking.
Structural Inspection- Check all screws and joints quarterly, tightening any loose connections. Watch for splitting wood around screw holes and reinforce as needed.
Seasonal Protection- For outdoor rocking chairs, elevate them slightly off the ground during wet seasons. Use a breathable furniture cover during extended periods of non-use.
Wrapping It Up
Building a DIY rocking chair is easier than most people think. With just $10 worth of 2x4s and some basic tools, you can create a functional and comfortable chair that would cost over $ 150 in stores.
The beauty of this project lies in its simplicity. No fancy woodworking skills or expensive equipment needed just follow the eight simple steps outlined above. From cutting the rockers to final testing, each step is designed to be approachable for beginners.
Ready to start your own $10 rocking chair project? Gather your materials, set aside an hour, and give it a try! Don’t forget to make it your own with the personal touches we suggested.
Share your finished chair photos in the comments section below, or let us know if you have questions about the build process.