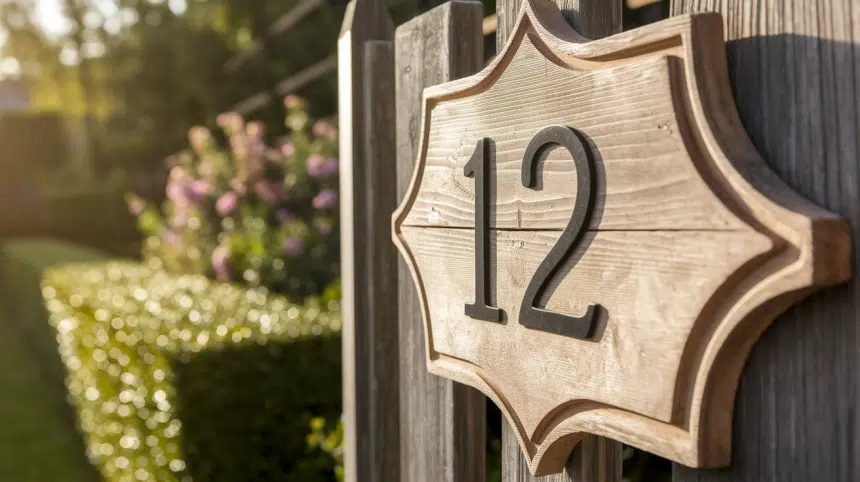
Is your house hard to find? Plain house numbers that blend into the background make it tough for visitors to spot your home.
A custom house number sign adds both function and style to your front entrance – without breaking the bank or needing expert skills.
With basic materials from a craft store and a few hours of your time, you can create a sign that fits your home’s look perfectly. Your visitors will find your house easily, and you’ll feel good each time you pull into your driveway.
This guide will show you simple way to make a house number sign that stands out. Let’s start with the basics and build something special for your home.
Why Make Your Own House Number Sign?
1. Your sign, your style
Store-bought signs come with limits. When you create your own, you pick the size, colors, and materials that match your home.
2. Save money while looking good
Pre-made signs can cost $50 to $200 for quality options. Making your own typically costs between $15 and $40, depending on the materials you choose.
3. Show off your home’s charm
Your house number is often the first thing guests notice. A handmade sign shows care and attention to detail before visitors even step inside.
4. Weekend fun with results
This project takes just a few hours but lasts for years. It’s perfect for a Saturday morning and gives you a sense of pride when finished.
5. Boost curb appeal
A well-designed house number sign can lift the look of your entire front area. This small change makes a big difference to how people see your home.
Here’s the updated table with a brief one-liner after the heading:
Materials and Tools Required for A Diy House Number Sign
Material Required
| Material | Purpose |
|---|---|
| 1/2-inch plywood (for the base) | Base of the sign |
| 1/4-inch x 2-inch poplar project boards (for the pattern) | Pattern details |
| 1×2 spruce, pine, or fir boards (for trim) | Trim for edges |
| Metal house numbers (with mounting hardware) | House numbers for identification |
| Wood glue | To bond materials together |
| 1 1/2-inch brad nails | For securing components |
| Caulk (for seams and nail holes) | To seal gaps and smooth the surface |
Tools Required
| Item | Purpose |
|---|---|
| Miter saw | For cutting angles and precise measurements |
| Table saw (optional but helpful) | For cutting larger pieces (optional but helpful) |
| Drill with bits | For drilling holes for mounting hardware |
| Sandpaper (medium and fine grit) | To smooth rough edges and surfaces |
| Measuring tape | For measuring the materials accurately |
| Pencil | For marking measurements and placement |
| Masking tape | For holding patterns in place while cutting or painting |
| Needle-nose pliers | For bending or adjusting small parts like nails or hardware |
| Paintbrush | For applying paint or finish to the sign |
| Wood sealer (like Thompson’s Water Seal) | To protect wood from weathering and moisture |
| Exterior paint (for trim) | For painting the trim to match or complement the sign |
| Primer (if needed for trim) | For applying a base coat on the trim if necessary |
Step-by-Step Guide to Create Your House Number Sign
This guide will walk you through making a custom house number sign that looks professional but costs much less than store-bought options.
Step 1: Plan Your Design

Take time to think about how you want your finished sign to look. Proper planning now will save you headaches later and help you buy the right amount of materials.
- Lay out numbers on plywood to check spacing and overall look
- Mark width needed for the sign based on number placement
- Draw a center guideline for pattern alignment
- Sketch your desired pattern (herringbone works well for beginners)
Remember: Make your sign big enough to read from the street. Most experts suggest numbers at least 4 inches tall for good visibility.
Step 2: Cut and Prepare the Base

The base provides structure for your entire sign. A clean cut and smooth surface will make every step that follows easier and lead to better results.
- Measure twice and cut once to avoid wasting materials
- Use a straightedge guide when cutting plywood for clean lines
- Sand all surfaces with medium grit, then finish with fine grit
- Remove all dust before moving to the next step
Remember: Choose exterior-grade plywood that can withstand weather conditions in your area.
Step 3: Create the Pattern
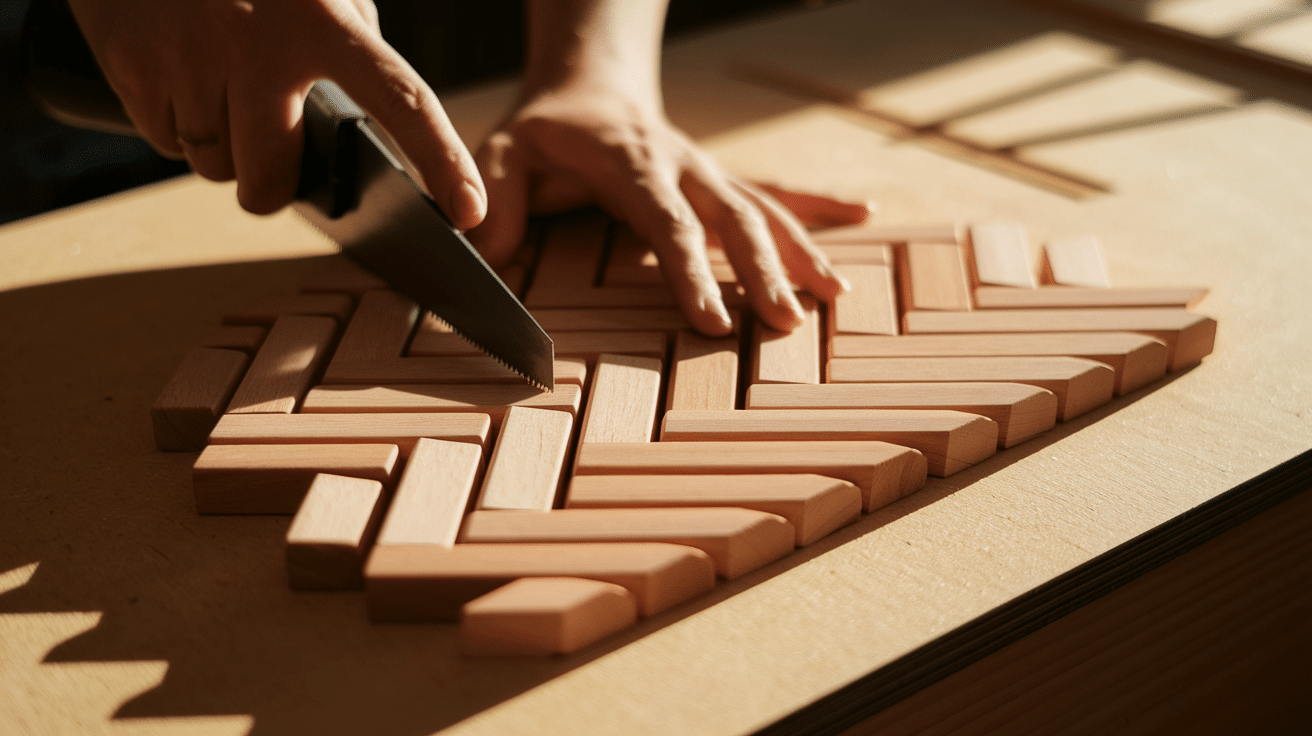
This step adds visual interest to your sign. Take your time with the pattern pieces as they will be the most visible part of your finished project.
- Cut all pattern boards at precise 45-degree angles
- Start at the center line and work outward for best symmetry
- Apply wood glue thinly but completely to the back of each board
- Let boards hang over the edges – you’ll trim them later
Remember: Lightly sand each pattern piece before gluing down to ensure smooth surfaces and tight joints.
Step 4: Trim the Excess
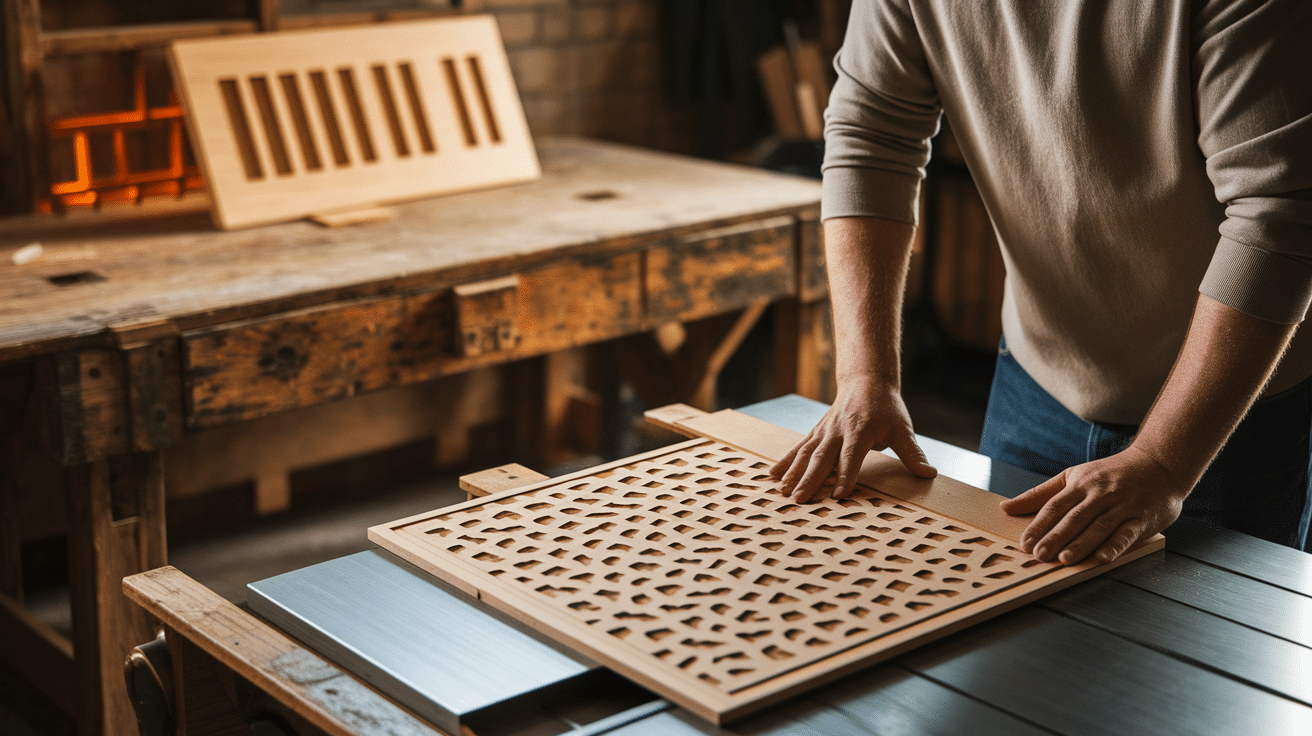
Trimming creates clean edges that will make your sign look professional. This step requires patience and attention to detail for the best results.
- Wait until glue is completely dry before trimming (at least 24 hours)
- Secure the sign firmly when cutting to prevent movement
- Make slow, steady cuts to avoid splintering the pattern pieces
- Sand all edges after trimming for a finished look
Remember: If using a table saw, a sled or guide will help make perfectly straight cuts.
Step 5: Seal the Wood
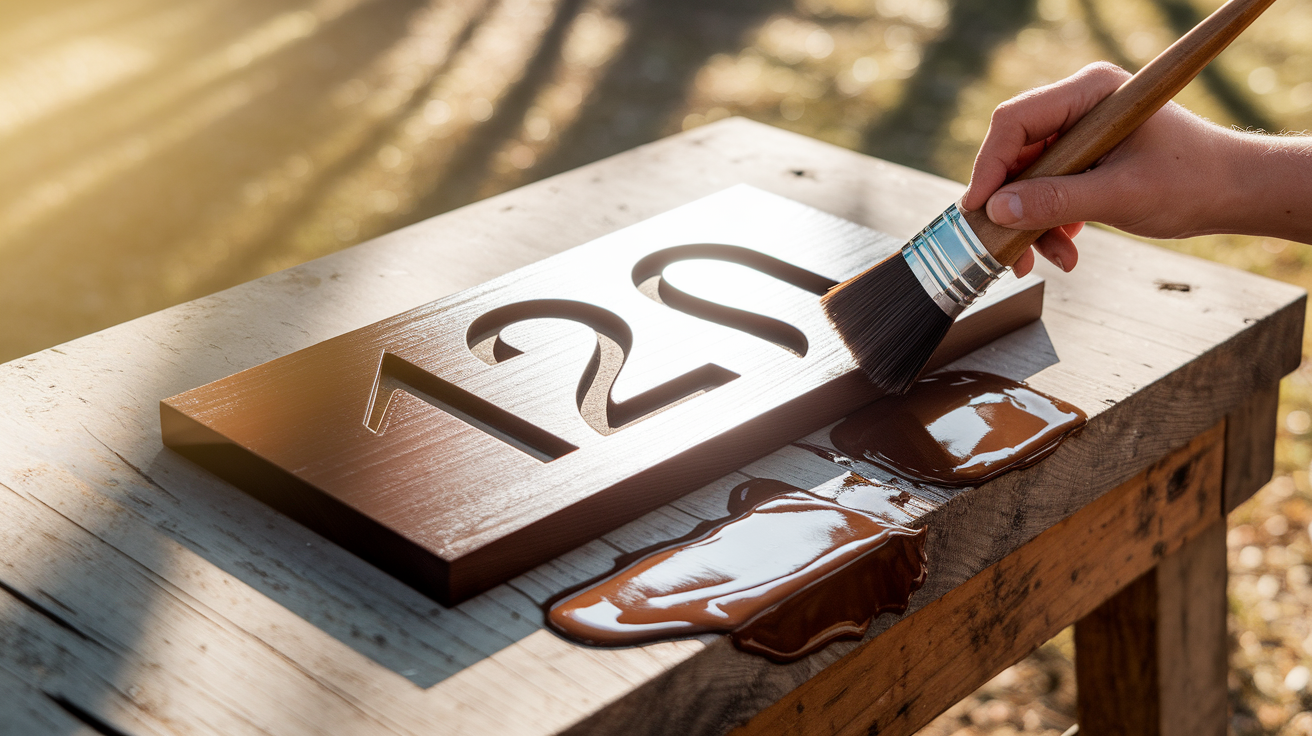
Sealing protects your sign from rain, sun, and other weather conditions. This step is essential for longevity, especially for outdoor signs.
- Choose a sealer rated for exterior use with UV protection
- Apply in thin, even coats with a good quality brush
- Allow full drying time between coats if applying multiple layers
- Expect some color change as the sealer soaks into the wood
Remember: Apply sealer in good weather conditions – not too humid, not too cold, and not in direct sunlight.
Step 6: Prepare and Attach the Trim

Trim frames your sign and gives it a finished, professional look. The contrast between the trim and pattern makes the design stand out more.
- Measure each side individually rather than assuming they’re all the same
- Cut 45-degree angles for clean corner joints
- Paint trim before attaching for easier coverage
- Attach with both glue and nails for the strongest hold
Remember: For the most professional look, attach the top and bottom trim pieces first, then the sides.
Step 7: Mount the Numbers

The numbers are the star of your sign. Take care with their placement and attachment to ensure they’re secure and look great.
- Arrange numbers with equal spacing between them
- Mark holes with the actual hardware rather than measuring
- Drill holes slightly larger than the screws for easy alignment
- Tighten nuts from behind until snug but not over-tight
Remember: Metal numbers will stand up to weather better than plastic ones and provide more contrast against the wood background.
Step 8: Final Touches
These finishing details make the difference between a homemade-looking project and a professional one. Don’t rush this last step.
- Fill all nail holes and gaps with exterior-grade caulk
- Sand filled areas once completely dry
- Touch up paint where needed with a small artist brush
- Apply a second coat of sealer if the sign will be in harsh weather
Remember: Take a photo of your finished sign to keep track of your house number if you ever need to make a replacement.
Few Tips for Maintaining Your DIY House Number Sign
- Check for water damage: Look for warping, splitting, or peeling finish every few months. Touch up the sealer on any spots that look worn to prevent water from seeping into the wood.
- Clean with mild soap: Wash your sign twice a year with a gentle soap and soft cloth. Avoid harsh chemicals or pressure washing that could damage the finish or loosen the numbers.
- Tighten hardware regularly: Metal numbers can loosen over time due to temperature changes. Check the screws and nuts every spring and fall, tightening any that feel loose.
- Touch up paint when needed: Keep a small amount of the trim paint for touch-ups. Even small chips can let moisture in, so fix them promptly to prevent bigger issues later.
- Apply fresh sealer annually: Even good sealers break down from sun exposure. Apply a new thin coat of exterior sealer once a year to maintain protection and keep the wood looking fresh.
Conclusion
Your house number sign tells people more than just where you live—it shows how much you care about your home. With a weekend of work and basic materials, you’ve made something that serves a real purpose while adding to your home’s look.
The best part of this project is that you can change it as you wish. Don’t like the color? Paint it. Want a new pattern? Make another one with different boards. Each sign is as unique as the home it marks.
Remember that a well-made sign needs only basic upkeep to stay looking good for years. A quick clean and fresh coat of sealer each spring will keep it working well.
Now it’s your turn to create a house number sign that makes your home stand out!