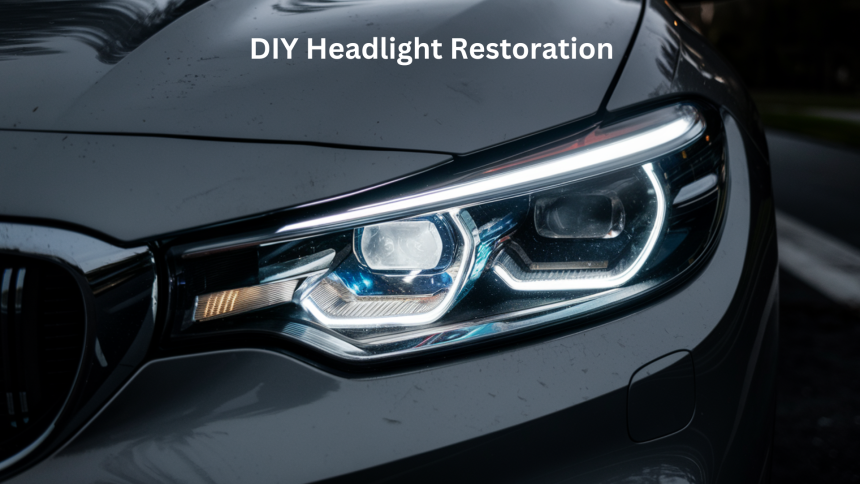
Is your car’s bright look ruined by foggy, yellow headlights? Those cloudy headlights don’t just look bad—they make your whole car seem older and less valuable. Even worse, they can make driving at night dangerous because they block some of your light.
The good news? You can fix those hazy headlights yourself while being on a budget! No need for costly garage visits or buying new headlight units that can cost hundreds of dollars.
This step-by-step guide will show you how to bring your headlights back to their clear, bright state.
The method shared here is long-lasting and needs no extra care after you finish. With basic tools and a little time, your car will look newer, and your night drives will be much safer.
Ready to change those dull headlights into crystal-clear beams? Let’s get started!
Materials that You’ll Need
Before getting into your headlight restoration project, gather these essential supplies to ensure a smooth and effective process.
Having the right tools on hand will help you achieve professional-level clarity and protection for your headlights.
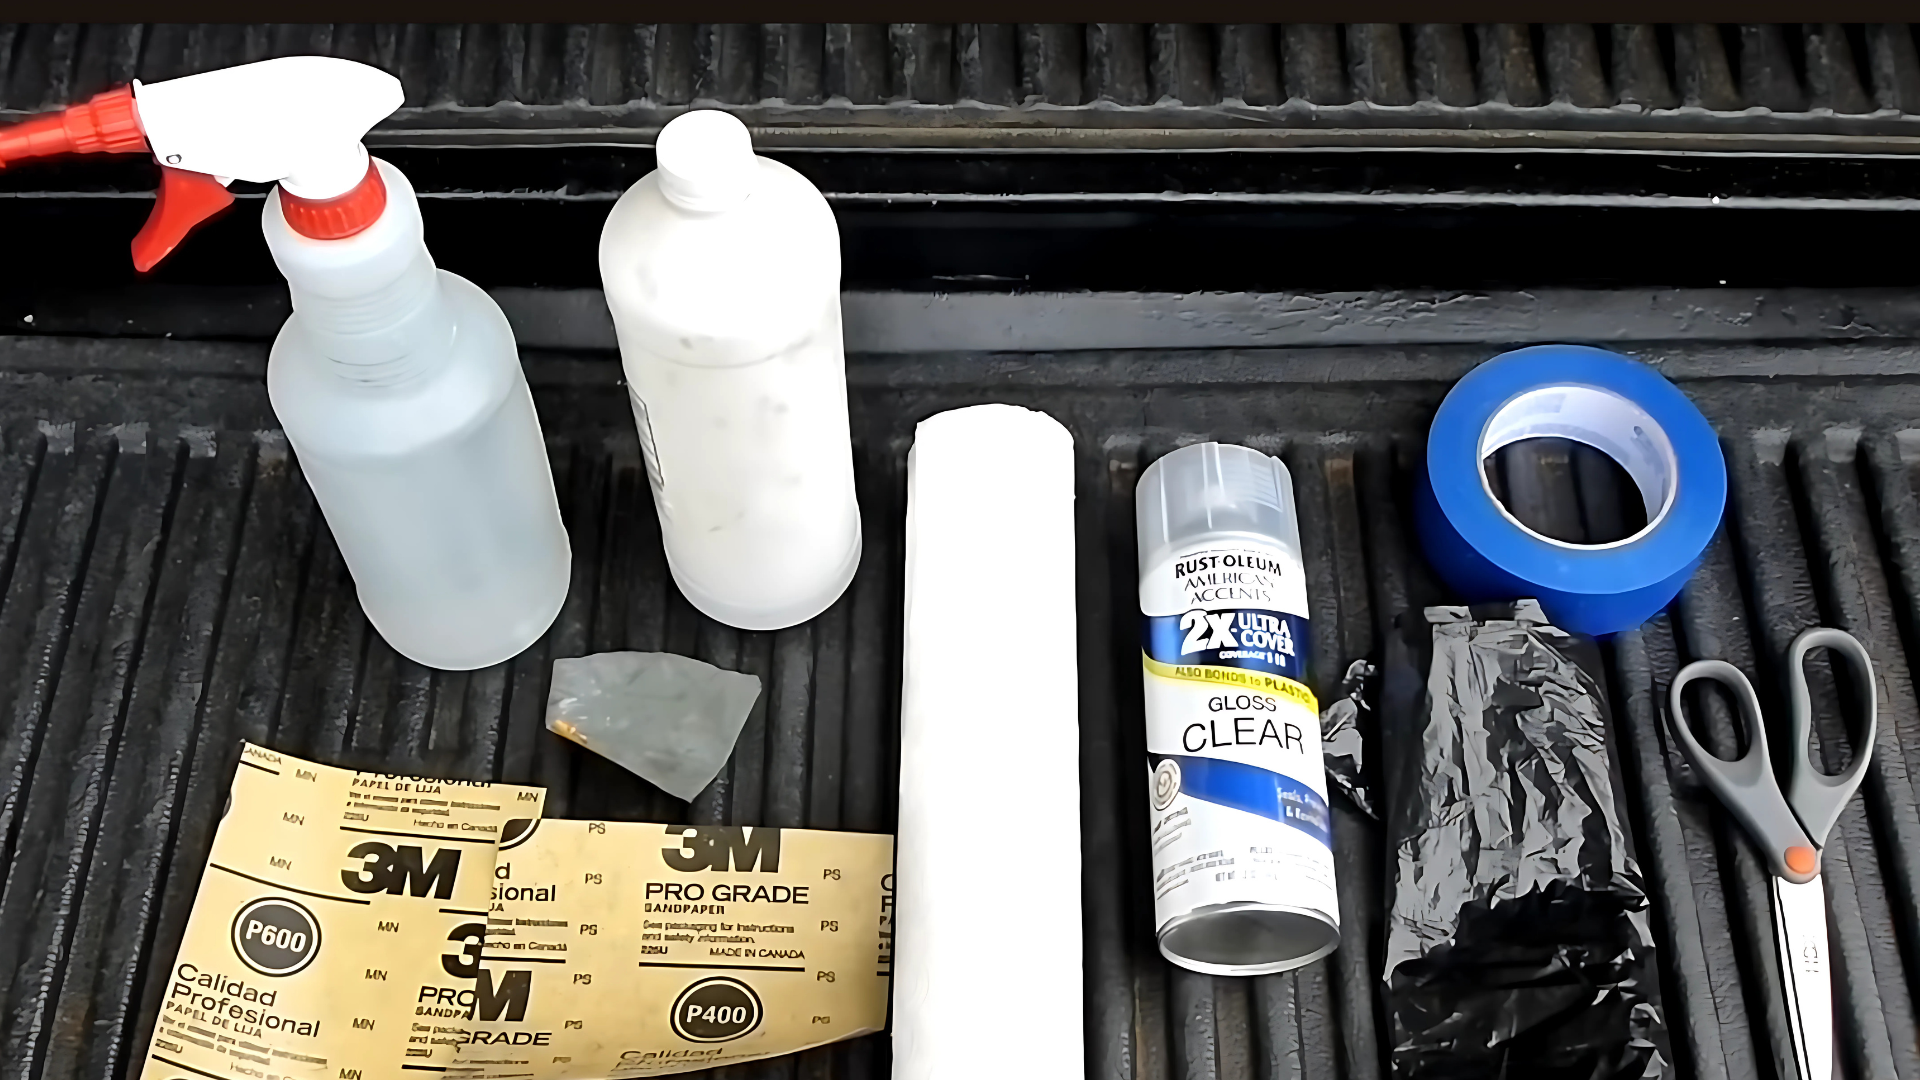
A successful headlight restoration starts with quality materials—no fancy equipment is needed! These basic yet effective supplies will help you remove haze and restore shine in no time.
| Material | Purpose |
|---|---|
| Tape (Painter’s Tape) | To tape off the headlight and surrounding area for protection. |
| Garbage Bags | To cover the vehicle and protect the paint from scratches and overspray. |
| Scissors | For cutting the garbage bag and creating protective covers. |
| Paper Towels | For cleaning and wiping down the headlight lens after sanding. |
| Three Types of Sandpaper: 400 grit, 600 grit, and 2000 grit | Used for sanding the headlight lens in stages to remove oxidation. |
| Spray Bottle or Hose (Water Source) | Used to keep the surface wet while sanding. |
| Alcohol (For Cleaning) | To clean the lens of any oils or debris after sanding. |
| Clear Coat (Gloss and UV Resistant) | For applying a protective, UV-resistant clear coat to the headlight. |
| Microfiber Cloth and Car Wax (Optional) | Used for polishing the headlight lens after the clear coat has dried. |
Step-by-Step Guide for Headlight Restoration
Achieve professional-grade results without specialty equipment—just systematic polishing and protection. Follow these easy steps to restore your headlights to like-new brightness!
Step 1: Prepare the Area
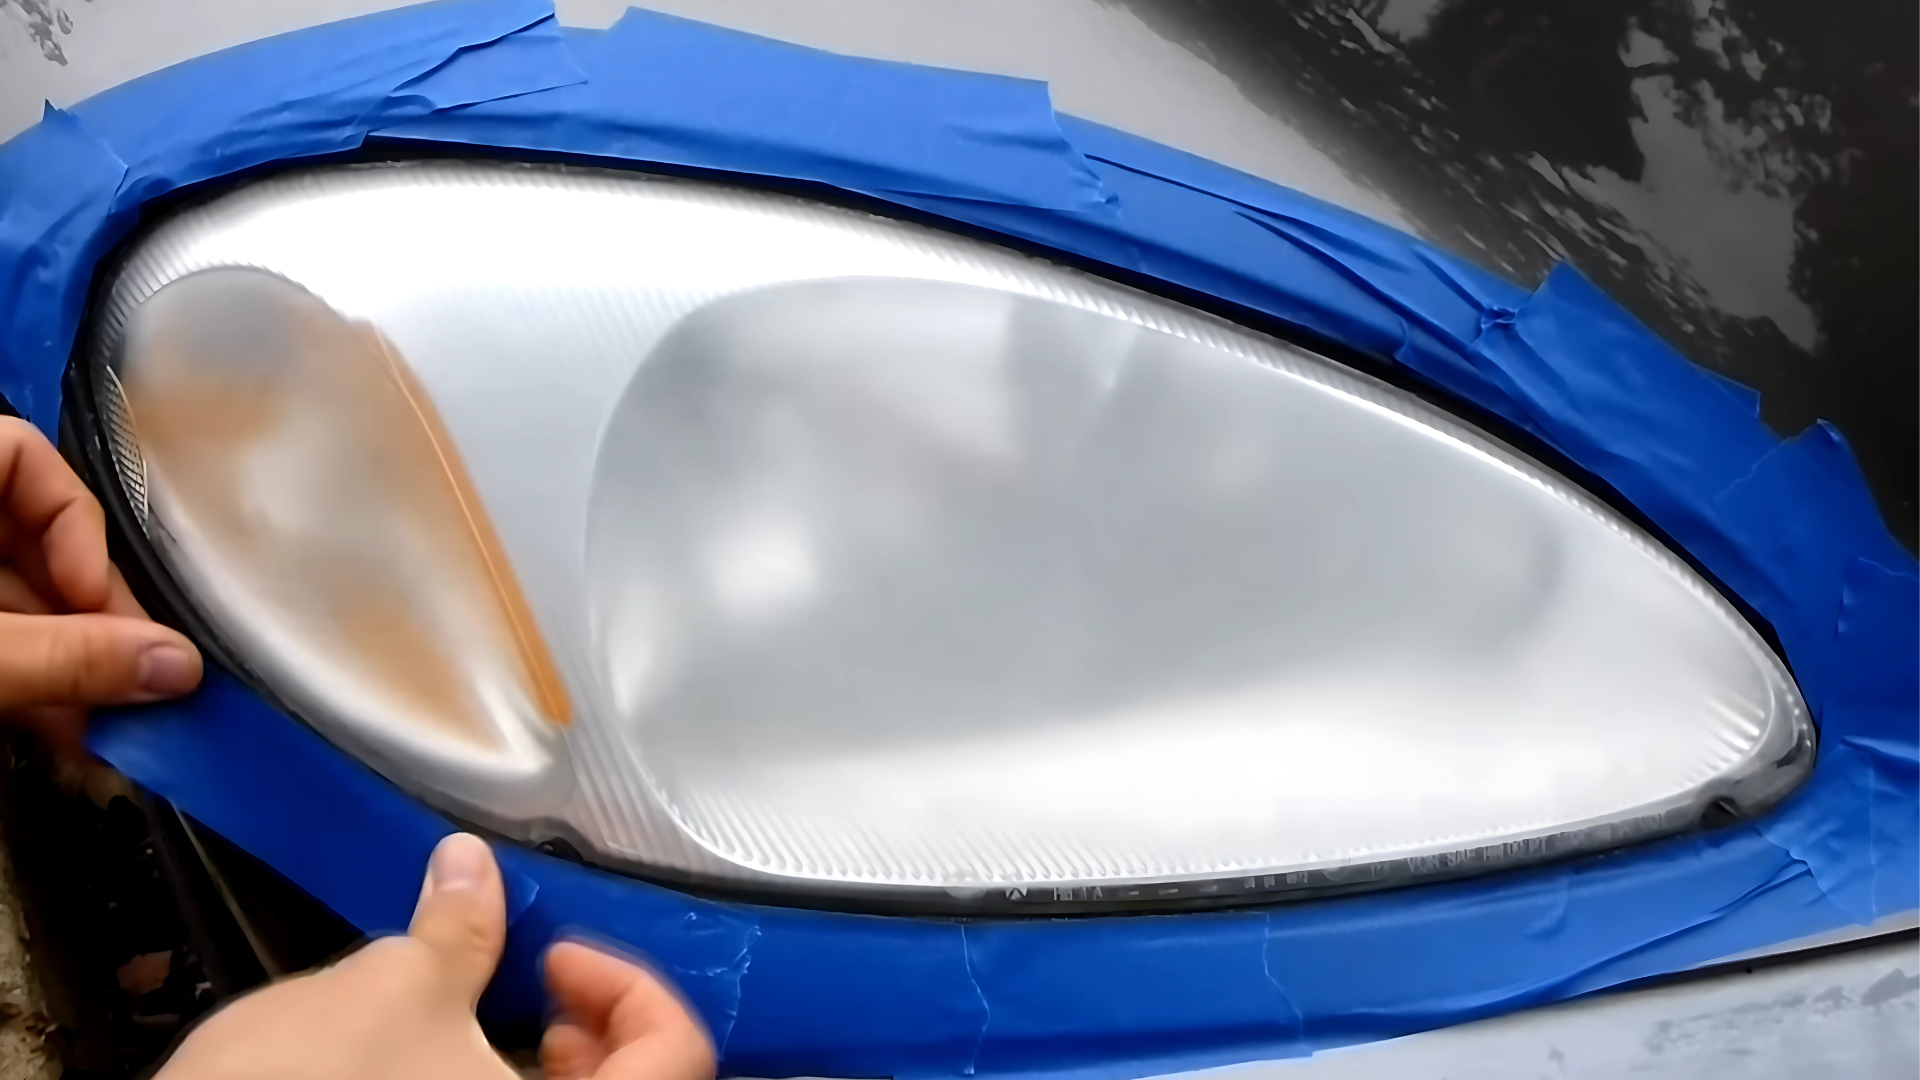
Proper preparation protects your car’s paint and ensures a clean workspace for your headlight restoration project.
- Carefully place masking or painter’s tape around the edges of each headlight, creating a protective border between the lens and your car’s body
- Consider removing the headlights if possible to make the job easier and more thorough
- If removal isn’t an option, use garbage bags to cover nearby parts of your car and secure them with tape
- Ensure only the headlight lens remains exposed when you finish taping
Step 2: Sanding the Headlights (Initial Stage)

Start removing that stubborn yellow layer with your 400 grit sandpaper while keeping everything wet to protect the plastic.
- Thoroughly wet the headlight surface using water from a spray bottle or garden hose
- Use 400 grit sandpaper in small circular motions across the entire surface
- Keep the headlight wet throughout the entire sanding process
- Continue until you see the damaged yellow layer coming off
- The headlight will begin to look frosted rather than yellow as you work
- This critical first step removes the UV-damaged outer plastic that causes cloudiness
Step 3: Sanding the Headlights (Mid Stage)

The 600 grit sandpaper marks an important middle phase in your headlight restoration process, creating a significantly smoother surface while continuing to remove oxidation and damage.
- Use 600 grit sandpaper, which is finer than your starting grit
- Keep the headlight wet throughout the sanding process to protect the plastic
- Alternate between circular and back-and-forth motions for best coverage
- Sand until you notice the surface becoming visibly clearer and smoother
- Ensure you treat the entire headlight evenly for consistent results
- Take your time with this step – rushing could lead to uneven restoration
Step 4: Final Sanding (Fine Finish)
The final sanding stage gives your headlights that perfectly smooth surface needed before applying clear coat protection.
- Use 2000 grit sandpaper for this finishing step
- Keep the headlight wet while sanding to improve effectiveness and reduce dust
- Apply gentle, even pressure with your sandpaper
- Complete the process with horizontal side-to-side strokes for an even pattern
- This consistent pattern helps the clear coat adhere properly
- When finished, the headlight should feel completely smooth with no rough spots
- There should be no visible scratches remaining on the surface
Step 5: Cleaning the Headlights
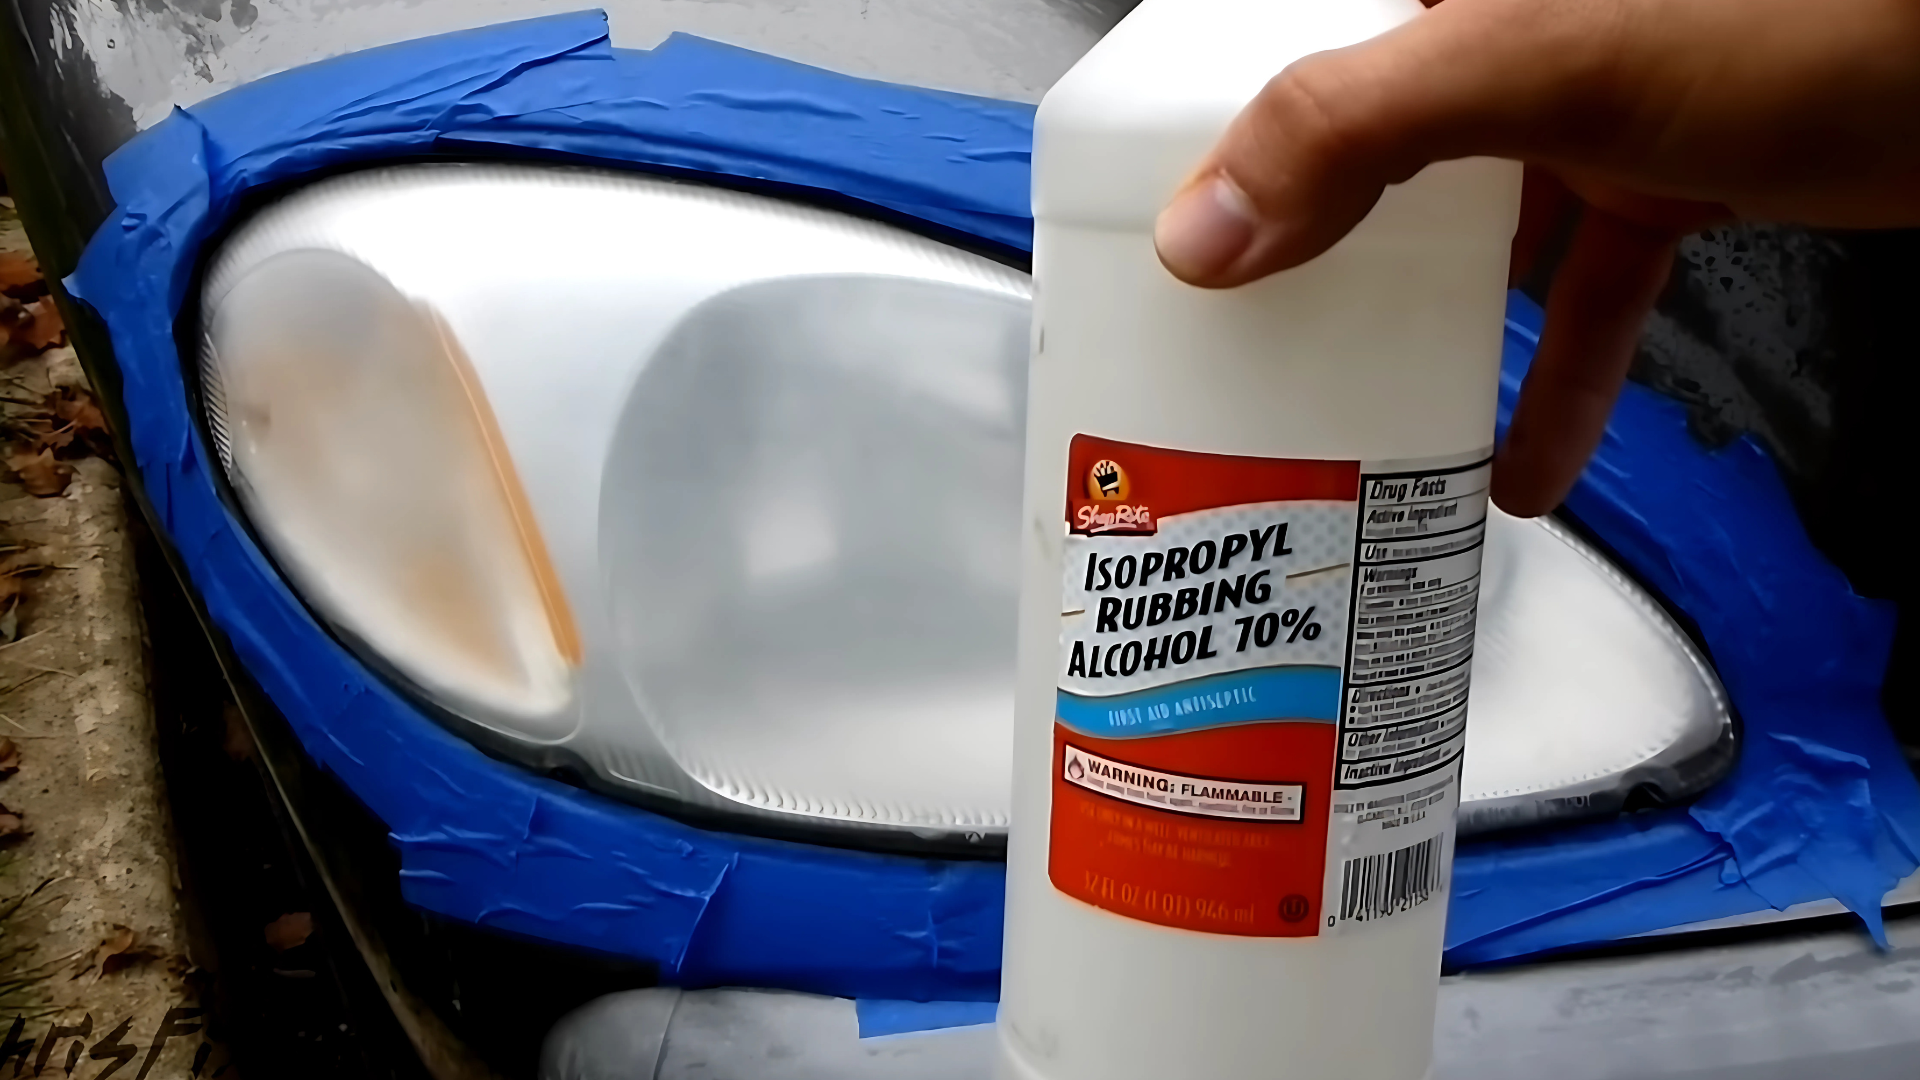
After sanding, thoroughly cleaning your headlights is crucial for a successful restoration. This step removes all debris and prepares the surface for the clear coat application.
- Use a lint-free paper towel dampened with alcohol
- Wipe the entire headlight surface from top to bottom
- Alcohol helps remove finger oils and any remaining moisture
- Ensure that every bit of dust and plastic residue is completely removed
- A perfectly clean surface is essential for proper clear coat adhesion
- Skipping thorough cleaning can significantly reduce the longevity of your restoration
Step 6: Protect the Paint and Surrounding Areas
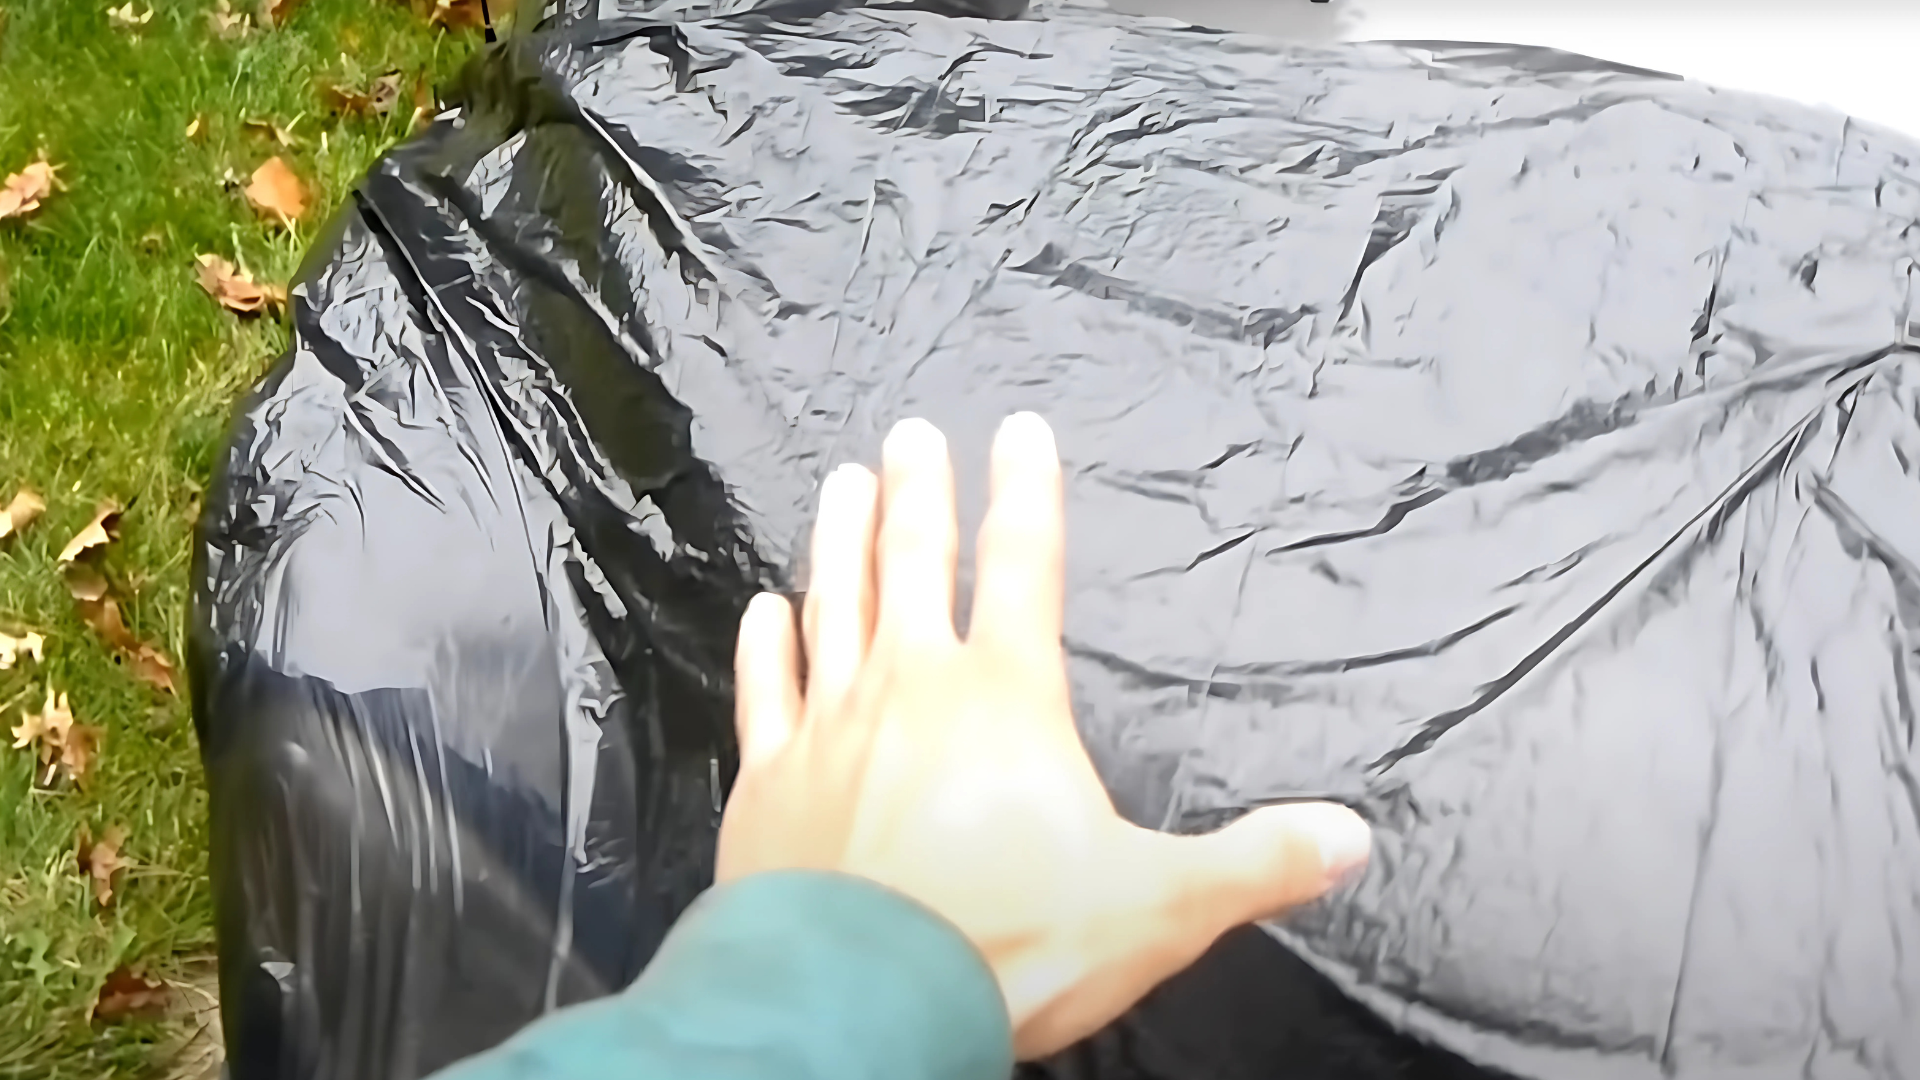
Before applying the clear coat, you need to carefully shield all surfaces around your headlight to prevent overspray damage. This crucial preparation step protects your car’s paint and trim from potentially permanent damage.
- Cut a garbage bag into pieces large enough to cover all surfaces near the headlight
- Tape these pieces securely in place, ensuring complete coverage of paint and trim
- Pay special attention to covering every exposed area – even tiny droplets of clear coat can damage your car’s paint
- Take your time with this step – a few extra minutes of preparation can prevent costly repairs later
- Double-check your protective covering for any gaps before moving to the spraying stage
Step 7: Apply the Clear Coat
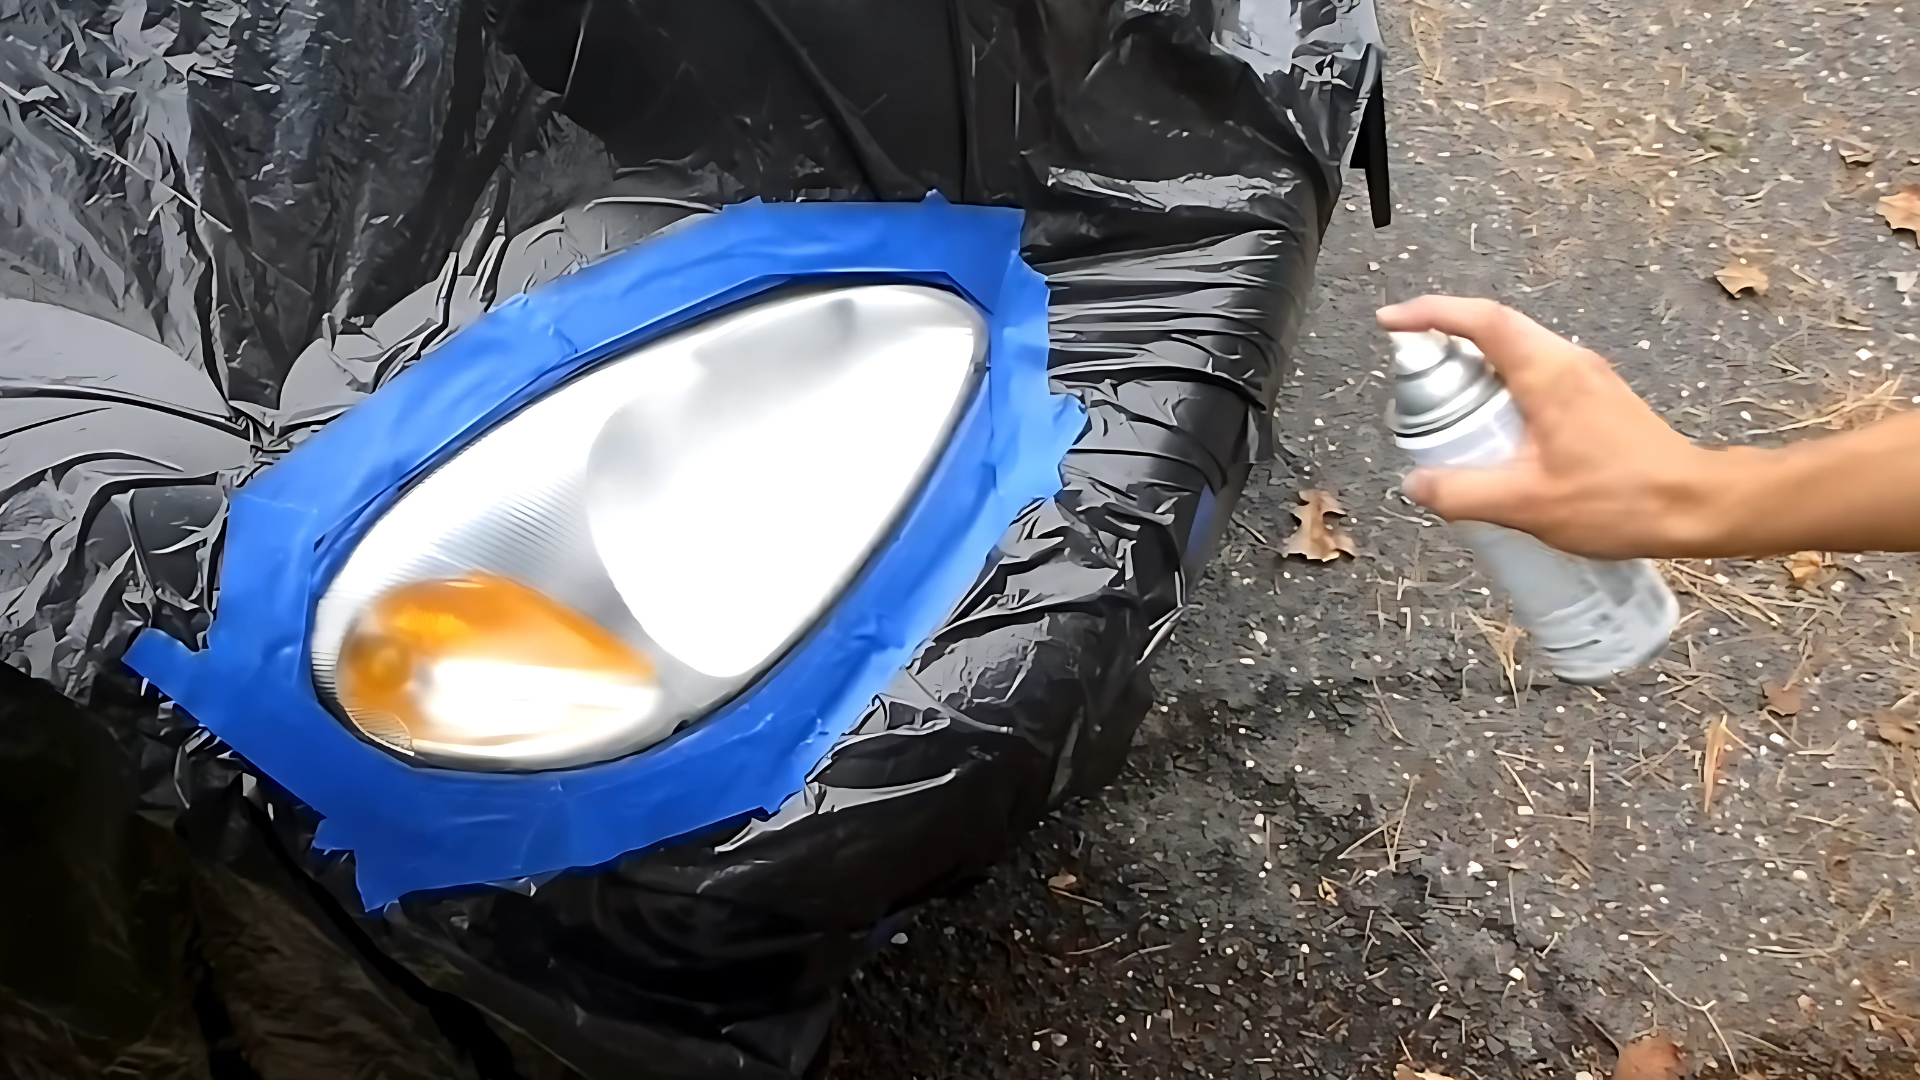
Protect your restored headlight with UV-resistant clear coat spray to prevent future yellowing and damage.
- Hold the spray can approximately 8 inches from the headlight surface
- Apply a light, even first layer across the entire lens
- Allow the first coat to dry for 5 minutes before proceeding
- Add a second coat using the same careful spraying technique
- Wait another 5 minutes for the second layer to dry
- Apply a third and final coat for maximum protection
- The three layers of clear coat create a durable shield against UV rays
- This protective barrier prevents yellowing and oxidation
Step 8: Optional Final Steps (Polishing and Waxing)
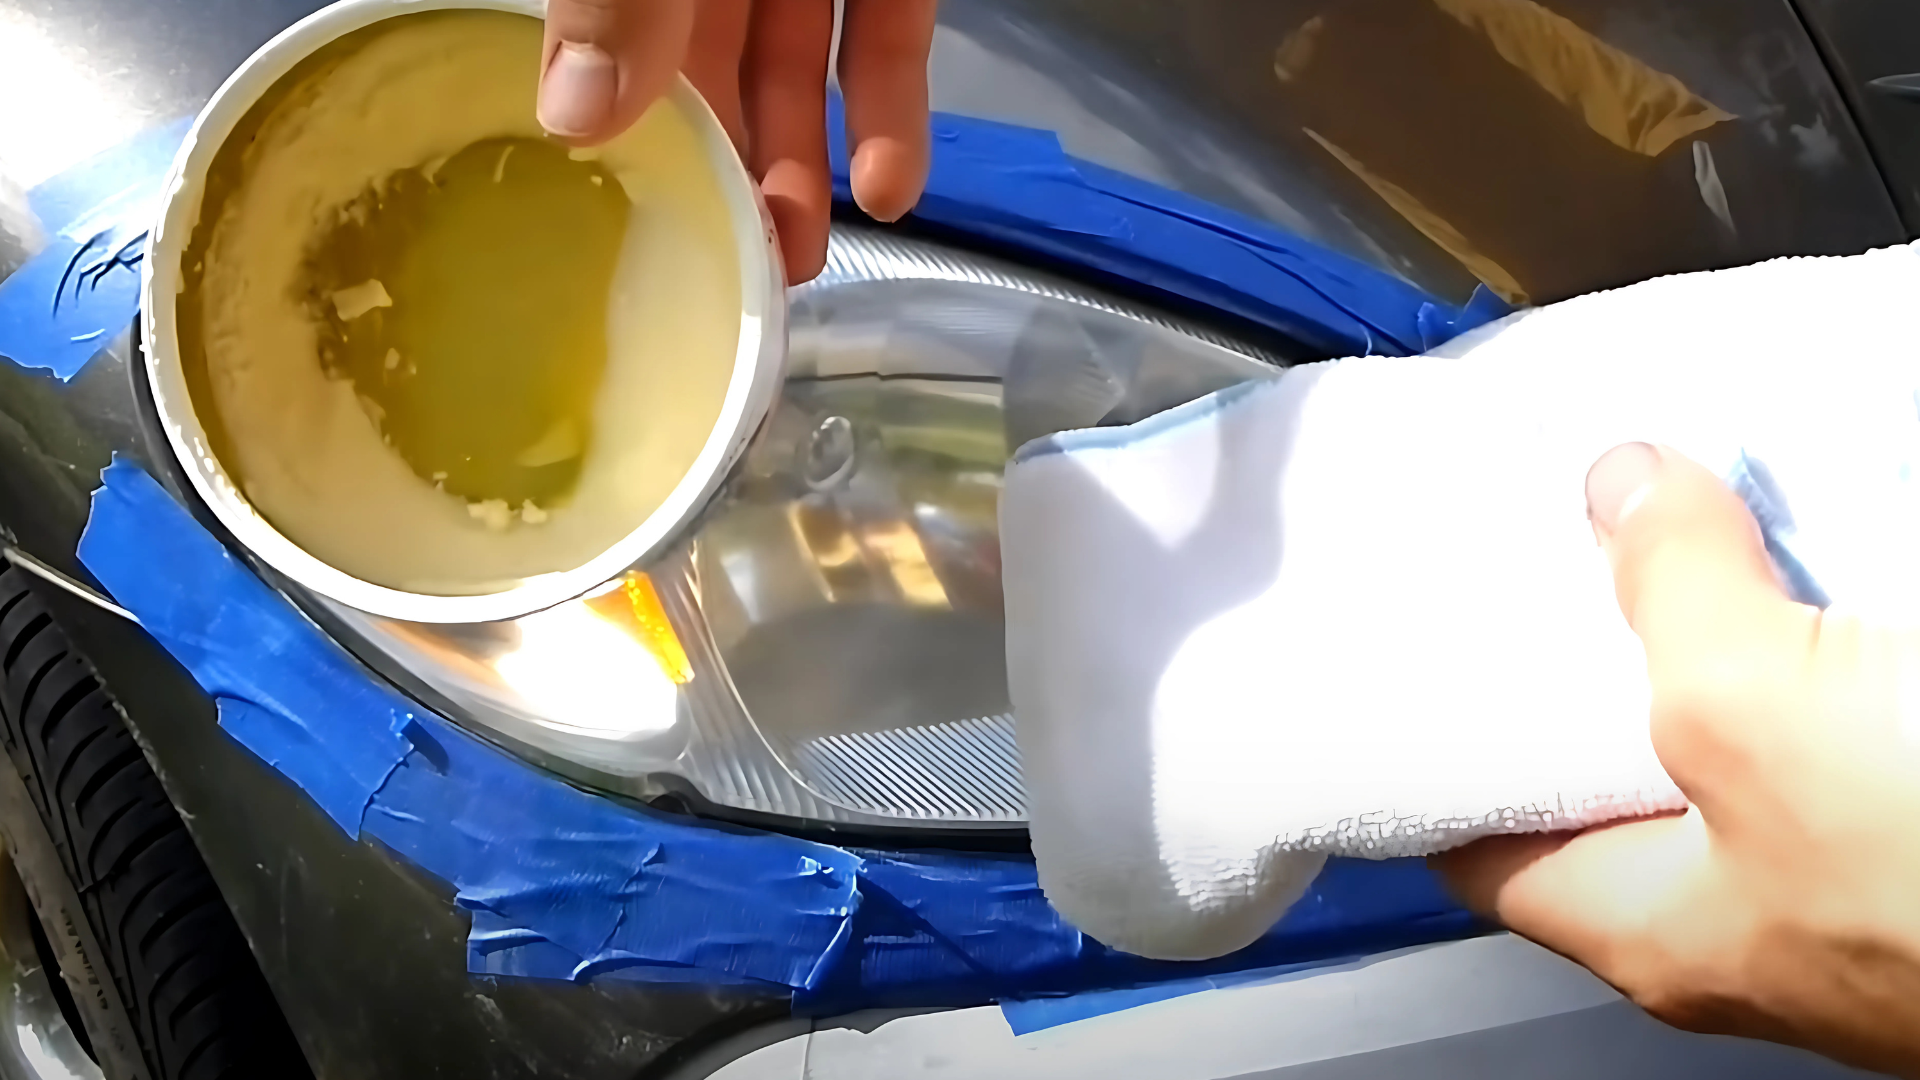
These finishing touches add extra shine and protection to your restored headlights, making your work last longer and look more professional. Wait a full 24 hours for the clear coat to completely dry before starting these steps
- Use 3000 grit sandpaper with water (wet sanding) to remove any “orange peel” texture or imperfections
- The extremely fine grit smooths the surface without creating scratches
- Apply car wax using a clean microfiber cloth in gentle circular motions
- Buff the wax thoroughly after application until the surface shines
- Waxing creates an additional protective barrier over your clear coat
- This extra layer helps repel dirt and environmental contaminants
- Repeat waxing every few months for continued protection
Video Tutorial
Check out the video below by ChrisFix for a step-by-step guide on how to restore the headlights of your car at home:
Simple Ways to Protect & Maintain Headlights
Keeping your headlights clear doesn’t require special skills—just consistent care. With a few easy habits, you can prevent foggy lenses and maintain bright, safe visibility for years.
These simple tips will help you avoid costly replacements and keep your headlights shining like new.
-
Regular Cleaning – Wash headlights weekly with mild soap and water to prevent dirt buildup and oxidation.
-
UV Protection – Apply a UV-resistant sealant or wax every 3 months to block sun damage and yellowing.
-
Park Smart – Whenever possible, park in the shade or a garage to minimize sun and weather exposure.
-
Avoid Harsh Chemicals – Use only automotive-safe cleaners—household products can damage plastic lenses.
-
Check for Moisture – If condensation appears inside the housing, address the seals promptly to prevent internal damage.
-
Buff Light Haze Early – Gently polish with a microfiber cloth and car-safe polish at the first sign of cloudiness.
Wrapping Up
Bringing your headlights back to their clear, bright state doesn’t have to be hard or costly. With the steps shown in this guide, you can make your car’s headlights look almost new again. The best part is that this fix lasts a long time when done right.
Clear headlights not only make your car look better but also keep you safer on the road at night. The small amount of money and time you put into this project pays off in both looks and safety.
Try these steps on your own car and see the big difference it makes! Many car owners are shocked at how much better their cars look after this simple fix.
Share how your project turned out and any helpful tips you found along the way. Let us know in the comment section below!