
Applying tile adhesive and fixing the first wall tile |
 |
Welcome to the third part of our tiling guide.
Fixing the battens and getting the first tile on the wall.
continued from: Part 2
|

|
This page is © Copyright 2001-2014 helpwithdiy.com |
|

Please note: We will accept no responsibility for any damage or injury as a result of following this guide.
For further information please see our disclaimer, a link to which can be found at the bottom of this page.
|

Fixing the horizontal batten to the wall |
When you have marked out the best tile positioning both vertically and horizontally get to hand two pieces of perfectly straight edged batten.
One piece of batten about 10cm (8in) shorter than the surface width, and the other about 10cm (8in) shorter than the height of the surface to be tiled.
To fix the batten to the wall you can either use nails or screws and plugs, usually it is better to use screws as it is more sturdy to support the tiles until the tile adhesive has hardened sufficiently.
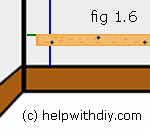 |
Place the batten you made for the width directly on and under the horizontal line you made for the bottom row of tiles earlier (see fig 1.6), use your spirit level to ensure you get a nice level line off the batten.
Screw the batten securely to the wall at regular intervals (around every 30cm (1ft)) always ensuring the batten is level.
|
|

Vertical batten placement |
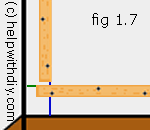 |
The next step is to fix the vertical batten to the wall. Take a piece of batten about 10cm (8in) shorter than the height of the wall and place it against the vertical line you made for the first tile in the row (see fig 1.7).
Screw the batten securely to the wall at regular intervals (around every 30cm (1ft)) using your spirit level to ensure the batten is perfectly vertical.
|
|

Applying the tile adhesive |
Before mixing your tile adhesive you should calculate how much you will need (guidance to the coverage is usually given on the manufacturer's instructions) and try not to make too much at a time.
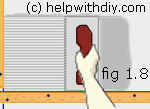 |
Mix your tile adhesive according to the manufacturer's instructions. When ready, apply the adhesive to the wall using your tile trowel, try to ensure an even coat. Use the teeth on the tile trowel to create ridges of adhesive (see fig 1.8).
Apply the adhesive to an area about 2 and a half tiles wide and 3cm (one inch) higher than the top of the tile's height.
|
|

Installing the first ceramic tile |
This step should not be rushed as the first tile will dictate the run of the rest of the tiles.
|
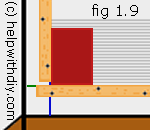 |
To install the first tile, sit it tight into the corner you have made with your battens (see fig 1.9) then push it against the wall firmly, use your level to ensure it is perfectly placed.
Another important check is to place your spirit level vertically on the face of the tile to ensure it is sitting up straight. If you are not happy with the placement then it is better to upseat the tile, clean the area of adhesive and then start again.
|
|

|
In part 4 we will get the rest of the tiles on the wall.
|


|
|
|
